Register
- No credit card required to register.
- Once registered, you have seven days of full access at no cost.
- After seven days, we email a subscription link.
- If you decide not to subscribe, we remove the account and thank you for trying Sourjoe.
PUBLIC PREVIEW TIME 7:00
GUIDED PUBLIC PREVIEW
You are inside the real Book of Sourjoe — not a simplified marketing tour. Sourjoe brings tested recipes, guided bake-session instruction, practical calculators, bread education, and useful reference tools into one working home-sourdough app.
This Guided Public Preview lets you explore how the Book is organized, how its tools work, and the depth of its content before deciding whether Sourjoe is right for you.
When the seven-minute Public Preview is used, it becomes available again in this browser after a 30-minute pause.
About Us. We are a father (Joe) and son (Aaron) duo with a shared passion for sourdough. Sourjoe grew from the way we approach bread together: curious, practical, and grounded in the home kitchen.
Our mission. Bring the recipe to life in the home kitchen. Instead of sending bakers between blogs, videos, articles, message boards, advertisements, and paper notes, Sourjoe brings useful instruction and tools into one working experience.
Our motto. By home bakers, for home bakers.
The Book of Sourjoe is the 'Learn' part of the Sourjoe App. The 'Recipes' portion of the App is the baking tool used to execute a bake session.
 Click this compass icon to reveal a guide explaining the App's icons.
![]() Open the Main Table of Contents and click its calculator icon to launch the calculator chooser.
Open the Main Table of Contents and click its calculator icon to launch the calculator chooser.
Newcomers to the world of sourdough should work their way through the START HERE section.
A new suite of Sourjoe calculators is now available. Open the Main Table of Contents and use its calculator icon to launch the calculator chooser.
We updated our public landing page to be a mimic of the app so that new users can explore our features and benefits before signing up. Check it out at Sourjoe
In the Book:
If you are a novice sourdough baker, we recommend working through the following sections in order. If you're an intermediate or experienced baker, you can probably skip these chapters, but a quick review never hurts.
In Recipes:
Once you have read the basics outlined above, you are now ready to start on your sourdough journey. These Links will take you to the Recipes page.
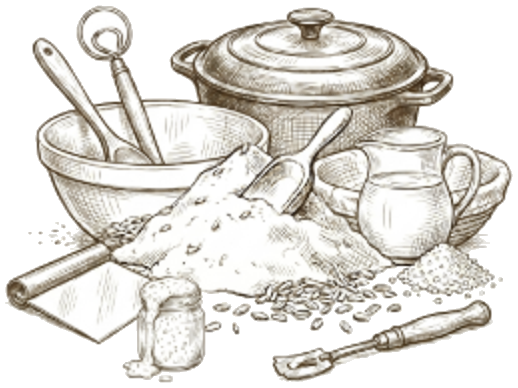
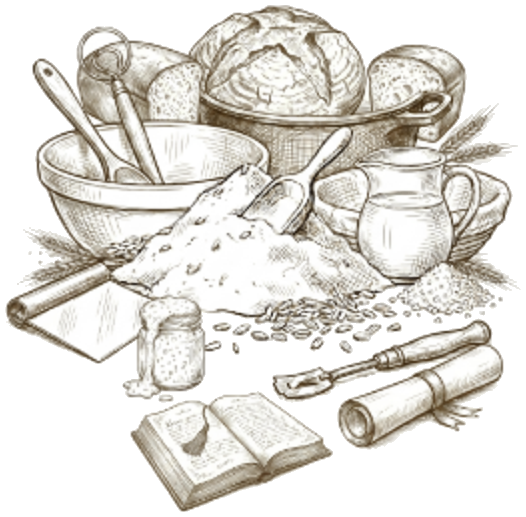
There are dozens of ingredients and tools used in the art of artisanal sourdough baking. Luckily, for the home baker, there are only a handful of essential ingredients and tools required. This chapter outlines those essentials, and the Reference chapter expands on the lists. If you are a beginner at sourdough baking, stock up on the essentials and read this chapter before making a mess in the kitchen.
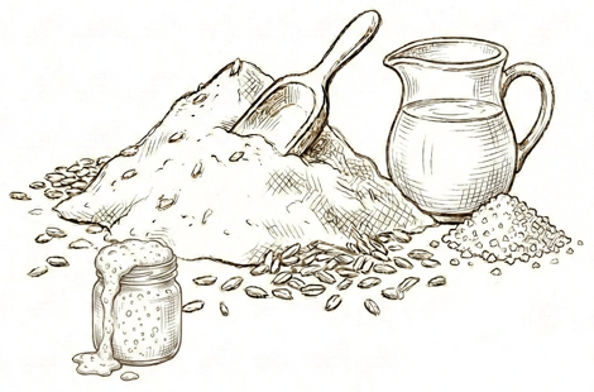
A section on Ingredients? For recipes that commonly have 3 Ingredients? Yup. Read through the details for each of the basic bread baking Ingredients and hopefully you will learn something new. Check out the Rabbit Hole to understand the role of the 'invisible' ingredients in bread baking -Time and Temperature.
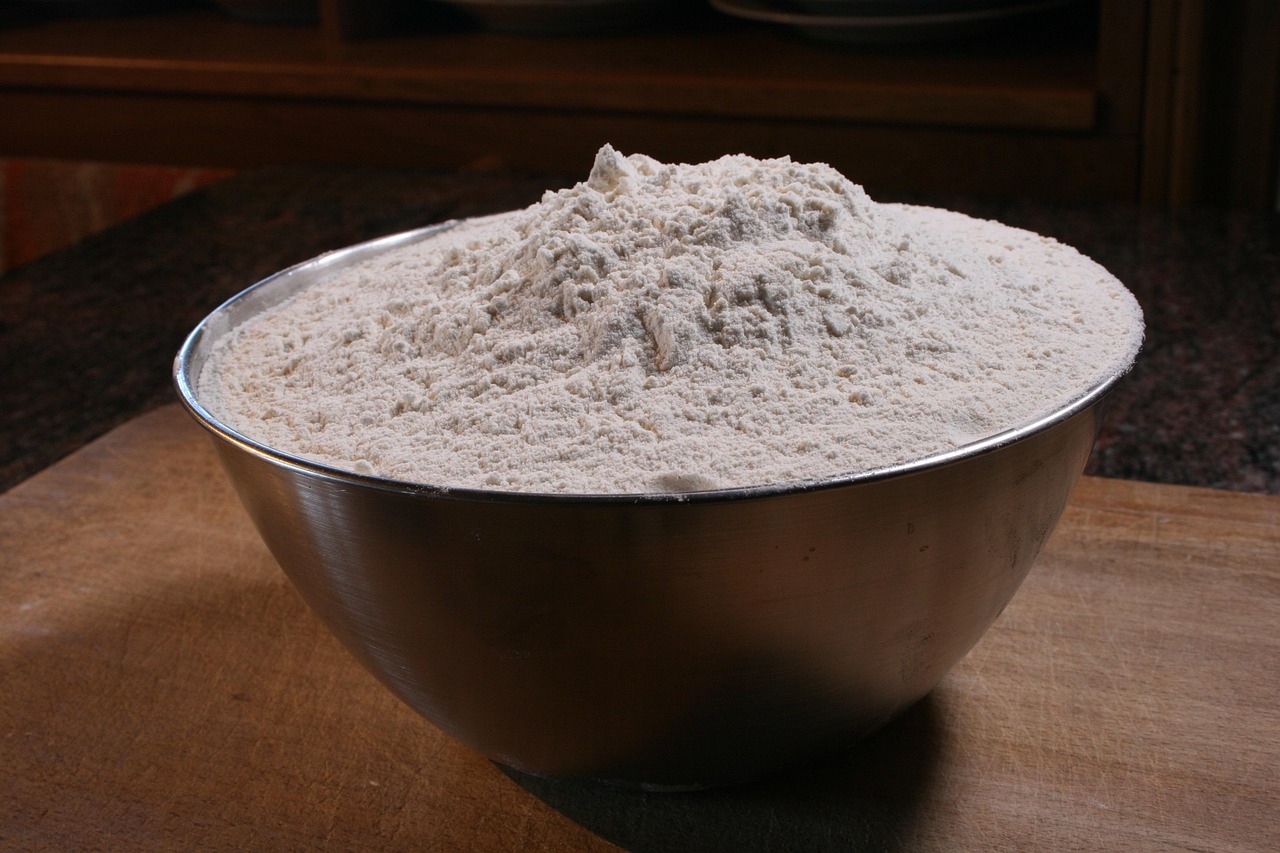 Flour
Flour
Flour is the soul of your bread. Beyond being a simple powder, it is a complex collection of proteins and starches. If you are interested in the variety of grains humans use to make flour, check out our Grains A to Z section of the Reference Chapter.
The milling process is crucial: stone-ground flour retains the bran and germ, preserving nutrients and enzymes, whereas industrial roller-milling often removes these to increase shelf life at the cost of flavor and nutrition. For artisanal sourdough, Bread Flour (12-14% protein) is the gold standard for creating the strong gluten network required for an open, airy crumb.
 Water
Water
Water is the catalyst. It hydrates the flour, waking up the dormant enzymes and allowing glutenin and gliadin proteins to link into an elastic network. The "Hydration Level" (the ratio of water to flour) is the single biggest factor in determining your crumb texture: higher hydration leads to large, irregular holes, while lower hydration creates a tighter, sandwich-style crumb.
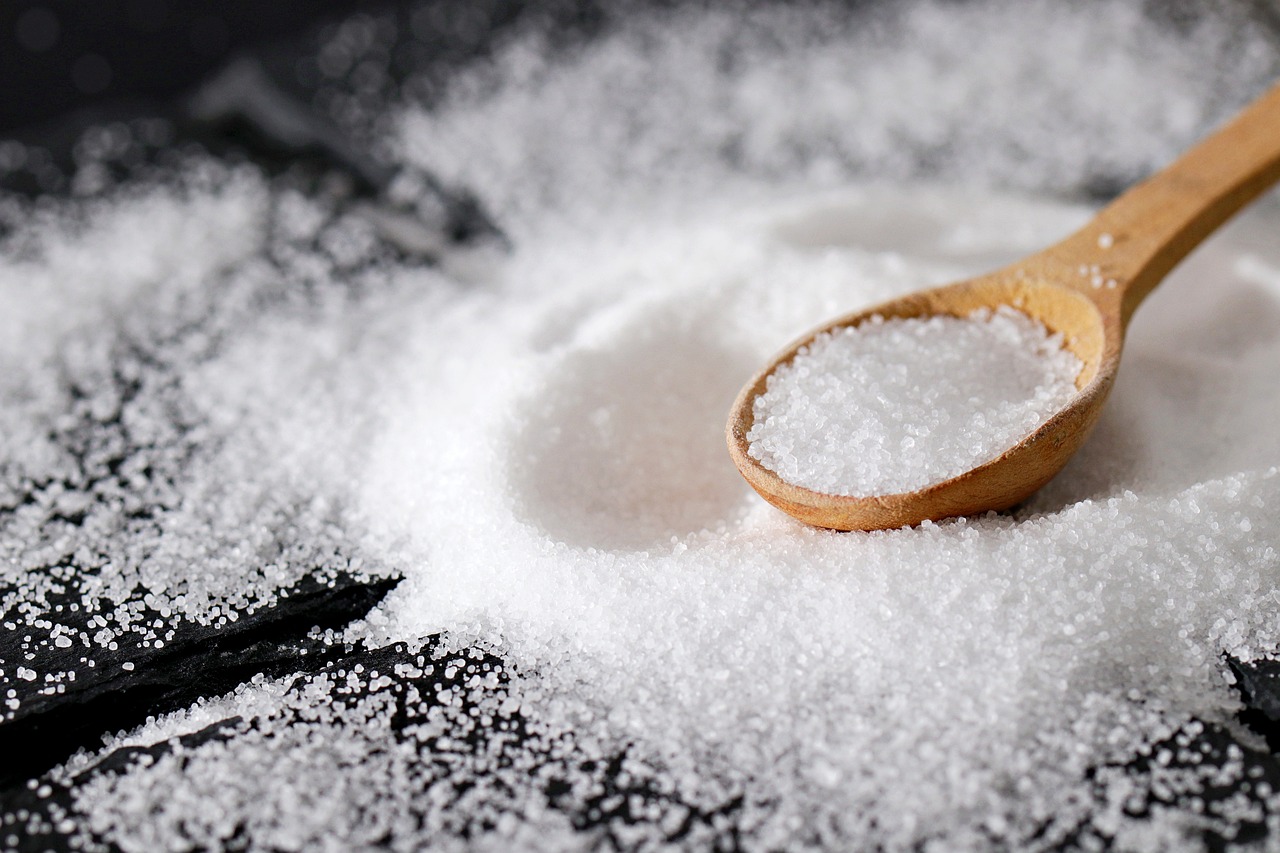 Salt
Salt
Salt does more than season; it regulates. It strengthens the gluten by tightening protein strands and slows down fermentation so the yeast doesn't "exhaust" the sugars too quickly. Most recipes use 1.8% to 2.2% salt relative to the flour weight. Without it, sourdough is bland, pale, and structurally weak.
 Yeast & Bacteria
Your Starter is a SCOBY—a Symbiotic Culture of Bacteria and Yeast. The wild yeast produces the CO2 that makes the bread rise, while the Lactic Acid Bacteria (LAB) produce the acids responsible for that signature tang and improved digestibility. This long, slow fermentation process neutralizes phytic acid, making the minerals in the grain easier for your body to absorb.
In sourdough, you cannot separate time from temperature. They are two sides of the same metabolic coin.
 1. Time as a Structural Ingredient
Time allows for the breakdown of complex carbohydrates and gluten proteins. If you are impatient, you make bricks; if you wait too long, you make soup. Precise timing allows the LAB to develop flavor complexity that commercial bread simply cannot match. Every extra hour of fermentation adds a new layer of organic acids and esters to the crumb.
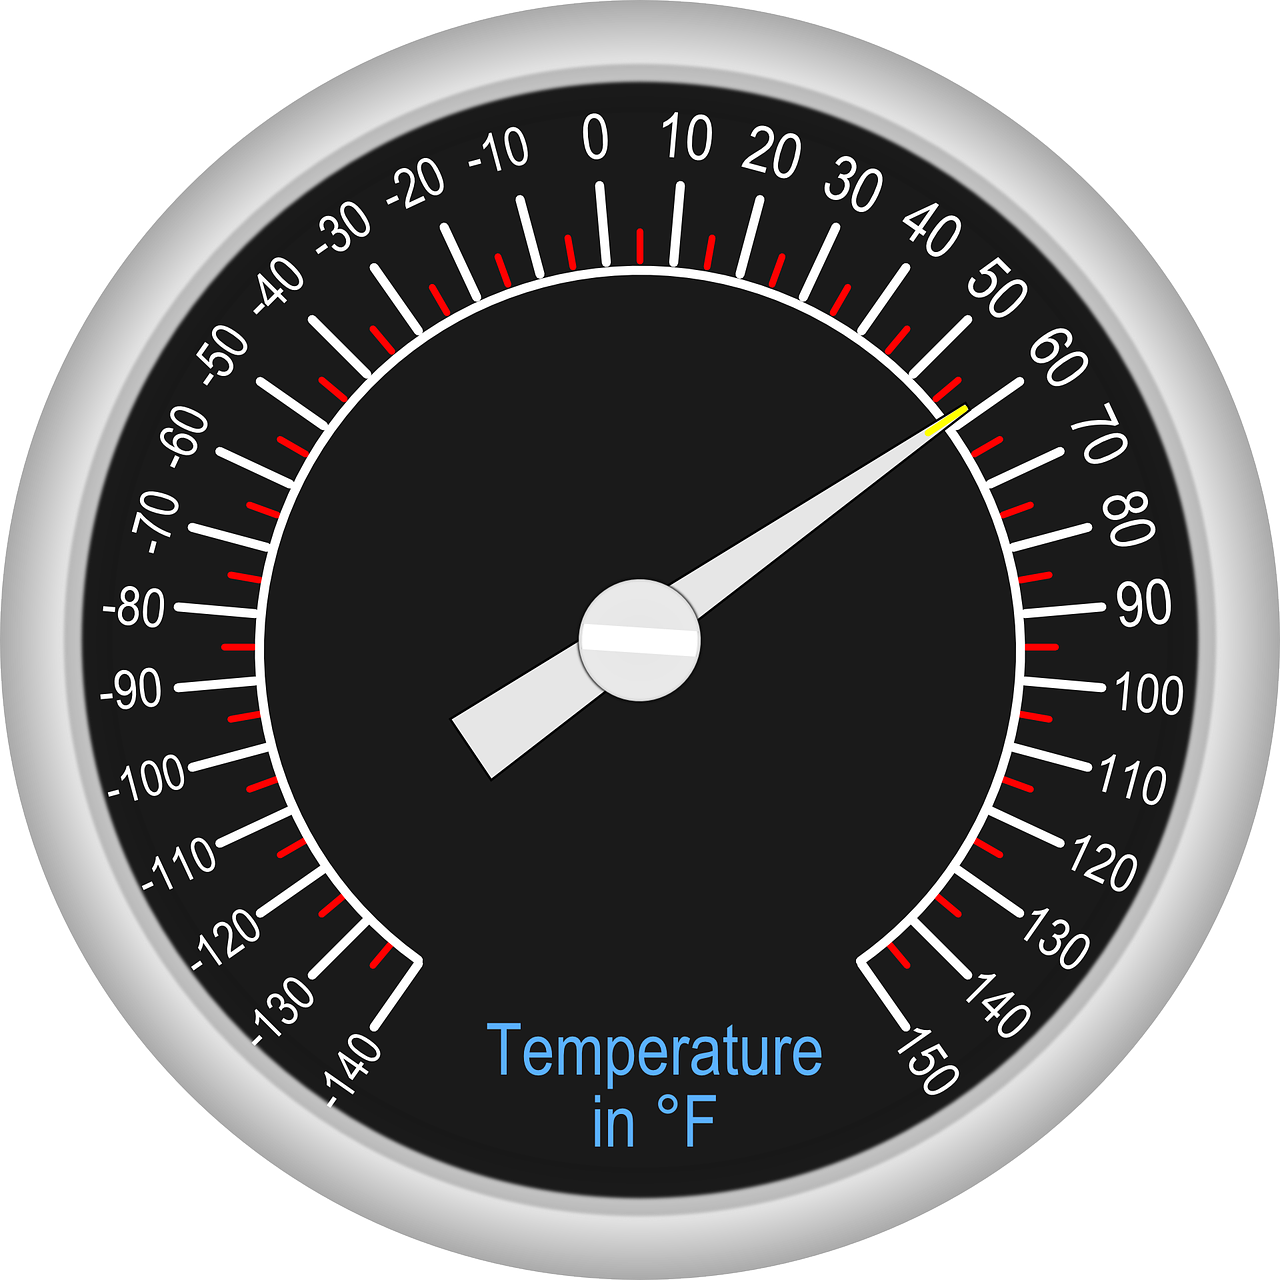 2. Temperature as the Throttle
Temperature is the speed at which the "biological engine" of your dough runs. Wild yeast activity peaks around 80°F (27°C while Lactic Acid Bacteria (LAB) thrive slightly warmer, near 89°F (32°C). By manipulating these, you control the flavor profile:
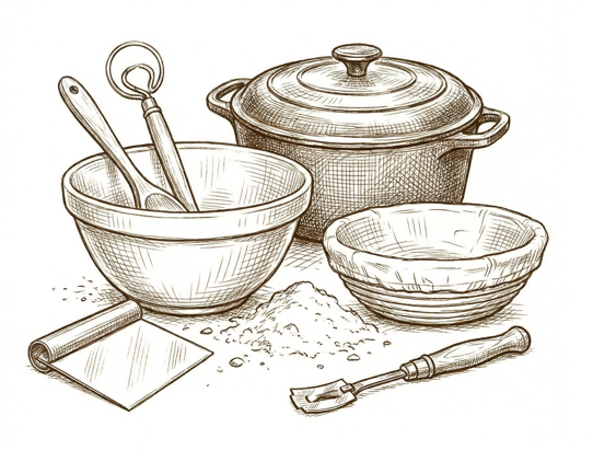
This list contains the minimal list of tools you will need to bake bread at home. Click on the tool name to open the full description (from the 'Tools A to Z' section of the Reference Chapter). Note that some of the tools are redundant and are particular to the baker's preference. For instance, Lame and Scissors -> pick the scoring tool you prefer. Same for the baking vessel - you don't need to procure a Pullman or Loaf Pan if you intent to bake free-form loafs (in either a Combo Cooker or a Dutch Oven). Also note that you can substitute any other scoring, baking vessel, thermometer etc. tool that suits your baking style and budget.
For a complete list of home sourdough baking tools, go to Tools A to Z section of the Reference Chapter.
 Digital Scale
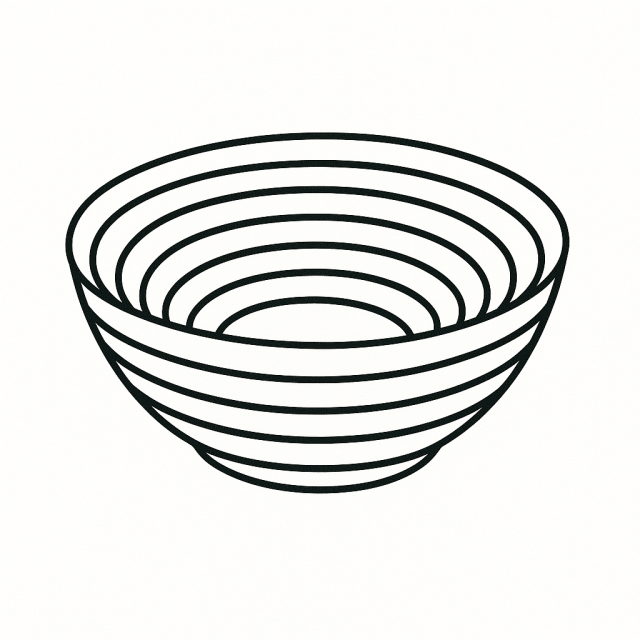
 Mixing Bowls
 Bowl Scraper
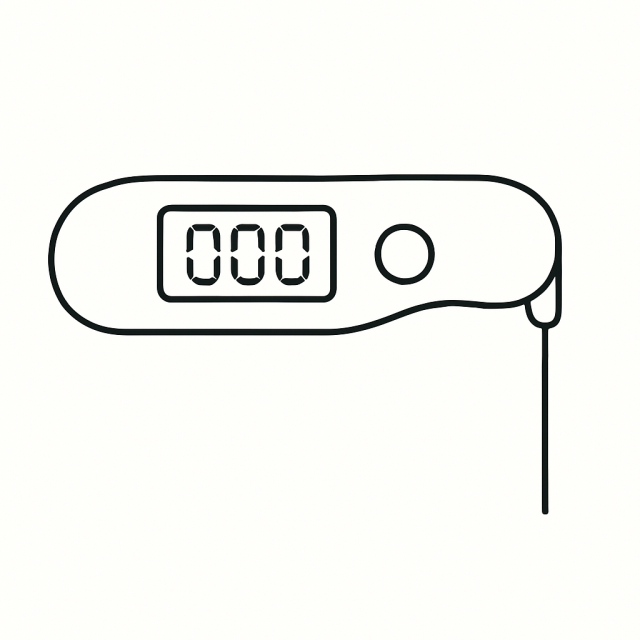 Digital Thermometer
 Proofing Baskets
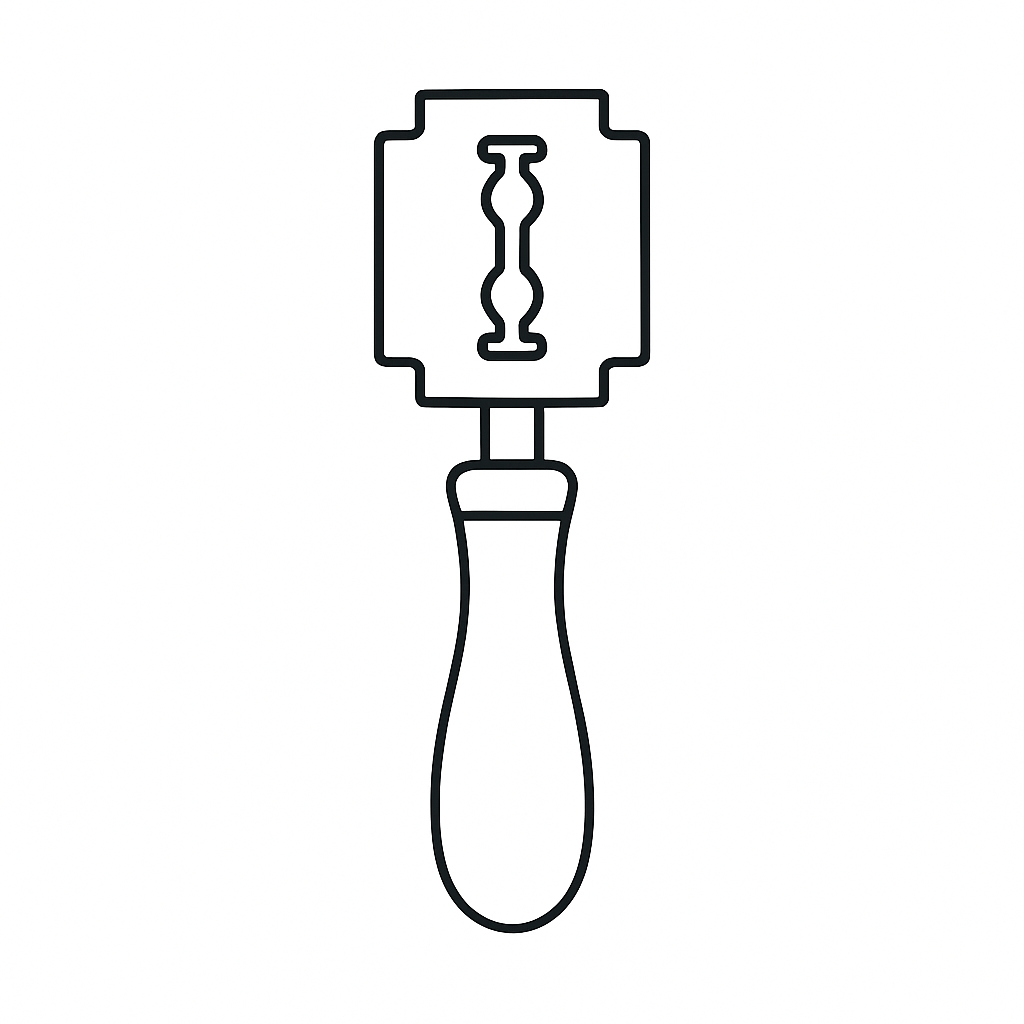 Lame
Lame
 Scissors
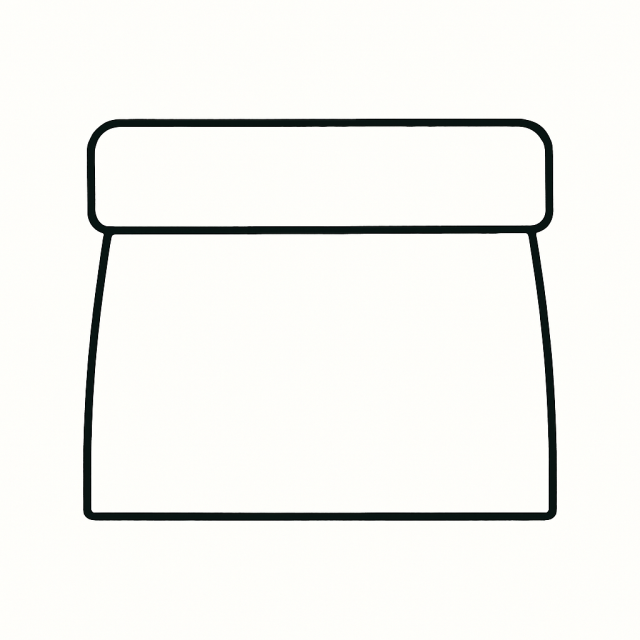 Bench Knife
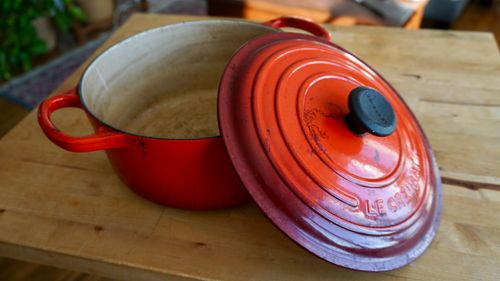
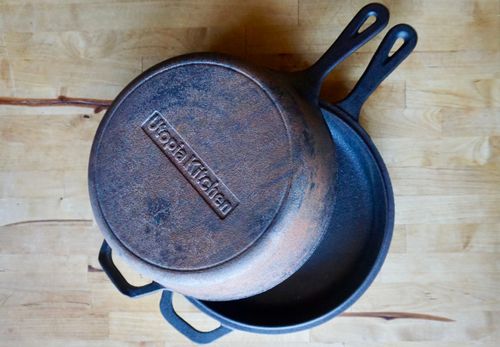
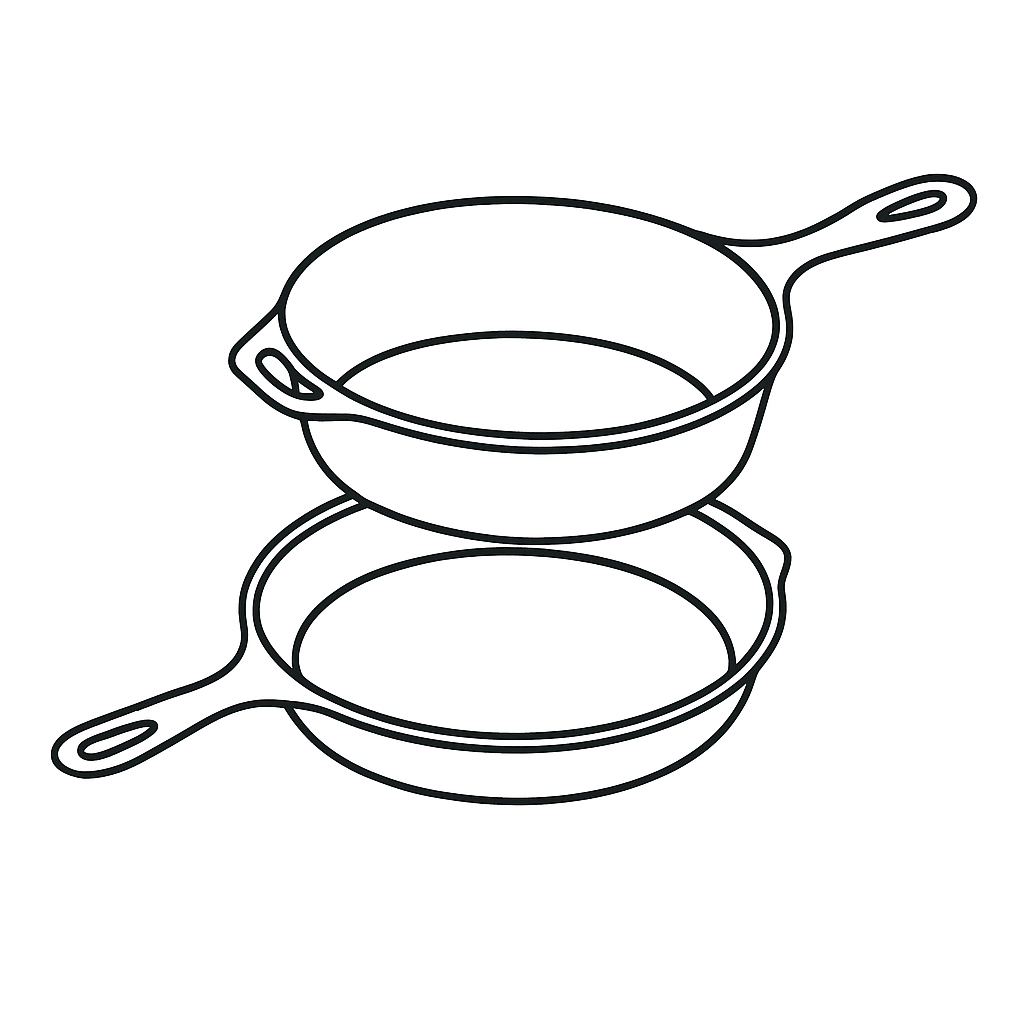 Combo Cooker
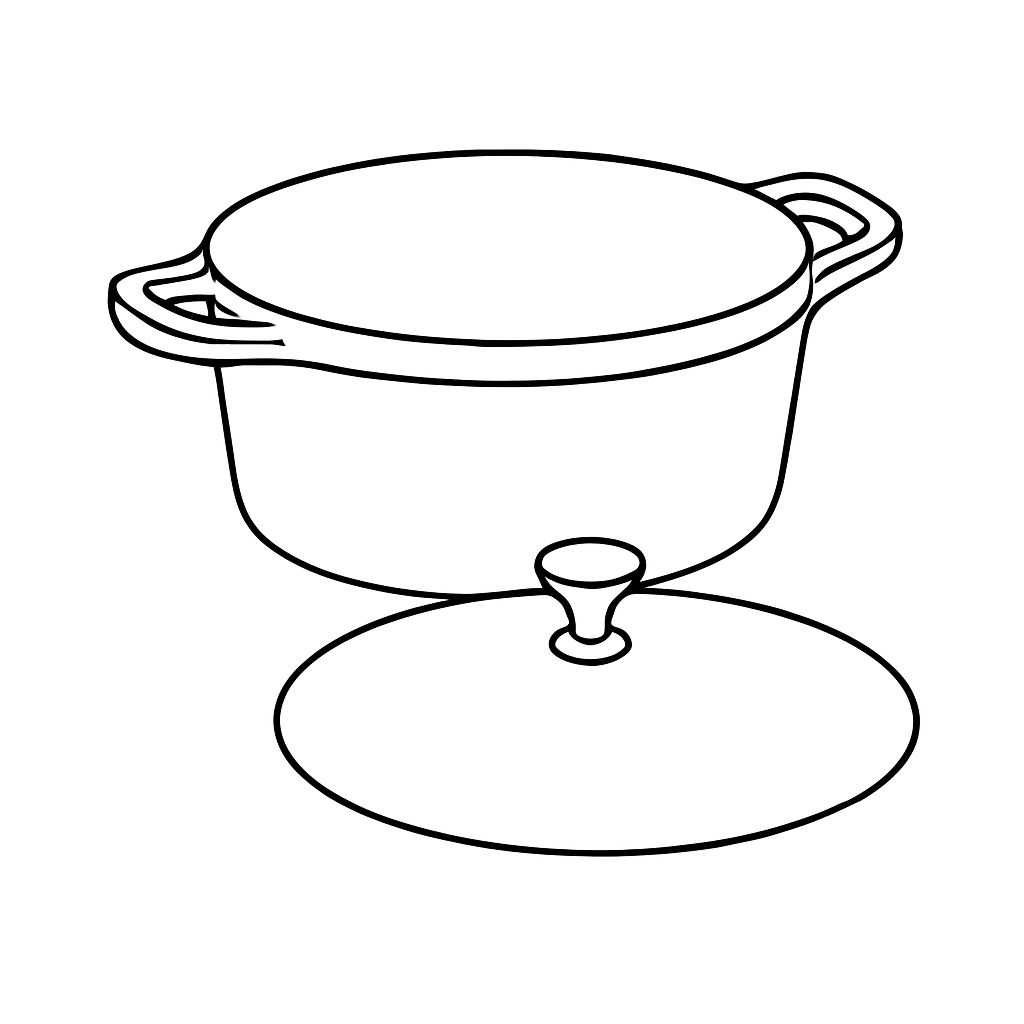 Dutch Oven
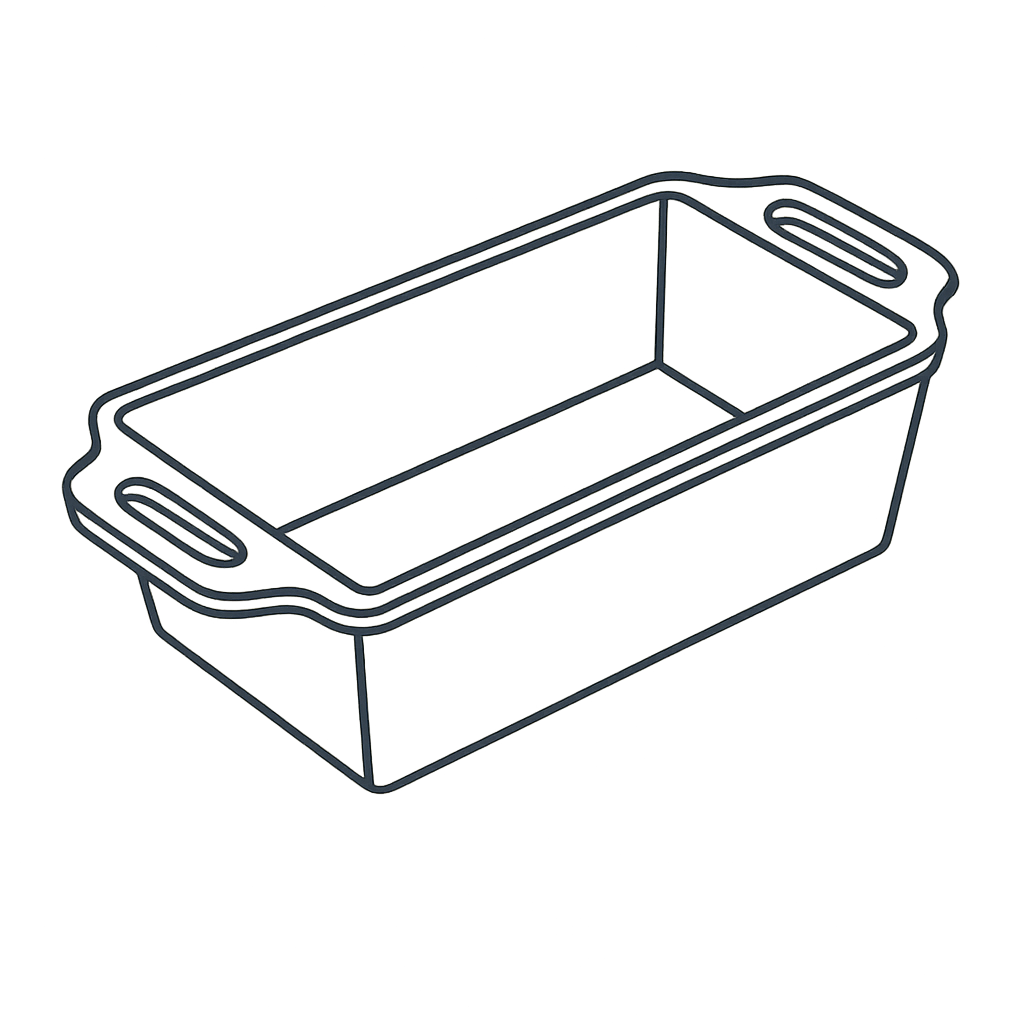 Loaf Pan
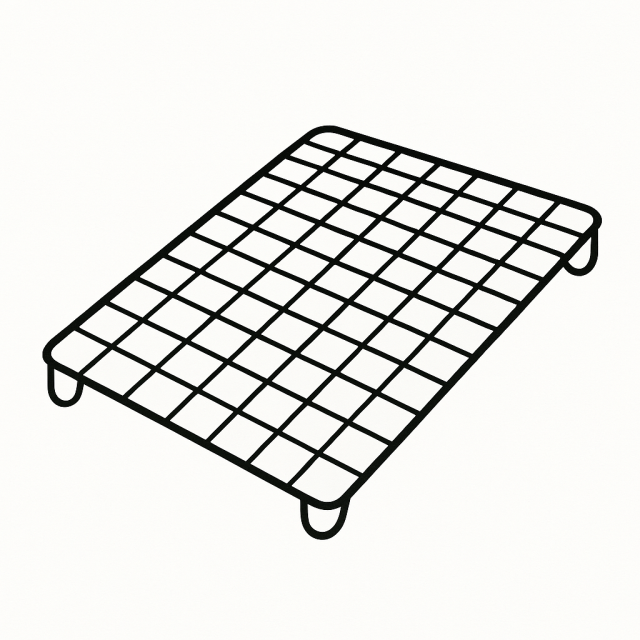 Cooling Rack
Why is a heavy cast-iron pot considered "essential"? It's all about Thermal Mass and Evaporative Cooling. Professional bakeries use deck ovens that inject bursts of steam. Steam keeps the "skin" of the dough moist and elastic, allowing the loaf to expand fully before the crust hardens (Oven Spring).
At home, we don't have steam injectors. The Dutch Oven works by trapping the moisture that evaporates from the dough itself in a small, sealed space. This creates a localized "steam room" that mimics a million-dollar professional oven.
Don't have the gear yet? You can still bake spectacular bread using items already in your kitchen:
Using a scale isn't just about accuracy; it's about Repeatability. A "cup of flour" can vary by as much as 30 grams depending on how tightly it's packed. That 30g difference is the gap between a supple dough and a dry, tough one. In the world of sourdough, we don't bake by volume; we bake by mass.
The prime ingredient in bread baking is the leavening agent. In modern bread baking, the leavening agent is most commonly commercial Yeast. This class of yeast is highly specialized to rise bread quickly and consistently. It makes the bread that most people are accustomed to. This is unfortunate in that the bread is not fermented slowly, which makes real bread more delicious and nutritious. Commercial-yeast bread is still tasty, but because it lacks the fermenting power of natural yeast and bacteria working together, the properties of the resulting bread are not so healthful.
If you are a novice home bread baker, do not be put off by stories of mysterious and complex processes to make your own starter and leaven—read the sections of this chapter and be patient. Yes, it takes up to six days to initiate your starter, but from that point on, you will have a vibrant symbiotic colony of bacteria and yeast (a SCOBY) that, if fed regularly, will live as long as you!
 ?
?
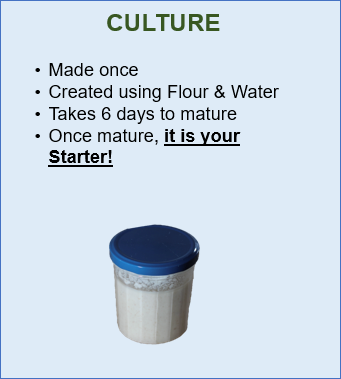
A Culture is the starting point—the biological embryo—of your sourdough Starter. It begins as a simple mixture of flour and water, nurtured and fed over several days (typically 5 to 7). During this time, you are cultivating a concentrated SCOBY—short for Symbiotic Culture Of Bacteria and Yeast. Once that microbial community is strong and stable, the Culture graduate to what we call a Starter.
We don't usually talk about “Cultures” during day-to-day baking because they're just the early phase of building a Starter—and you only need to go through this process once. There are many ways to kick off a Culture, but the basics are always the same: mix flour and water (sometimes with extras like yogurt or fruit juice) and wait for microbial activity to take hold. The mix is fed repeatedly over several days until it's thriving.
When your Culture begins to reliably rise and fall in volume after each feeding—typically on a 6 to 9 hour cycle at room temperature—that's the sign it has matured into a proper Starter. From that point on, we refer to it as a Starter, and rarely use the term Culture again (though some people still do).
Establishing a culture is a biological battle known as microbial succession. It moves through three distinct phases:
The famous San Francisco Sourdough is stable because the bacteria (F. sanfranciscensis) and yeast (K. humilis) have a mutualistic bond. The bacteria process sugars the yeast can't eat, and the yeast provides nutrients the bacteria need. They are literally better together.
The Global Sourdough Project analyzed 500 cultures and found that while flour type matters, the microbes on the baker's hands often become part of the SCOBY. Your culture is a unique biological fingerprint of you and your kitchen!
?
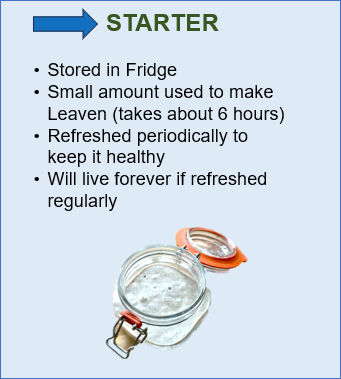
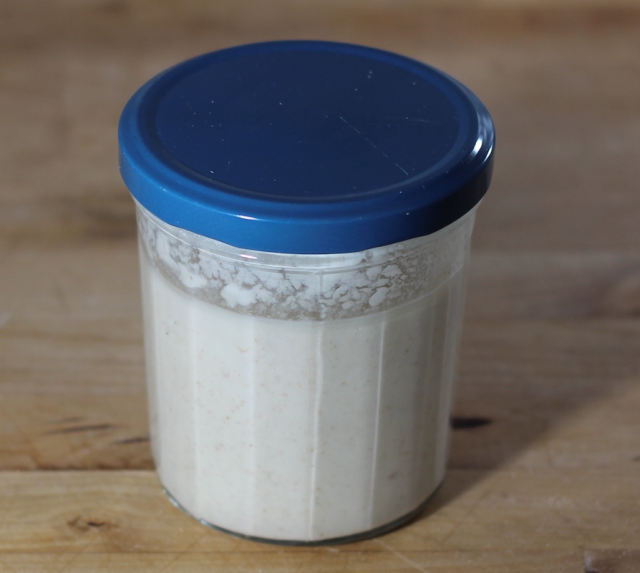
For home bakers, a sourdough Starter is usually stored in the refrigerator in a covered container. Most keep between 225g and 450g on hand—any more than that and you'll likely end up with unnecessary waste. This excess is called discard, which builds up when the Starter is fed regularly but not used for baking as often.
Many home bakers keep a separate discard jar in the fridge to collect this excess Starter. And it's not just waste—discard can be turned into delicious things like crackers, pancakes, muffins, and more.
Once your Starter is well-established and refrigerated, it becomes remarkably resilient. Even if it takes on a vinegary smell or develops a funky aroma, the microbial community inside is usually still alive and kicking. Some bakers feed their Starter weekly, even if they're not baking; others stretch it to monthly. If left too long between feedings, a dark liquid known as hooch may form on the surface. This is normal—just a sign that it needs a refresh. Some bakers stir the hooch back in before feeding, while others pour it off. Make your Starter from Scatch
Feeding your Starter is easy: discard most of it (into your discard jar), keeping only a small amount—typically 25g is enough as a base for refreshing. A common formula is the 1:4:4 ratio: mix 25g of Starter with 100g of warm water and 100g of flour. Let it sit on the counter for 1 to 4 hours (2 hours is a good average), then cover and place it back in the fridge.
From there, you can scoop out 15g to 25g at a time to build your Leaven as needed. This can be done multiple times until the Starter jar dips below ~150g, or starts smelling overly sour and hoochy. At that point, just repeat the feeding process to bring it back to life.
When you refrigerate your starter, you are inducing a state of quiescence. While yeast activity slows to a crawl, certain cold-tolerant Lactic Acid Bacteria (LAB) remain metabolically active. This is why a starter stored in the fridge for a week often smells more vinegary (acetic acid) than one kept on the counter (lactic acid).
Sourdough starters are resilient, but accidents happen—jars break, ovens get turned on with starters inside, and mold strikes. A Safety Stash uses the science of Desiccation to pause biological time completely.
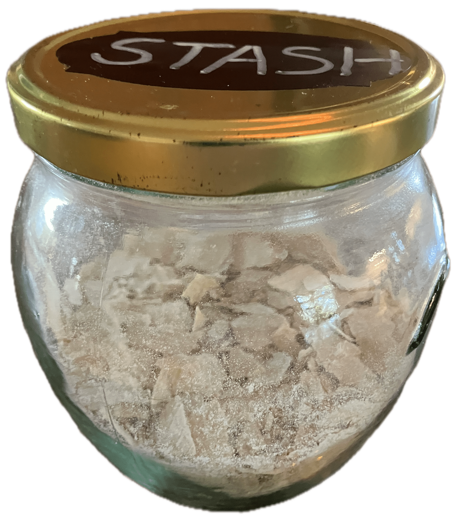
Did you know there is a "Fort Knox" for sourdough? The Puratos Sourdough Library in Sankt Vith, Belgium, preserves over 120 unique sourdough cultures from around the world. To ensure these genetic lineages survive, they are preserved in cryo-freezers at -80°C, but also "woken up" and fed with their original local flours every two months.
➤ Visit the Virtual Sourdough Library
Why does your starter different than your neighbor's? It's not just the flour; it's you. A study by the Rob Dunn Lab found that the microbiome on a baker's hands significantly influences the bacterial composition of their starter. In a way, your starter is a biological mirror of its baker.
Because starters are living things that require regular feeding, humans have a tendency to anthropomorphize them. It is a global tradition to name your starter. Some of the most popular names include:
 ?
?
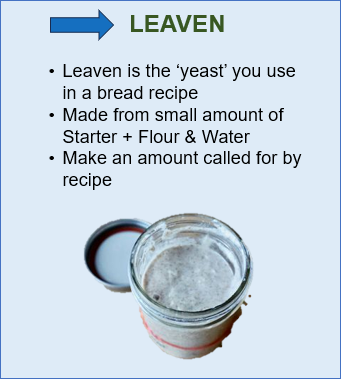
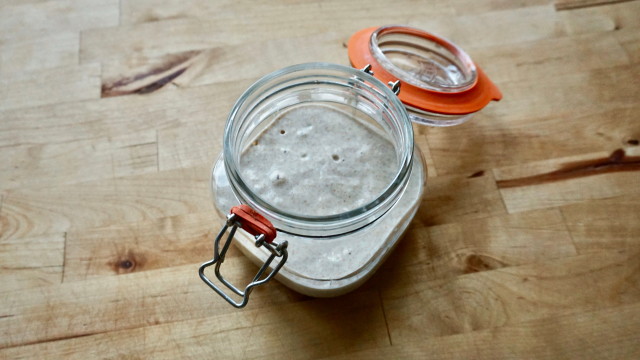
A Leaven (also called a levain) is a refreshed, high-activity Starter tailored specifically for a bake. While the Starter is your "master seed" kept in the fridge, the Leaven is the offshoot brought to peak microbial activity. To build one, take a small amount of refrigerated Starter (about 15g), mix it with 60g of flour and 60g of warm water, and let it mature until it is aerated, bubbly, and has doubled in size. At this point, it is officially a Leaven.
Most single-loaf recipes require 100g to 125g of Leaven. This specific build provides exactly what you need with minimal waste. If you're scaling up for two loaves, simply double the inputs: 30g of Starter, 120g of flour, and 120g of warm water.
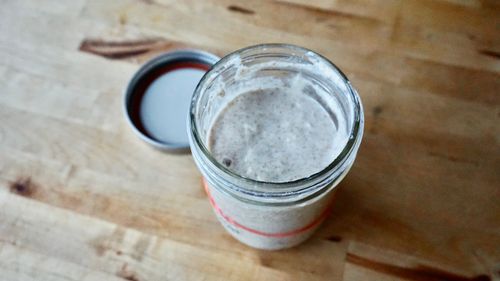
You'll know your Leaven is "ripe" when it reaches peak volume and smells pleasantly sweet-tart—reminiscent of yogurt or overripe fruit. A classic "ready" check is the Float Test: drop a teaspoon of Leaven into a glass of water. If it floats, the carbon dioxide production is sufficient to leaven your dough. At room temperature, this maturation typically takes 6 to 8 hours.
In the Sourjoe App, we often build Leavens by matching the flour ratio of the specific recipe. While it feels logical, there is a biological reason: enzymatic adaptation. The microbes in your starter produce specific enzymes (like amylase and protease) tailored to break down the specific starches they are "used" to eating. By feeding the Leaven the same flour it will encounter in the main dough, you "prime" these metabolic pathways, leading to a more vigorous bulk fermentation.
The Float Test is a measure of density. As yeast consumes sugars, it releases CO2 gas, which becomes trapped in the gluten network. When the Leaven is aerated enough to become less dense than water, it floats. Note: High-hydration leavens or those made with 100% Whole Wheat may sometimes fail the test even when ready, as the coarse bran can "pop" the bubbles or the mix may be too liquid to hold its shape.
If a matured Leaven is left out too long, it will eventually collapse. At this stage, it becomes more acidic and alcoholic—essentially turning back into a "Starter." This happens because the food supply is exhausted and the increasing acidity begins to trigger proteolysis, where enzymes actually start breaking down the gluten structure that holds the gas. If your schedule changes, don't worry: just take a small scoop of the collapsed leaven, feed it with fresh flour and water, and it will be back to peak in a few hours.
The word "Levain" is French, but it traces back to the Latin levamen, meaning "alleviation" or "mitigation"—literally "that which lightens." Historically, "leaven" was the term for the portion of fermented dough saved from one day to the next, a practice dating back to ancient Egypt (circa 3000 BC).
If baking bread was a book, these are its chapters—the ones every loaf is told, er... made from. They range in size and complexity but never in order, no matter the recipe. Thinking of baking this way helps you gauge where you are, anticipate what's next, and eventually craft your own recipes.
There are seven chapters. Only seven, even though the variety hiding in something as simple as flour, water, salt, and starter is immense—bagels, pizza dough, rustic boules, baguettes, whole meal ryes, sandwich loaves, and beyond. We'll walk through each one: why it matters, why we split things up this way, and why it helps everyone from beginners to pros.
?
Why do we insist on cooling inclusions? It's about Thermal Equilibrium. If you add 100g of toasted sunflower seeds at 150°F (65°C) to 900g of dough at 78°F (25°C), you don't just warm the dough—you create "hot spots" that can denature the gluten proteins and accelerate local fermentation to the point of over-proofing before the rest of the loaf is ready.
When we toast seeds as part of the preparation step, we are inducing the Maillard Reaction. This is a chemical reaction between amino acids and reducing sugars that gives browned food its distinctive flavor. Scientifically, toasted seeds are more than just "tasty"; the toasting process also reduces the moisture content of the seeds, preventing them from making the surrounding dough "gummy" during the bake.
Research shows that bakers who pre-measure ingredients have a 40% lower rate of "failed bakes" compared to those who measure as they go. This is because the act of staging ingredients allows you to visually verify the ratios. If your 100g of water looks the same as your 500g of flour, you know something is wrong before you ruin the dough.
?
The Initial Mix is where biology meets physics. At this stage, you choose between two primary philosophies: the traditional Autolyse or the faster Fermentolyse. Your choice will dictate the extensibility of the dough and the eventual structure of the crumb.
Flour and Water (True Autolyse)A true Autolyse involves mixing only flour and water. This rest period allows dormant enzymes (amylase and protease) to begin breaking down starches and proteins. The result is a dough that is naturally smoother and more extensible (stretchy) before you even begin kneading. Because there is no yeast or salt present, the gluten bonds form freely and without the tightening effect of salt or the competitive activity of fermentation.
Many modern bakers prefer a Fermentolyse, where the leaven is included in the initial mix. This initiates fermentation immediately. While the dough still benefits from enzymatic hydration, the presence of acids from the leaven begins to strengthen the dough sooner. This method is highly efficient and is often used by bakers who want a more pronounced "sour" profile, as the bacteria have more time to produce organic acids throughout the entire process.
In both methods, salt is withheld until after this initial rest. Salt is hygroscopic—it pulls water away from the flour—and can interfere with the full hydration required for optimal gluten development during this critical first stage.
The term "Autolyse" was introduced to the baking world by Raymond Calvel in 1974. A professor at the École Française de Meunerie, Calvel noticed that over-mixing dough in industrial machines was destroying the flavor and color of French bread (oxidizing the carotenoid pigments). He discovered that a simple rest period allowed the dough to "mix itself" through natural enzymatic action, reducing the physical labor required and preserving the flour's natural aroma.
The word comes from the Greek auto (self) and lysis (splitting). During this stage:
Why keep salt out? Salt is a "dough tightener." It inhibits the protease enzymes from doing their job. If you add salt too early, you lose that beautiful, relaxed stretch that makes sourdough shaping so much easier. Scientifically, salt also competes with the flour for water molecules, leading to slower, less complete hydration of the grain.
?
Bulk Fermentation is the most critical stage in the Baker's Process. This is when the dough comes alive. It is a dual-purpose phase: the yeast produces gas to aerate the loaf, while the baker performs a series of "Stretch and Folds" to organize the gluten into a strong, supportive structure. This stage begins the moment the Leaven is incorporated and typically lasts 3 to 5 hours depending on your kitchen temperature.
During this stage, the baker spends significantly more time waiting than working. The stretch-and-fold tasks occur every 20 to 30 minutes for up to 5 cycles. These intervals allow the gluten to relax between manipulations so it can be stretched further without tearing. Because precise timing is so vital to avoid over-proofing, the Sourjoe app provides built-in timers and notifications to keep your bake on track.
After the final stretch-and-fold, the dough is left undisturbed for a "Final Bulk Rest" (typically one hour). This allows the microbial activity to peak and the dough to fill with tiny, well-distributed gas pockets before shaping.
Why don't we just knead sourdough like "normal" bread? High-hydration doughs are too sticky for traditional kneading. Instead, we use intermittent aeration. Each time you stretch the dough and fold it over itself, you are essentially "braiding" microscopic gluten strands into stronger "cables."
Think of it like building a skyscraper: the gluten is the steel frame, and the yeast provides the air inside. If the frame is too weak, the skyscraper (your loaf) will collapse in the oven. The 20-30 minute rest between folds is called Relaxation; it allows the chemical bonds to rearrange so you can build strength vertically and horizontally.
Bulk fermentation is finished when the dough says it is, not just when the timer goes off. Look for these three scientific signs:
During these 5 hours, the pH of your dough drops from around 6.0 to nearly 4.0. This acidity doesn't just provide flavor; it actually helps to bleach the flour naturally and makes the final bread more resistant to mold growth on the counter.
?
Once the bulk fermentation is complete, the dough is ready to be Divided and Pre-shaped. This stage is about transforming a large, fermented mass into individual, manageable loaves. After dividing, each piece is gently rounded into a loose ball to organize the surface fibers before a critical pause known as the Bench Rest.
If the dough has developed properly, it will feel airy yet resilient. You will notice the edges of the dough are rounded and "domed" rather than flat—a clear sign that the internal gas pressure and gluten strength are sufficient. During the bench rest (typically 20-30 minutes), the gluten relaxes just enough to allow for the final, tighter shaping without tearing the delicate outer skin.
Shaping is the process of creating a structural "skin" around the dough. Scientifically, you are stretching the outer gluten sheath to its maximum limit without rupturing it. This tension acts like a balloon; it contains the expanding CO2 during the final bake, forcing the bread to grow up (Oven Spring) rather than spreading out into a pancake.
When you divide and pre-shape, you are physically manipulating the gluten bonds, causing them to tighten and become "elastic" (snapping back). If you tried to do your final tight shaping immediately, the dough would resist and likely tear.
During the Bench Rest a process called Stress Relaxation occurs at a molecular level. The gluten strands rearrange themselves, losing their "memory" of the previous stretch, which makes the dough extensible again. This allows you to achieve a much tighter final shape, which is the secret to a professional "ear" on your crust.
Bakers often debate how "gentle" to be during this stage. While you want to avoid popping all the large bubbles (the alveoli), a slight "degassing" during shaping is actually beneficial. It redistributes the yeast to fresh food sources and breaks up huge gas pockets into smaller, more uniform ones, leading to a more consistent crumb structure.
?
Proofing is the final stage of fermentation where the shaped dough rests and expands before hitting the heat of the oven. During this time, the wild yeast produces the critical CO2 that leavens the loaf, while the bacteria finalize the flavor profile. Historically, bakers "proved" the strength of their yeast at this stage to ensure a successful bake—hence the name.
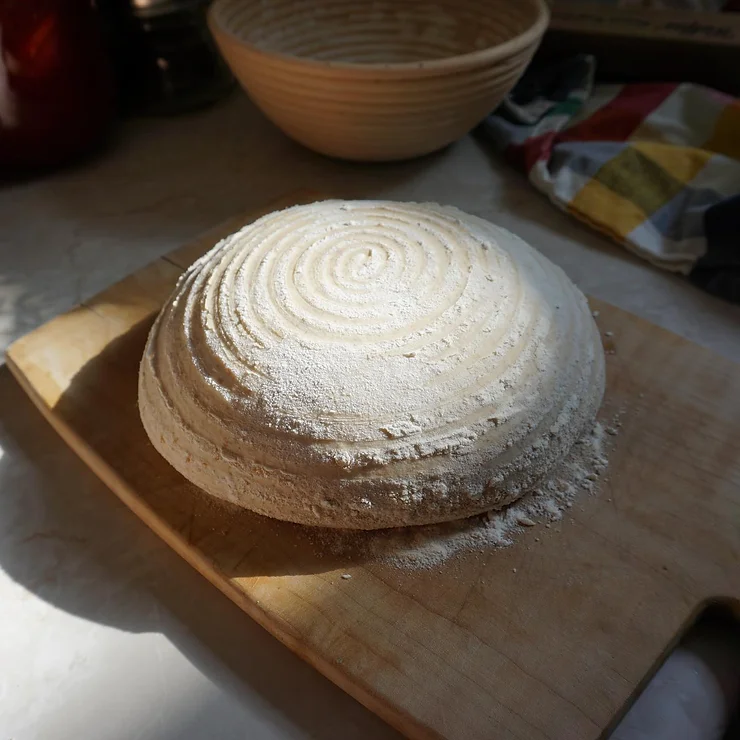
Load Dough into BannetonUsing a proofing vessel helps maintain the dough's shape and tension as it aerates. Whether you use a Banneton (cane basket), a Brotform, or a simple bowl, the vessel provides the necessary structural support. Cane bannetons are particularly favored as they allow the dough to "breathe" and wick away surface moisture, resulting in a cleaner score and a better crust.
Ambient proofing occurs at room temperature (70°F - 85°F). This is a high-speed method where yeast activity is maximized. While faster (3 - 4 hours), it produces a loaf with milder acidity and a softer, creamier crumb.
Cold proofing, or "retarding," involves refrigerating the dough (38°F - 45°F) for 12 - 24 hours. The cold temperature dramatically slows yeast activity but allows the Lactic Acid Bacteria (LAB) to continue producing complex organic acids. This results in a tangier flavor and a sturdier dough that is significantly easier to score.
The poke test is your biological "gas gauge." Gently press a floured finger half an inch into the dough. Observe the speed and depth of the rebound to determine the internal pressure.
Perfectly Proofed: The dough springs back slowly and leaves a visible, shallow indentation. It is at its maximum potential for Oven Spring.
 Under-proofed: The dough snaps back quickly and completely. This means the yeast
has much more "work" to do. Baking now often causes "tunneling" or a massive, uncontrolled burst
at the weakest point of the crust.
Under-proofed: The dough snaps back quickly and completely. This means the yeast
has much more "work" to do. Baking now often causes "tunneling" or a massive, uncontrolled burst
at the weakest point of the crust.
 Over-proofed: The indentation remains and doesn't rebound at all. The gluten
structure has been weakened by excessive acidity and the weight of the gas. This loaf will
likely deflate when scored and bake up flat and dense.
Over-proofed: The indentation remains and doesn't rebound at all. The gluten
structure has been weakened by excessive acidity and the weight of the gas. This loaf will
likely deflate when scored and bake up flat and dense.
Why does cold bread taste better? It's down to the competition between Lactic Acid and Acetic Acid.
When you "retard" the dough in the fridge, the yeast (which produces gas) and the lactic-acid bacteria (LAB) slow down significantly. However, the bacteria responsible for acetic acid are more cold-tolerant. Over 12 - 24 hours, they build up a flavor profile that is impossible to achieve at room temperature.
It's important to remember that when you put a 2-lb mass of dough into a 38°F fridge, the center doesn't cool instantly. It can take 2 - 4 hours for the core of the loaf to drop below 50°F. This "Thermal Lag" means that fermentation is still happening at a decent pace for the first few hours of the cold proof. This is why we usually let the dough sit at room temperature for 20 - 30 minutes in the banneton before refrigerating—to ensure the engine is "running" before we put it in the cooler.
Ever wonder where those beautiful tiny blisters on a sourdough crust come from? They are a direct result of a long cold proof. During the retard, enzymes break down starches into simple sugars on the surface of the dough. When these sugars hit the high heat of the oven, they undergo a rapid Maillard reaction and caramelization, creating those prized "micro-blisters."
?
The Bake stage is the dramatic conclusion where your 24-hour effort is transformed by fire. This phase is a sequence of thermal events: Scoring, the Covered Bake (steam phase), the Uncovered Bake (color phase), and the Final Doneness Check.
ScoringScoring is more than decoration; it is pressure management. By making intentional incisions, you dictate exactly where the bread will expand during its rapid "oven spring." Without a score, the gas will rupture the crust at its weakest point, often resulting in a misshapen loaf.
The depth of these cuts is crucial: for room-temperature proofed loaves, scores typically range from 1/4 to 1/2 inch deep, ensuring proper expansion without compromising structure. For doughs that have undergone cold fermentation, slightly deeper cuts may be necessary due to a firm surface.
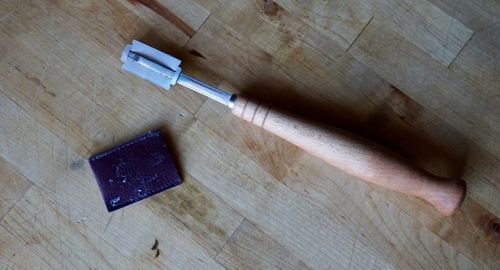 A razor-sharp Lame or fresh blade is essential to prevent "dragging" the dough.
The goal is a clean, swift stroke that allows the loaf to bloom outward without resistance.
Dull blades tear the gluten surface, leading to a jagged and stunted rise.
A razor-sharp Lame or fresh blade is essential to prevent "dragging" the dough.
The goal is a clean, swift stroke that allows the loaf to bloom outward without resistance.
Dull blades tear the gluten surface, leading to a jagged and stunted rise.
The first 20 minutes occur in a sealed vessel, such as a Dutch Oven or Combo Cooker. By trapping the steam released from the dough, you keep the surface hydrated and elastic. This moisture prevents the crust from setting prematurely, allowing the "Oven Spring" to reach its maximum volume.
Professional results require high initial heat—typically 500°F (260°C). This thermal shock causes the yeast to go into a final "frenzy" of gas production before the temperature reaches lethal levels for the microbes.
Baking on a stone or tray while covering the loaf with a large stainless steel bowl can achieve similar results, provided the seal is tight enough to retain the escaping moisture.
Removing the lid and dropping the heat to 450°F (232°C) shifts the focus from volume to Maillard Reaction and caramelization. This is where the complex sugars and amino acids on the surface react to the dry heat, creating the signature aroma and the deep, nutty, mahogany-colored crust characteristic of artisanal sourdough.
This second phase ensures the interior "crumb" is fully set while the exterior achieves the desired thickness and crunch. Without this uncovered time, the crust would remain pale and leathery.
A fully baked loaf will have lost 10-25% of its weight through evaporation. Traditionally, bakers "knock" on the bottom of the loaf; a hollow sound indicates that the moisture has evaporated sufficiently to leave a structured, airy interior.
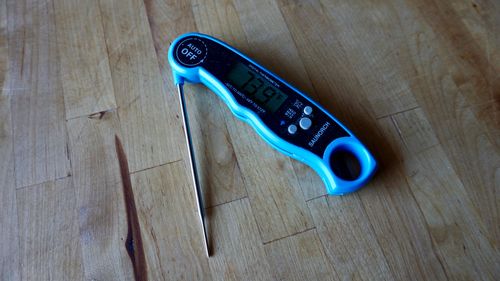
For absolute precision, use a digital probe thermometer. A target internal temperature of 200°F to 205°F (93°C - 96°C) ensures that the starch has fully gelatinized and the loaf will not be gummy once cooled.
Oven Spring is the final expansion of gases within the dough. Scientifically, it occurs across a specific thermal timeline:
As the timeline shows, the "dough" technically becomes "bread" between 140°F and 180°F. This is known as Starch Gelatinization. The starch granules absorb moisture and swell until they burst, creating the semi-solid crumb structure. If you pull the loaf before the center hits 200°F+, this process remains incomplete, resulting in a gummy interior.
Because dough is a poor conductor of heat, the center of the loaf lags significantly behind the crust. While your oven is 500°F, the center of the loaf is often still under 100°F for the first 10 minutes. This "lag" is what gives the yeast enough time to perform its final burst of expansion before the temperature reaches the lethal 130°F threshold.
The high heat of the bake kills all the yeast and bacteria, but the organic acids (lactic and acetic) produced during fermentation remain. These acids act as natural preservatives, lowering the pH of the baked loaf and making it highly resistant to mold growth—allowing sourdough to stay fresh longer than commercial breads.
?
Cooling on a Rack: Once removed from the oven, place the loaf on a wire cooling rack. This promotes air circulation around the bread, preventing condensation from forming on the crust, which could lead to sogginess. Proper cooling solidifies the crumb structure and enhances the crust's crispness. During the cooling phase, sourdough bread continues to lose weight due to moisture evaporation. While the majority of water loss occurs during baking, cooling can contribute an additional 1-2% reduction in weight.
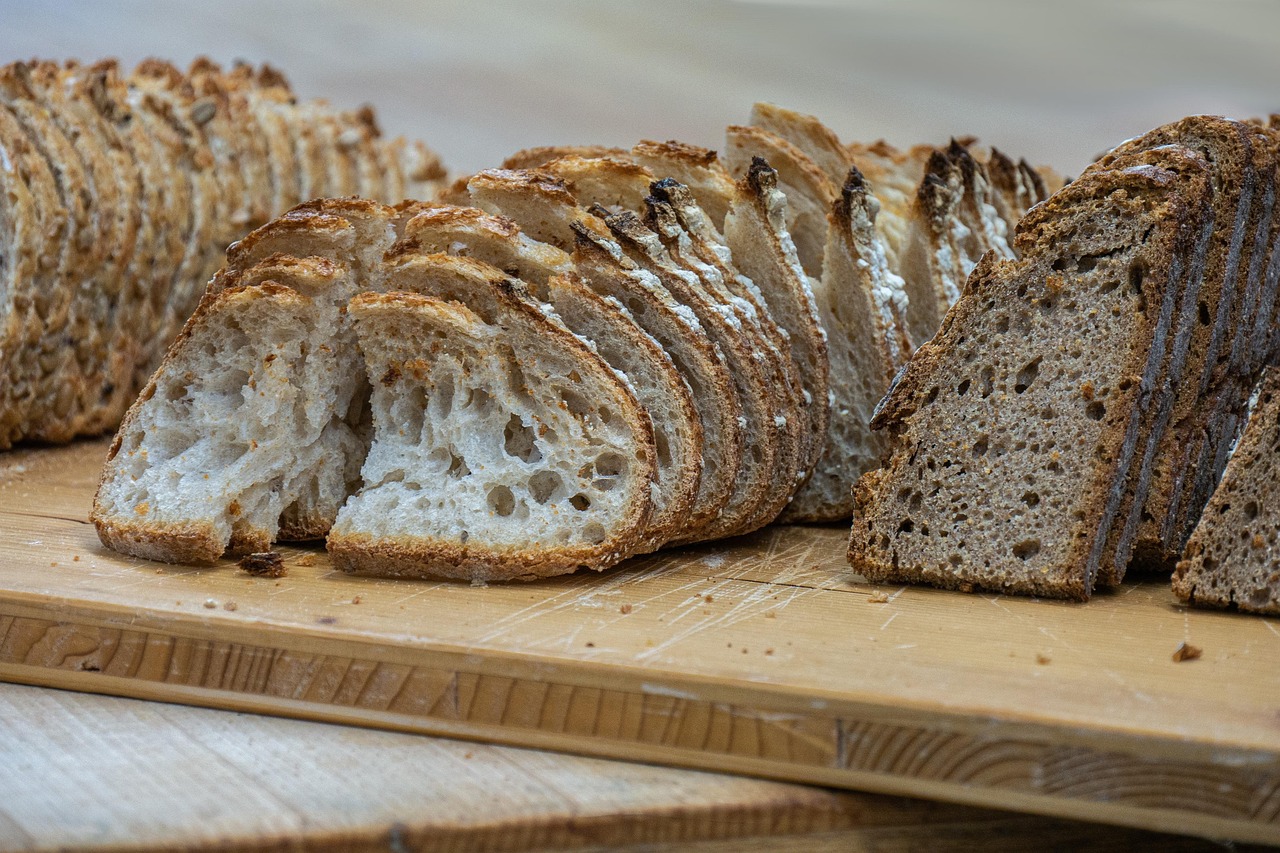
Resting Period Before Slicing: Allow the bread to rest for at least one to two hours before slicing. Many bakers wait until the bread is room temperature before slicing. Cutting too soon can result in a gummy interior, as the crumb continues to set during this time. Patience ensures a better texture and flavor development.
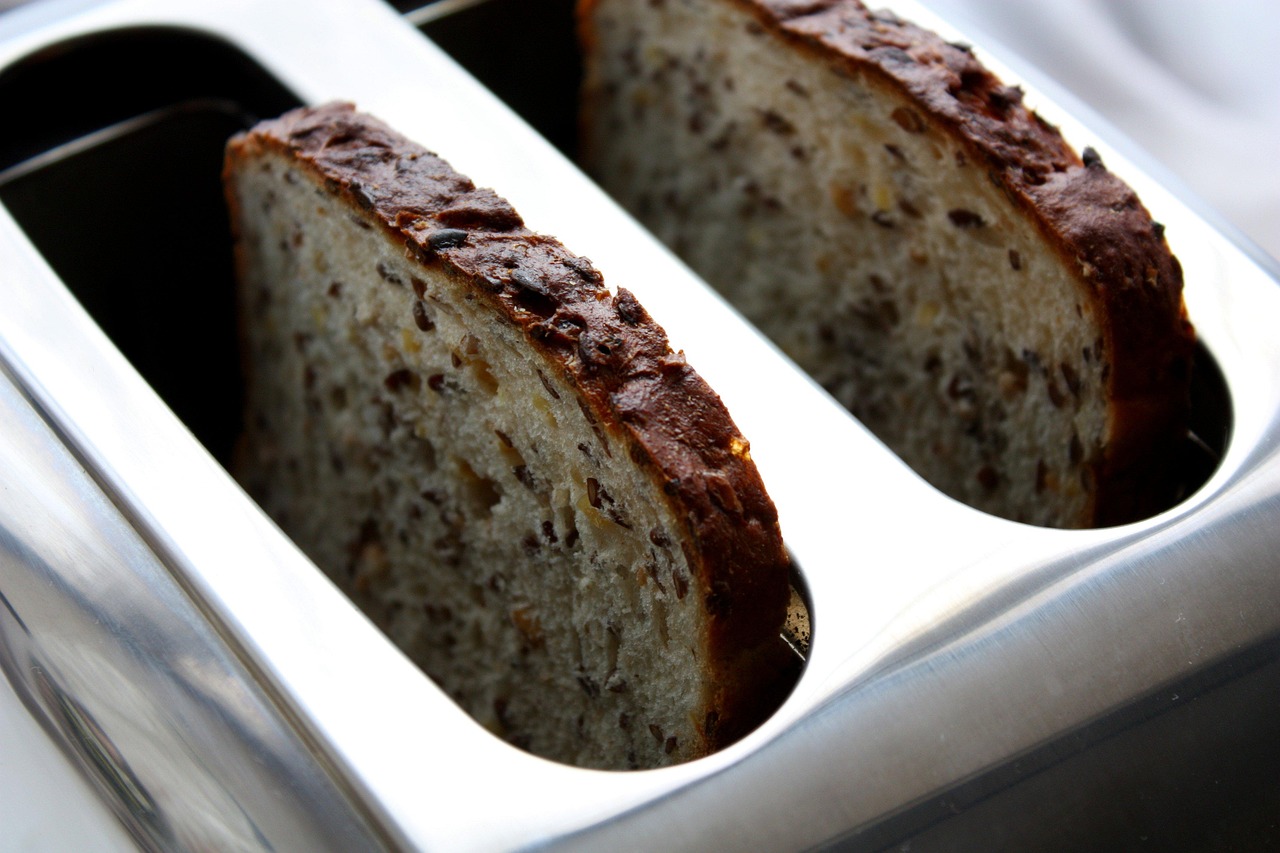
Storing the Bread: For short-term storage, keep the bread at room temperature in a paper bag or wrapped in a cloth to maintain the crust's integrity. Avoid plastic bags, as they can soften the crust. For longer storage, consider freezing slices in airtight bags, which can be toasted directly from the freezer when needed.
When bread cools, a chemical process called Starch Retrogradation begins. During baking, starch molecules are "gelatinized" (swollen with water). As the bread cools, those starch molecules begin to realign into a crystalline structure. While this eventually leads to "staling," it also creates something called Resistant Starch.
Research has shown that the cycle of freezing, thawing, and then toasting bread significantly alters how your body processes the carbohydrates. This creates a higher concentration of Type 3 Resistant Starch. Unlike regular starch, resistant starch isn't fully broken down in the small intestine; instead, it travels to the large intestine where it acts as a prebiotic, feeding your healthy gut bacteria.
Sourdough's low pH (acidity) makes it naturally mold-resistant, but after a few days, retrogradation makes it feel bone-dry. Don't toss it—this "aged" bread is a secret ingredient:
If baking bread was a book, these are the chapters with which every loaf of bread is told, er... made. The chapters range in size and complexity but never in order, even between each recipe.
In this Chapter:
Additional topics will be added here.
The Reference chapter provides a quick background to common sourdough baking terms. Scroll through the list or use the search tools in the header. Links to related Wikipedia articles are given for some items. We have made the Reference section a little more in-depth than a simple one-sentence explanation. For newcomers to sourdough baking, reading through the entire Reference section is a good idea.
more glossary stuff.
?

This Glossary section can be used as a quick 'A to Z' reference of sourdough baking terms. If you use the Search function in this app, it will take you directly to the term you are looking for in the Glossary (ands anywhere else that term appears). Also, if you are looking for more detailed information on a particular term, just click on it and more details will be revealed.
This section is updated regularly as we get more background information on each subject. Let us know if you have any other terms we have missed - or if you have any feedback on the content we are presenting.
Acetic acid (CH3COOH) is one of the main organic acids produced during sourdough fermentation. It is created by heterofermentative lactic acid bacteria working alongside yeast, and it is one of the compounds that gives sourdough its distinctive tang.
Acetic acid tastes sharper and more vinegary than lactic acid, which is milder and more yogurt-like. In sourdough, the balance between these two acids strongly influences the overall flavor profile.
Cooler, longer fermentation and stiffer doughs generally encourage relatively more acetic acid production. Besides adding tang, acetic acid also helps with natural preservation by making the bread less welcoming to mold.
Even though many aromas change during baking, acetic acid remains an important part of the finished loaf's flavor. Too little can make bread taste flat; too much can create an overly harsh, vinegary bite.
Acid Load refers to the Total Titratable Acidity (TTA) in the dough, which represents the total volume of organic acids present, distinct from pH (which measures the intensity of acidity).
High acid load triggers protease enzymes, which begin to break down the gluten network. This is known as "acid hydrolysis." If the TTA gets too high before the loaf hits the oven, the gluten structure can degrade, resulting in a flat, gummy loaf.
Managing acid load is key to crumb texture. A moderate load strengthens gluten swelling, but an excessive load destroys it.
Rye flour contains high levels of pentosans which require a high acid load to prevent them from interfering with the starch structure, which is why rye breads are traditionally sour.
Derived from the Latin for "little cavities," alveoli constitute the cellular structure of the crumb.
No new alveoli are created during baking; the oven heat simply expands the microscopic gas bubbles already trapped in the dough during mixing and fermentation. This is known as the "Ideal Gas Law" (PV = nRT).
The "Open Crumb" sought by artisan bakers is characterized by large, irregularly distributed alveoli with thin, gelatinized walls.
In Wonder Bread or sandwich loaves, mixers are designed to subdivide alveoli into thousands of uniform tiny cells, creating a "close crumb."
Wheat flour contains natural enzymes, primarily Alpha-amylase and Beta-amylase, which remain dormant until hydrated.
Beta-amylase snips maltose units from the ends of starch chains, providing the primary fuel for fermentation. Alpha-amylase attacks random points in the starch chain, creating dextrins that contribute to the gumminess and moisture of the crumb.
Without amylase, yeast would run out of food (sugar) quickly. Bakers sometimes add "Diastatic Malt" (sprouted barley) to boost amylase activity in flour that is deficient.
Amylase activity speeds up significantly in the oven until the dough reaches approximately 176°F (80°C), at which point the enzyme is denatured (killed).
Coined by Professor Raymond Calvel in 1974, this technique involves mixing only flour and water and letting it rest for 20 minutes to several hours.
During autolyse, two things happen: Protease enzymes degrade protein bonds, increasing extensibility (stretch), and starch granules fully hydrate. Importantly, because salt is absent, the osmotic pressure is low, allowing faster hydration.
It reduces the need for mechanical kneading, preventing the oxidation of carotenoid pigments (which give crumb its creamy color and flavor).
Calvel developed this method specifically to counter the decline in French bread quality caused by intensive mechanical mixers.
Standardized by French law, a traditional baguette can only contain flour, water, salt, and yeast/leaven.
The baguette's high ratio of crust to crumb maximizes the Maillard reaction surface area. Because of its thin diameter, heat penetrates the center rapidly, requiring a shorter bake time (20-25 mins) at high heat.
It is considered the ultimate test of a baker's shaping skill; the dough must be handled gently to preserve alveoli while creating enough surface tension to open the scores.
In 1920, a French labor law forbade bakers from starting work before 4 am. The baguette became popular because its thin shape could be baked and ready for breakfast, unlike large round boules.
A universal language for bakers. The total weight of the flour in the recipe represents 100%. All other ingredients are calculated as a percentage of that flour weight.
Formula: Ingredient % = (Weightingredient / Weightflour) × 100. This allows recipes to be scaled infinitely without altering the hydration or salinity balance.
It allows instant comparison of recipes. A baker knows instantly that a dough with 60% water is stiff (bagel) and 85% water is slack (ciabatta).
Because every ingredient is a percentage of flour, the total percentage of a dough recipe is always greater than 100% (e.g., 100% flour + 75% water + 2% salt = 177% Total).
Open the Baker's Math Calculator to test baker's percentages with your own flour, water, salt, starter, and add-in values.
Also known as a brotform, usually made from natural rattan cane.
The rattan material is slightly hygroscopic (water-absorbing). By wicking a microscopic layer of moisture from the dough's surface, it helps form a thin "skin." This skin provides the necessary tension for the loaf to hold its shape when turned out and scored.
Essential for high-hydration sourdoughs (75%+ hydration) which are too fluid to hold their shape on a flat surface during the final rise.
Using rice flour to dust a banneton is chemically advantageous because rice lacks gluten; it won't bond with the dough's gluten, ensuring a clean release.
Before the industrialization of compressed yeast in the late 19th century, the symbiotic relationship between the Brewer and the Baker was essential. Bakers would collect the creamy top-fermenting foam (barm) from ale vats to leaven their bread.
Barm is a concentrated slurry of active Saccharomyces cerevisiae (specifically ale yeast) suspended in wort. Unlike a flour-based sourdough starter which relies on wild yeast and bacteria, barm introduces a massive inoculation of a specific, vigorous yeast strain, resulting in a rise that is faster and more predictable than wild leaven.
It creates a loaf that is lighter and less acidic than traditional sourdough, often with a faint bitterness or "hoppy" note depending on the beer. It was the standard leavening for the English "Manchet" loaf.
The British slang term "barmy" (meaning crazy or foolish) originated here; it implies a person's head is full of frothing fermentation bubbles rather than brains.
French for "bathing" or "watering." It involves holding back 5-10% of the recipe's water and adding it after the gluten network has already formed.
Gluten development is more efficient in a slightly stiffer dough. By developing the gluten at lower hydration first, then adding the "bassinage water," bakers can achieve a super-high hydration (open crumb) without sacrificing dough strength.
Allows for the incorporation of water into flour that might otherwise turn into soup if mixed all at once.
The water added during bassinage acts as a lubricant between gluten sheets, potentially increasing the extensibility (stretchiness) of the final dough.
Shorter and thicker than a baguette, but oval rather than round (boule).
The oval shape creates a specific tension dynamic. When scored down the center, the expansion force is directed perpendicular to the cut, often resulting in a more dramatic "ear" than a round boule, where expansion is omnidirectional.
Preferred by many home bakers for slicing uniform sandwich pieces compared to a round loaf.
The term "Bâtard" in French implies an "illegitimate" or hybrid shape—neither a baguette nor a boule.
A classic commercial yeast preferment, traditionally hydrated at 45-60% (very stiff).
The low hydration and lack of salt in a biga favor yeast reproduction over bacterial acidity. This results in a pre-ferment that adds significant strength (gluten structure) and nutty, complex wheat flavors without adding sourness.
Essential for Ciabatta and other high-hydration Italian breads, where the stiff biga provides the structural "backbone" for the wet dough.
Because it is so stiff, a biga takes longer to ferment than a wet poolish, often 12-16 hours at cool room temperature.
A technique used when a starter has been refrigerated for a long time or is showing low activity.
By using a high inoculation ratio (e.g., 1:1:1) and warm water (80°F+), the yeast population enters an exponential growth phase (Log Phase) rapidly. This effectively "wakes up" the metabolic machinery of the culture.
Ensures the dough will have sufficient leavening power to avoid density, even if the mother starter was neglected.
Often kept at a smaller hydration (stiffer) to concentrate yeast density per gram.
The French word for "ball." It is the most primal and natural shape for dough to take due to surface tension.
A sphere has the lowest surface-area-to-volume ratio of any shape. This means a boule retains moisture (and internal heat) longer than a baguette, resulting in a distinct difference in crumb gelatinization and shelf life.
The default shape for Dutch Oven baking. Requires "cupping" motions during shaping to tighten the gluten skin.
The French word for a bakery, Boulangerie, is literally a place that makes boules.
Functionally identical to a banneton, but material differs.
Compressed wood pulp brotforms have higher thermal mass and insulation than cane baskets. They tend to keep the dough slightly warmer during ambient proofing and are less prone to sticking due to their smoother texture.
Often preferred for high-rye doughs (common in German baking) which are stickier than wheat doughs.
Historically, the spiral patterns were not just decorative; they increased the surface area of the crust, creating more crunch.
The period from the moment the starter is added until the dough is divided.
This is where ~70-80% of the yeast activity occurs. The dough becomes "viscoelastic" as gas bubbles (CO2) inflate the gluten network. The pH drops from ~6.0 to ~4.5, improving shelf life and flavor.
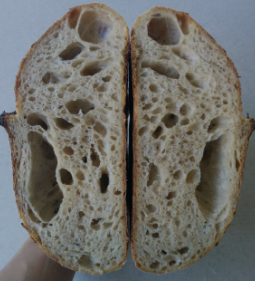
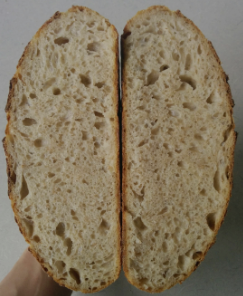
Success or failure is determined here. Under-fermented bulk leads to "fool's crumb" (large holes surrounded by dense dough). Over-fermented bulk leads to gluten degradation and collapse.
The volume increase (e.g., rising 50% vs 100%) is a better indicator of readiness than time, as ambient temperature dramatically alters the rate of fermentation.
The baker lifts the dough from the middle, allowing the ends to tuck under due to gravity, resembling a "coil."
Unlike kneading, which organizes gluten via shear force, coil folding relies on the dough's own weight and extensibility to align polymer chains. It builds structure while preserving the delicate gas bubbles already formed during fermentation.
Preferred in the later stages of bulk fermentation when the dough is airy and fragile.
If the dough doesn't stretch and tuck but simply lifts as a block, it has likely reached maximum strength (or is too dry).
Purified yeast strains selected for speed and CO2 production, available as Instant, Active Dry, or Fresh.
Unlike sourdough, which contains a symbiotic mix of yeast and bacteria (1:100 ratio), commercial yeast is a monoculture. It produces CO2 rapidly but lacks the bacteria to produce significant organic acids (flavor) or degrade phytates (nutrition).
Offers predictability and speed. "Hybrid" recipes use a pinch of commercial yeast to guarantee rise while using sourdough for flavor.
Louis Pasteur first identified yeast as a living organism in 1857, paving the way for the industrial production of yeast.
From the French word "to sleep" or "to lay down."
Linen is used because it is highly absorbent (wicking moisture from the dough surface to create a skin) but naturally non-stick when floured. Cotton tends to hold moisture and stick to the dough.
The cloth is folded into pleats between loaves to provide lateral support, forcing the baguette to proof up rather than flattening out.
A couche is never washed. It is simply shaken out and dried. Over years, it becomes "seasoned" with flour and yeast.
Technically known as the "soft solid foam" structure of the bread.
The crumb is set when starch gelatinization occurs (approx. 140°F-176°F). The texture (chewy vs. soft) is determined by the protein content of the flour and the degree of hydration.
Baker's evaluate crumb to diagnose faults: "Dense" implies under-fermentation; "Flying Roof" (gap at top) implies gluten degradation or poor shaping.
The "glossy" or "custardy" crumb seen in high-end sourdough is a result of fully gelatinized starch at high hydration.
Also called "knocking back."
While open-crumb bakers avoid this, some degassing is necessary to redistribute yeast to new food sources (sugars) and to equalize the temperature of the dough. It also prevents massive, singular air pockets (mouse holes) in the final loaf.
Sandwich breads are aggressively degassed to create a fine, uniform crumb. Artisan sourdoughs are handled gently to preserve irregularity.
Physics dictates that small bubbles are more stable than large ones; splitting large bubbles creates a more structurally sound loaf.
Means "leaven" in Dutch/Flemish. Traditionally buried in a bed of flour to maintain a cool, stable temperature.
Desem is maintained at cool temperatures (50-65°F) and low hydration (stiff). This specific environment selects for yeast activity over bacterial acidity, resulting in a starter that has powerful rising ability but a mild, sweet wheaty flavor rather than a sour one.
The gold standard for 100% whole wheat loaves that are light and not overly sour.
Traditionally started by burying a ball of dough in a sack of organic wheat flour for weeks.
The process of transforming a "shaggy mess" into a smooth, elastic dough.
Development involves creating disulfide bonds between protein chains. Mechanical mixing (kneading) forces these bonds, while time (autolyse/bulk) allows them to form chemically. Acid (sourdough) also aids development by altering the charge of proteins, helping them unfold.
Insufficient development leads to a flat loaf that cannot hold gas. Over-development (oxidation) leads to a bleached flavor and tough crumb.
You can achieve full development without ever kneading, simply by letting time and hydration do the work (No-Knead method).
Barley that has been sprouted (to activate enzymes) and then gently dried at low heat.
It is a concentrated source of Alpha-amylase. If flour has a low "Falling Number" (a measure of enzyme activity), 0.5% diastatic malt is added to convert starches to fermentable sugars.
Promotes a stronger rise, better crust browning (Maillard reaction), and moister crumb. BUT, too much leads to a gummy, sticky crumb that won't bake through.
"Non-diastatic" malt is dried at high heat to kill enzymes; it is used solely for flavor and color (like in bagels).
The necessary byproduct of maintaining a healthy culture.
Discard is highly acidic (pH ~3.8 - 4.0) and the gluten is usually degraded by protease activity. This makes it a poor leavener for bread but an excellent tenderizer for pancakes, crackers, or cakes (acid tenderizes gluten).
Removing discard ensures the ratio of "Food" (Fresh Flour) to "Eaters" (Microbes) remains high (e.g., 1:1:1 or 1:5:5) to promote vigorous growth.
Fried sourdough discard with scallions is a popular savory snack in the community.
From the Indo-European root *dheigh-, meaning "to knead" or "to form."
Dough is technically a "non-Newtonian fluid." Its viscosity changes depending on the stress applied to it. This property allows it to flow slowly into a banneton but bounce back when poked.
The medium in which biology (fermentation), chemistry (bonds), and physics (gas expansion) interact.
Dough becomes "Bread" at the moment the starch gelatinizes and the protein coagulates, locking the foam structure in place.
Commonly Rice Flour or Rye Flour.
Rice flour is superior because it contains no gluten. Wheat flour can absorb moisture from the dough and bond with it, essentially gluing the loaf to the banneton. Rice flour remains distinct and powdery even when damp.
Critical for high-hydration doughs. A 50/50 mix of Rice and Wheat flour provides a balance of non-stick properties and nice browning.
Excessive raw flour on the crust can burn and taste bitter; always brush off excess before baking.
The holy grail for many artisan bakers.
An ear forms when the "Hinge" (the uncut dough) lifts up and peels back. This requires: 1) A shallow scoring angle (30-45°), 2) Sufficient steam to keep the crust flexible, and 3) Rapid oven spring driven by high heat.
It maximizes the crust surface area for Maillard browning and indicates that the loaf was fully proofed and expanded.
Often called "Grigne" (French for grin or crack).
One of the two main rheological properties of dough (the other is extensibility).
Provided primarily by the Glutenin proteins, which form large, spring-like polymers. High elasticity means the dough is strong but hard to shape (bucky).
Elasticity is needed to hold the gas bubbles; without it, the bubbles would expand until they burst, and the loaf would flatten.
Acidity (sourdough) generally degrades elasticity over time, making older doughs less "snappy."
The endosperm is the seed's internal food reserve and by far the largest part of the wheat kernel. In milling, it is the portion most associated with refined white flour.
It contains mostly starch, along with significant protein and smaller amounts of vitamins and minerals. In wheat, many of the proteins that later form gluten come from the endosperm, while its starch granules supply the carbohydrates that gelatinize during baking.
Endosperm is the structural and energetic core of most bread flour. It provides the bulk of the gluten-forming proteins and the starch that feeds fermentation, sets the crumb, and influences loaf volume and texture.
About 83% of a wheat kernel's weight is endosperm. That is one reason white flour is so efficient to mill, even though removing bran and germ also removes much of the kernel's fiber and some of its micronutrients.
Brioche, Challah, Panettone.
Fats coat the gluten proteins, physically preventing them from bonding. This creates a "short" crumb that is tender and flaky rather than chewy. Sugar is hygroscopic (holds water), keeping the crumb moist for days.
Requires intensive mixing to develop gluten because the fat fights against the structure.
High sugar concentrations (>10%) can dehydrate yeast cells via osmosis, slowing fermentation significantly. Special "osmotolerant" yeasts are often used.
The partner to Elasticity.
Provided primarily by Gliadin proteins, which act like fluid bearings between the glutenin springs. Autolyse increases extensibility because protease enzymes clip some gluten bonds, allowing the network to relax.
Crucial for oven spring. If a dough is not extensible, it cannot expand in the oven—it will simply harden as a small brick.
Pizza dough requires high extensibility to be stretched thin; Bagels require high elasticity to hold their chew.
Also called "refreshment."
Feeding dilutes the metabolic waste (acid/alcohol) and introduces fresh maltose. This keeps the yeast in the "Logarithmic Growth Phase." If you stop feeding, they enter the "Stationary Phase" and eventually the "Death Phase."
Regular feeding selects for vigorous yeast. An unfed starter has a high count of dead cells and high acidity, leading to sluggish dough.
The ratio of feeding (1:1:1 vs 1:5:5) controls the timing of the peak; higher ratios take longer to peak.
From the Latin fervere, meaning "to boil" (due to the bubbles).
Formula: C6H12O6 → 2C2H5OH + 2CO2. (Glucose yields Ethanol + Carbon Dioxide). In sourdough, bacteria also convert sugars to Lactic and Acetic acids.
Fermentation provides the lift (CO2) and the flavor (organic acids/esters).
Fermentation generates 1 BTU of heat per pound of sugar consumed. This is why dough temperature naturally rises during bulk fermentation.
A portmanteau of "Fermentation" and "Autolyse." In a classic autolyse, only flour and water are mixed. In fermentolyse, the starter (levain) is added initially with the flour and water, but the salt is still withheld.
Purists argue this is not a "true" autolyse because the acidity of the starter immediately lowers the pH, which can slightly inhibit the protease enzymes responsible for extensibility. However, it solves the mechanical difficulty of trying to incorporate a wet, slimy starter into a stiff, autolysed dough ball later on.
It is a technique of efficiency and convenience. By dissolving the starter in the water before adding flour, you ensure perfect distribution of yeast throughout the dough, preventing "hot spots" of fermentation.
If you use this method, your "Bulk Fermentation" clock starts the moment you mix the flour and water, unlike a traditional autolyse where the clock starts only after the mix is finished.
Dropping a teaspoon of starter into water to see if it floats.
It's a density test. Water density is 1.0 g/cc. If the starter has trapped enough CO2 bubbles, its density drops below 1.0, and it floats. This implies the yeast is active and the gluten is strong enough to hold gas.
A "Go/No-Go" gauge for beginners.
False Negatives: A starter made with rye or whole wheat might be very active but too heavy/dense to float. False Positives: A starter might float because of trapped air from stirring, not fermentation.
Replaces intensive kneading.
Folding serves three purposes: 1) Expels old CO2 and brings yeast into contact with new food; 2) Equalizes dough temperature (the outside is cooler than the inside); 3) Physically aligns gluten strands to build tension.
Essential for structure in high-hydration doughs.
The "Four-Fold" method is standard, but "Lamination" is an extreme folding technique used to build maximum layers.
Gluten does not exist in dry flour; it is created by hydration.
It is a bond between two proteins: Gliadin (provides fluidity/stretch) and Glutenin (provides strength/elasticity). Sourdough acidity modifies these proteins, making them swell and hold water better, but too much acid breaks them down.
The "Balloon" that holds the gas. Without gluten, bread is a brick.
Rye flour contains gluten proteins, but they cannot form a strong network because rye also contains pentosans (gums) that physically interfere with bonding.
Home mills allow bakers to use "fresh flour."
Freshly milled flour is biologically active. It contains the germ (oils and vitamins) which oxidize quickly after milling (going rancid). It stimulates fermentation faster than aged flour due to higher nutrient availability.
Adds intense flavor. However, fresh flour has weaker gluten structure because "aging" (oxidation) naturally strengthens gluten. Many bakers mix fresh flour with aged bread flour.
Industrial mills remove the germ to increase shelf life; home milling keeps it in.
The "Rauding" method or "Pincer" method are common hand techniques.
Hand mixing imparts very little friction heat compared to spiral mixers, which can raise dough temp by 15-20°F. This makes hand mixing ideal for managing fermentation temperature in home kitchens.
Provides tactile feedback on gluten development that a machine cannot.
You cannot "over-oxidize" dough by hand, but you can easily do so in a mixer (bleaching the flavor).
Heterofermentative bacteria are one of the major metabolic groups of lactic acid bacteria found in sourdough. Instead of producing mainly one acid, they create a mixture of fermentation products that broadens both flavor and dough behavior.
From simple sugars, they produce lactic acid plus carbon dioxide and either ethanol or acetic acid, depending on the strain and conditions. In sourdough, classic organisms such as Fructilactobacillus sanfranciscensis are valued because this metabolism contributes both acidity and aromatic complexity.
These bacteria help give sourdough its layered flavor. They are especially important when bakers want more tang, more aromatic depth, and a little extra gas production beyond what yeast alone provides.
The sharper vinegary note associated with some sourdoughs is closely tied to heterofermentative activity, because this group can shift part of its metabolism toward acetic acid under the right dough conditions.
Also called "Bolted" flour or Type 85.
It has the bran sifted out (which cuts gluten strands) but retains the germ and the aleurone layer (flavor and nutrients). This offers the "best of both worlds": the rise of white flour with the flavor of whole wheat.
The signature flour of the "Tartine" style loaf.
You can simulate it by mixing 50% Whole Wheat and 50% Bread Flour.
Homofermentative bacteria are a major group of lactic acid bacteria. In baking language, they are the organisms most associated with clean, direct acidification rather than strongly mixed flavor production.
When they ferment common hexose sugars, more than 90% of the end products are typically lactic acid. This means they lower pH efficiently without producing much carbon dioxide or acetic acid compared with heterofermentative bacteria.
They help mature dough by acidifying it quickly and steadily. In practical terms, they contribute a milder, rounder acidity and support dough conditioning, mineral availability, and microbial stability.
Many real sourdough ecosystems contain a mix of homofermentative, facultative heterofermentative, and obligately heterofermentative bacteria, so bakers usually experience the combined effect of several metabolic styles at once.
Named after "Hooch," the colloquial term for illicit alcohol.
When yeast runs out of sugar, fermentation stops, and the flour solids settle. The liquid on top is roughly 12-14% Ethanol. It acts as a protective cap against mold.
A sign of neglect. Stirring it back in adds a very strong sour/boozy flavor; pouring it off keeps the starter milder.
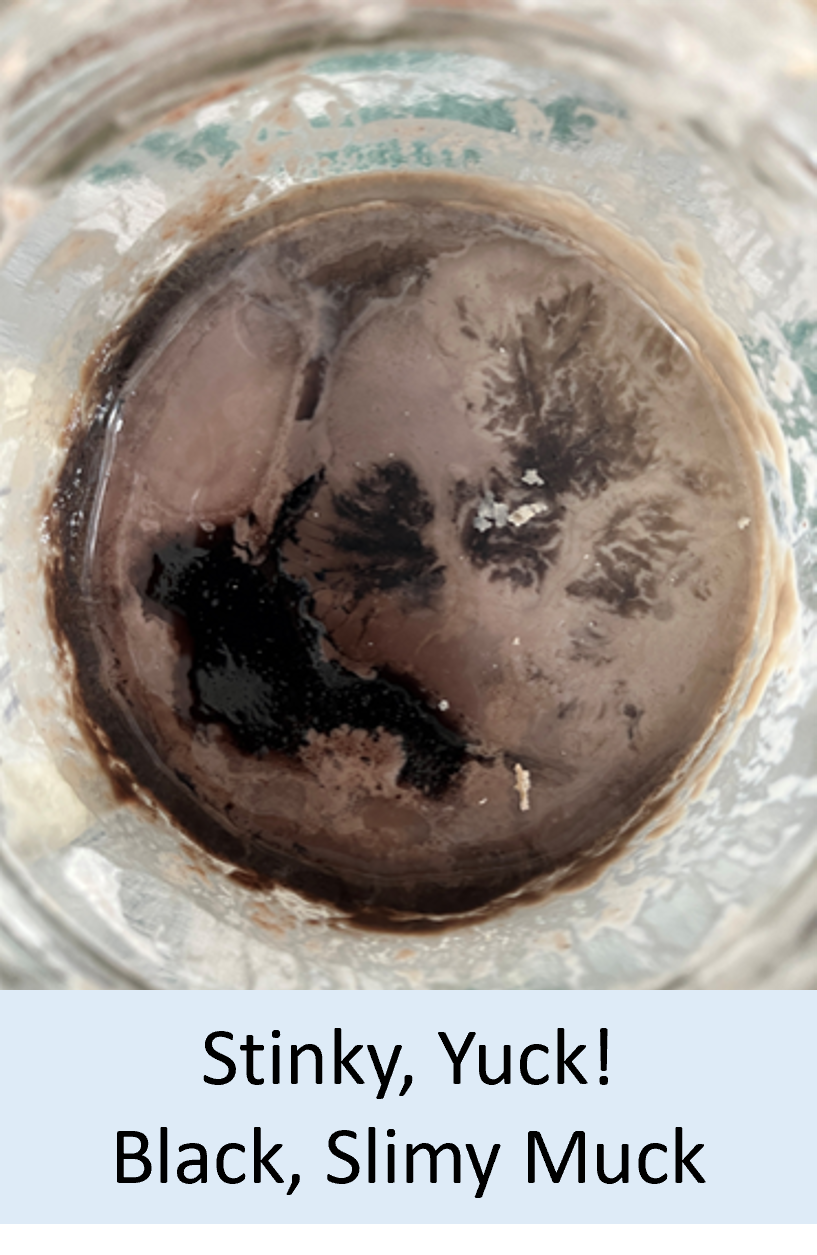
If your hooch turns pink or orange, it indicates bacterial contamination (Serratia marcescens) and the starter must be discarded.
The most discussed metric in modern sourdough.
Higher hydration increases the mobility of enzymes and yeast, speeding up fermentation. It also facilitates steam generation inside the loaf, creating larger alveoli (open crumb). However, above ~85%, gluten structure struggles to hold the weight of the water.
Low hydration (60%) = Bagels (tight). High hydration (80%+) = Ciabatta/Tartine (open).
Whole wheat flour absorbs 10-15% more water than white flour, so a 75% hydration whole wheat dough feels stiffer than a 75% white dough.
Pushing, pulling, and folding dough to align proteins.
Kneading adds energy to the system, accelerating the cross-linking of glutenin molecules. However, it also incorporates oxygen, which oxidizes lipids (destroying creamy color) and antioxidants.
Traditional for stiff doughs. Sourdough bakers largely replaced kneading with "Time + Folding" to preserve flavor pigments (carotenoids).
The "Windowpane Test" determines if kneading is complete.
Often referred to as "liquid bread," Kvass is an ancient drink (dating back over 1,000 years) produced by fermenting toasted rye bread (or rye flour) with water, sugar, and often a sourdough culture or raisins.
Kvass represents a "mixed fermentation" ecosystem identical to sourdough starter. It relies on the symbiosis of Lactic Acid Bacteria (Lactobacillus) for tartness and Yeast (Saccharomyces) for carbonation. However, unlike beer, the fermentation is halted early, resulting in very low alcohol content (0.5%–1.0%) but high probiotic density.
It is the ultimate "Zero Waste" cycle in baking. Old, stale rye bread is toasted and soaked to make Kvass. Conversely, the sediment from the bottom of a Kvass barrel (which is essentially a liquid sourdough starter) was historically used by bakers to leaven the next batch of rye bread.
In 19th-century Russia, it was consumed more commonly than water because the acidification (pH < 4.5) killed harmful pathogens like cholera and typhoid.
The mild, creamy acid found in yogurt and sourdough.
Produced by Homofermentative bacteria (which produce only lactic acid) and Heterofermentative bacteria (which produce lactic + acetic). It creates a "softer" acidity compared to vinegar.
Promoted by warm fermentation temperatures (80°F - 90°F) and liquid starters. It helps tenderize the gluten.
Lactic acid is non-volatile (it doesn't evaporate in the oven), so it remains in the bread as a background flavor note.
A broad category including Lactobacillus, Leuconostoc, and Pediococcus.
The star player is Fructilactobacillus sanfranciscensis. LAB are anaerobic and feed on maltose and glucose. They lower the dough pH to ~4.0, which inhibits pathogenic mold (giving sourdough its long shelf life).
LAB provides the flavor; Yeast provides the rise.
LAB can reproduce much faster than yeast, doubling every 30 minutes in ideal warmth.
Pronounced "Lahm" (French for blade).
Using a curved blade allows the baker to cut a "flap" of dough. As the loaf expands, this flap lifts away from the loaf, protecting the opening from the direct heat of the oven, keeping it soft longer so the loaf can expand further.
Controls the "Oven Spring." Without a score, the loaf will rupture at the weakest point (a "blowout").
A straight blade is used for decorative scoring (wheat stalks, leaves); a curved blade is used for the "Ear."
Often used interchangeably with "Starter," but technically distinct.
Bakers manipulate the levain to suit the bread. For a sweet bread, a "Young Levain" (used before peak acidity) is used to minimize sourness. For a rustic loaf, a "Mature Levain" (past peak) increases acidity.
Keeps the "Mother" culture pure and safe in the fridge while the Levain is used up completely in the dough.
Also called "Sponge" or "Chef" in various traditions.
Discovered by French chemist Louis-Camille Maillard in 1912.
A reaction between amino acids (proteins) and reducing sugars (maltose/glucose) that occurs rapidly above 284°F (140°C). It creates hundreds of flavor compounds (pyrazines, furans) that taste "toasty" or "nutty." It is distinct from Caramelization, which happens at 320°F (160°C) and involves only sugar.
Creates the crust flavor. Steam facilitates this by dissolving sugars on the surface before they dry out.
The cooler fermentation of sourdough releases more amino acids, leading to a darker, redder crust than yeast bread.
From the Old French mesteillon (mixture). Historically, farmers would sow wheat and rye in the same field (intercropping) as an insurance policy. If the season was wet/cold, the hardy rye would thrive; if it was warm/dry, the wheat would flourish. The resulting harvest was milled together into "Maslin flour."
This mix naturally balances enzymatic activity. Rye is high in amylase enzymes (which can make bread gummy), while wheat provides the strong gluten network that rye lacks. By growing them together, the soil biology (mycorrhizal fungi) often improves nutrient uptake for both grains compared to monoculture.
Maslin bread was the staple loaf of the medieval peasantry—denser and darker than the aristocrat's "Manchet" (white wheat) but lighter than pure rye "Black Bread." Today, it is prized for its complex, earthy flavor profile that neither grain achieves alone.
The concept of "terroir" in bread is perhaps best expressed in Maslin, as the ratio of wheat to rye in the flour was determined entirely by that specific year's weather conditions.
Traditionally the "Village Bread" baked in communal ovens once a week.
The low surface-to-volume ratio means a Miche retains moisture for a week or more. The large thermal mass requires a lower baking temperature for a longer time to ensure the center cooks before the crust burns.
The ultimate test of fermentation management—ensuring the center isn't dense while the outside holds its shape.
Ideally made with high-extraction flour (Poilâne style).
Also called the "Chef" or "Madre."
A stable ecosystem. While you can create a starter in 7 days, a "Mother" that is years old has established a robust equilibrium between specific bacterial strains and yeast that is resistant to invasion by foreign molds.
The source of consistency. You take from the Mother to build a Levain, then feed the Mother and return her to safety.
The Puratos Sourdough Library in Belgium stores over 100 Mother cultures from around the world.
A synonym for Sourdough, often used on menus to sound less "sour."
Relies on wild yeasts (mainly Kazachstania humilis or Saccharomyces exiguus) found on the grain hull and in the air. These yeasts are distinct from commercial S. cerevisiae and are acid-tolerant.
Offers lower glycemic index (GI) and higher mineral bioavailability due to long fermentation degrading phytates.
All bread was "naturally leavened" until the late 19th century.
The "Poor Man's Sourdough" or the traditional method of French bakeries.
Unlike a starter, Old Dough contains salt. This slows down the yeast significantly, allowing the dough to be kept for up to 48 hours without over-acidifying. It inoculates the new batch with mature flavor compounds.
Used to improve the flavor of baguettes without the complexity of maintaining a liquid starter.
It is the only pre-ferment that is a fully kneaded dough.
Occurs in the first 10-15 minutes of baking.
Caused by three forces: 1) Thermal expansion of gases (Ideal Gas Law), 2) Vaporization of water into steam (volume increases 1600x), and 3) Accelerated yeast activity until lethal temp (140°F/60°C). Spring stops when the crust hardens or starch gelatinizes.
Steam is critical here; it keeps the crust elastic so it can stretch. Without steam, the crust sets instantly, and the spring is lost.
A cold loaf (from the fridge) often springs more than a warm one because steam condensation on the cold surface delays crust setting.
The "Point of No Return."
Protease enzymes have degraded the gluten network so much that it can no longer hold gas pressure. Simultaneously, yeast has consumed all sugars, leaving no fuel for oven spring.
Results in a flat, pale loaf (no sugar for browning) with a dense, gummy crumb. Cannot be fixed, but can be baked as flatbread (Focaccia).
Over-proofed dough often tears when scored because it has lost elasticity.
Wooden for loading; Metal for unloading.
Wood absorbs moisture, preventing raw dough from sticking. Metal is thinner and smoother, allowing it to slide under baked loaves easily but sticking to raw dough. Using semolina creates "ball bearings" to reduce friction.
Essential for pizza or baking directly on a stone.
Also known as a "Pala" in Italian.
The principal storage form of phosphorus in plant seeds (including wheat). It is found primarily in the bran layer of the grain.
Formula: C6H18O24P6. Phytic acid has a strong negative charge, which causes it to bind tightly (chelate) to positively charged minerals like iron, zinc, calcium, and magnesium. This bond prevents the human body from absorbing these minerals during digestion.
Sourdough is the antidote to phytic acid. The long fermentation time and acidity (pH 4.5–5.0) activate the enzyme phytase naturally present in the flour. Phytase breaks the bond, degrading the phytic acid and "unlocking" the minerals for absorption.
While commercial yeast fermentation reduces phytic acid by about 20-30%, a long sourdough fermentation can reduce it by over 90%, making sourdough significantly more nutritious than standard whole wheat bread.
Introduced to France by Polish bakers in the 1840s.
Because it is liquid and uses commercial yeast, Poolish ferments very quickly. It maximizes protease activity, making the dough very extensible (stretchy). It produces a sweet, nutty, milky flavor profile rather than sour.
The standard for French Baguettes. It provides the "open" structure that stiffer preferments cannot.
A poolish is ready when the surface is covered in bubbles and begins to collapse (the "drop").
Gently pressing a finger 1/2 inch into the dough.
You are measuring the internal gas pressure vs. the elasticity of the gluten. Underproofed: High elasticity snaps back immediately. Overproofed: Gluten is weak, indentation stays forever. Perfect: Indentation springs back slowly but leaves a small dimple.
Crucial for timing the bake.
Cold dough yields false results (it always feels firmer). The poke test is unreliable on retarded dough.
Popularized recently by Tartine Bakery.
Cooking the grains pre-gelatinizes their starch, allowing them to hold massive amounts of water that doesn't make the dough sticky. During baking, this bound water releases slowly, creating a hyper-moist custard-like crumb that stays fresh for days.
Allows bakers to exceed 100% hydration functionally.
Porridge should always be added after gluten development (during lamination or first fold) to avoid damaging the gluten network.
Includes Sourdough Levain, Poolish, Biga, and Sponge.
Pre-fermentation increases the concentration of organic acids, ethanol, and enzymes. This reduces the time needed for bulk fermentation and improves shelf life (acidity inhibits staling).
Flavor complexity. A straight dough (mixed all at once) tastes "flat" compared to one with a pre-ferment.
Can comprise anywhere from 10% to 50% of the total flour.
Historically used to "prove" the yeast was alive.
This phase is about aerating the shaped structure. If done at room temp, it takes 2-4 hours. If done in the fridge (retarding), it takes 8-24 hours. The goal is to increase volume by 30-50% (not double, which is usually too much for sourdough).
Determines the final density of the crumb.
Humidity control is critical; if the skin dries out (skins over) during proofing, it will restrict expansion in the oven.
From the Greek proteo (protein) and lysis (loosening/dissolving). It is the primary mechanism by which dough relaxes over time.
Driven by protease enzymes naturally present in the flour (and activated by acidity), proteolysis clips the bonds of the gluten network. In moderation, this increases extensibility (stretch), allowing the loaf to expand in the oven. In excess (e.g., extremely long fermentation), it destroys the gluten entirely, resulting in a sticky, soupy dough that cannot hold gas.
It balances elasticity. Without proteolysis, dough would be "bucky" (rubber-band like) and impossible to shape. It also releases free amino acids, which are essential precursors for the Maillard reaction (browning) and flavor development.
Whole wheat flour has higher protease activity than white flour, which is why 100% whole wheat doughs can degrade faster if fermented too long.
Slowing down the process.
At 39°F (4°C), yeast activity drops to near zero, but bacterial activity (LAB) continues slowly. Specifically, it favors the production of Acetic Acid over Lactic Acid, increasing sourness. It also allows the gluten to physically tighten, making scoring much easier.
Flavor development and scheduling convenience (bake when you want).
The "blisters" on a sourdough crust are almost exclusively a result of cold retardation, likely due to CO2 degrading the surface gluten.
During baking, starch granules absorb water and gelatinize. After the loaf leaves the oven, some of those starch molecules slowly begin lining up again into a more ordered structure. That re-ordering is called retrogradation.
Amylose tends to retrograde first as bread cools, while amylopectin continues reorganizing more slowly during storage. This molecular tightening is one of the main reasons crumb becomes firmer even when a loaf has not dramatically dried out.
Retrogradation is a major driver of bread staling. It affects softness, sliceability, and shelf life, which is why bakers use fermentation, fats, emulsifiers, or storage strategies to slow the process.
Some retrograded starch becomes resistant starch (often called RS3). That portion is less digestible in the small intestine, which is one reason cooled bread can behave a little differently nutritionally than bread eaten hot from the oven.
Named after the late French Master Baker Gérard Rubaud, who baked in Westford, Vermont. He developed this method to mix large batches of high-hydration dough by hand without a machine.
The motion mimics the action of a mechanical "diving arm" mixer. By scooping the dough, lifting it, and letting it fall, the baker uses gravity and the dough's own weight to generate shear force. This aligns the gluten polymers without the excessive friction or oxidation caused by spiral mixers.
It is the gold standard for incorporating the levain and salt into an autolysed dough. Because it is gentle, it is ideal for weak flours (like spelt or rye) or very wet doughs (>75% hydration) that would otherwise stick uncontrollably to the counter.
Practitioners often describe the motion as "scooping up a cat"—firm but gentle support from underneath to avoid tearing the structure.
Typically used at 1.8% to 2.2% of flour weight.
Salt strengthens gluten via Charge Shielding. Gluten proteins naturally repel each other; salt ions neutralize these charges, allowing proteins to pack tighter. It also creates osmotic pressure, drawing water out of yeast cells, slowing fermentation.
Without salt, dough is sticky, slack, and ferments uncontrollably fast (yeast gone wild). The flavor is also bland.
In Tuscany, bread is traditionally made without salt (Pane Toscano) due to historical tax wars.
Common in Rye baking and ancient techniques.
Boiling water instantly gelatinizes the starch and denatures the amylase enzymes. In rye bread, this is critical because rye has excessive amylase; if not scalded or acidified, the amylase would turn the crumb into a sticky goo.
Adds sweetness (glucose release) and softens the crumb.
Similar to Tangzhong, but often done with coarser meals.
Also called "docking."
Creates a "weak point" for gas to escape. Without it, the rapid expansion of gas (Oven Spring) will tear the crust at random spots (usually the bottom seams). Scoring directs the energy of expansion.
Functional (expansion) and Aesthetic (signature).
Historically, bakers used unique scoring patterns to identify their loaves in communal village ovens.
Also known as "French Kneading" or the Bertinet Method.
It aligns gluten strands rapidly by using the momentum of the dough to stretch it. It adds significant oxygen to the dough, which strengthens the gluten network but can oxidize flavor pigments if overdone.
The best way to tame a sticky, high-hydration dough (75%+) without adding extra flour.
Effective because the rapid impact temporarily stiffens the dough (shear thickening), making it easier to handle.
The ancient leavening agent.
Typically contains Candida milleri or Kazachstania humilis (yeast) and Fructilactobacillus sanfranciscensis (bacteria). The yeast provides lift (CO2), while the bacteria provide flavor (acids) and consume maltose, a sugar the yeast cannot eat, creating a perfect non-competitive symbiosis.
The heart of the process.
The yeast in sourdough is resistant to the acid produced by the bacteria; commercial baker's yeast would die in a mature sourdough culture.
Planetary mixers (KitchenAid) vs. Spiral Mixers (Professional).
Mixers introduce friction heat. Calculating "Friction Factor" is essential for hitting "Desired Dough Temperature" (DDT). In a home mixer, friction can raise temp by 1°F per minute of mixing.
Essential for enriched doughs (Brioche) which require intensive development, but often unnecessary for artisan sourdough.
Over-mixing in a machine can literally break the gluten bonds (mechanical breakdown), turning dough into soup.
Done in the bowl at 30-minute intervals.
By stretching the dough to its limit and folding it, you are mechanically aligning the gluten polymers. The rest period between folds allows the bonds to relax (increasing extensibility) so they can be stretched again (increasing strength).
Builds structure gradually without oxidation.
Usually performed 4-6 times during bulk fermentation.
Commonly associated with Kombucha, but Sourdough is also a SCOBY.
A SCOBY is a biofilm. In sourdough, the matrix is the dough itself. The stability of the SCOBY relies on the acidity produced by the bacteria, which creates an environment where only the specific acid-tolerant yeast can survive.
The biological engine of the bread.
You can actually make bread using Kombucha SCOBY liquid, but the flavor profile will be different (more gluconic acid).
Typically 5-10% of the total flour is cooked with water (1:5 ratio) to 149°F (65°C).
At 149°F, the starch granules burst (gelatinize) and absorb water. This water is "bound" and doesn't make the dough sticky, yet it remains in the baked loaf. It inhibits starch retrogradation (staling).
Creates the signature "shreddable," fluffy texture of Hokkaido Milk Bread.
Allows you to create a 75% hydration dough that handles like a 60% hydration dough.
The modern archetype of open-crumb sourdough.
Characterized by high hydration (75-85%), young leaven (low acidity), and moderate protein flour. This combination favors enzyme activity and extensibility, resulting in a custardy crumb and massive alveoli.
Shifted the global standard from stiff sour loaves to moist, mild ones.
Relies heavily on "coil folds" and gentle handling to preserve the delicate structure.
The most common fault in beginner sourdough.
Characterized by the "Pyramid Shape" (steep sides) and "Fool's Crumb" (large tunnels surrounded by dense, gummy dough). The yeast has energy left to burst the loaf (excessive spring), but the gluten matrix hasn't relaxed enough to expand evenly.
Indicates bulk fermentation was cut short or dough was too cold.
Large holes do not always mean good bread; if the surrounding crumb is dense, it is under-proofed.
Bran is the multi-layered outer portion of the edible wheat kernel. It is rich in fiber, minerals, antioxidants, and B vitamins, and it is retained in whole wheat flour but removed from most white flour.
Bran absorbs substantial water and physically interferes with gluten development. In dough, coarse bran particles can interrupt gas retention and reduce loaf volume, while finer bran still tends to make dough feel thirstier and heavier.
Adding bran increases whole-grain character, nutrition, and water demand, but it usually requires process adjustments such as higher hydration, longer soaking, or gentler expectations for volume and openness of crumb.
Bran is only about 14.5% of the kernel by weight, yet it has an outsized effect on dough handling because it changes both absorption and gluten performance.
The germ is the living embryo of the seed, the part that could grow into a new wheat plant. It is small in proportion but dense in nutrients, including vitamins, minerals, protein, and healthy fats.
Because the germ contains unsaturated lipids and active enzymes, it shortens flour shelf life compared with refined flour. Those oils are nutritionally valuable, but they are also more prone to oxidation and rancidity after milling.
Wheat germ adds nuttiness, aroma, and nutritional value to dough, but it can also soften structure slightly and make flour storage more demanding. Bakers often use it deliberately in whole-grain formulas or as an added flavor component.
Lightly toasted wheat germ is sometimes added to bread or cereal for flavor alone, even when the rest of the flour is refined.
A wheat grain, also called a wheat berry, is the entire seed of the wheat plant. It contains three main edible parts: bran on the outside, the starchy endosperm in the middle, and the germ tucked near one end.
Whole-grain flour contains all three parts in their natural proportions. Refined white flour is made mostly from the endosperm, because removing bran and germ improves shelf life and milling performance but also removes much of the fiber and part of the original nutrient package.
Understanding the whole grain helps bakers understand flour behavior. The amount of bran, germ, and endosperm that remains after milling strongly affects absorption, gluten performance, fermentation, flavor, color, and loaf volume.
Millers often speak in terms of extraction rate: the percentage of the original grain that ends up in the flour. Higher extraction generally means more flavor and nutrition, but also a more demanding dough.
The classic test for gluten development.
A successful windowpane indicates that the glutenin proteins have formed long, interconnected chains capable of holding gas bubbles without rupturing. If it tears, the gluten is either undeveloped or degraded.
Crucial for enriched doughs (Brioche) which must be fully developed before fat is added. Less critical for rustic sourdough which develops during bulk.
Whole wheat dough will rarely pull a perfect windowpane because the bran particles physically cut the gluten strands.
No Rabbit Hole content...yet!
?
This section gives the background on sourdough baking related tools. Most of these tools are common household implements - some are more specialized. Each Tool is explained by its Purpose, how it is used in the Baker's Process and some handy Tips and Techniques.
At the bottom of the expanded Tools list is the Sourjoe Rabbit Hole where we put more reading details in each section of the book. Jump into the rabbit hole and explore!
 Purpose: A baker's apron is a practical garment designed to protect clothing from flour,
dough, spills, and stains during the baking process. It serves as a barrier between the baker and the often messy work of mixing,
kneading, shaping, and decorating. Typically made from durable, easy-to-clean fabric like cotton or a cotton-polyester blend, a baker's
apron also features pockets for quick access to tools like thermometers, timers, or pens, helping bakers stay organized and efficient
in a busy kitchen.
Purpose: A baker's apron is a practical garment designed to protect clothing from flour,
dough, spills, and stains during the baking process. It serves as a barrier between the baker and the often messy work of mixing,
kneading, shaping, and decorating. Typically made from durable, easy-to-clean fabric like cotton or a cotton-polyester blend, a baker's
apron also features pockets for quick access to tools like thermometers, timers, or pens, helping bakers stay organized and efficient
in a busy kitchen.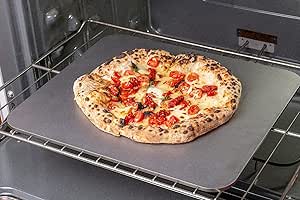 Purpose: A baking steel is a heavy-duty, ultra-heat-conductive slab of steel designed
to replicate the intense, even heat of a commercial pizza oven in a home kitchen. Its primary purpose is to drastically improve
baking results—especially for pizza, bread, and pastries—by providing superior heat transfer compared to traditional baking stones.
The dense steel absorbs and radiates heat more efficiently, resulting in perfectly crisp, blistered crusts and evenly baked goods in
less time.
Purpose: A baking steel is a heavy-duty, ultra-heat-conductive slab of steel designed
to replicate the intense, even heat of a commercial pizza oven in a home kitchen. Its primary purpose is to drastically improve
baking results—especially for pizza, bread, and pastries—by providing superior heat transfer compared to traditional baking stones.
The dense steel absorbs and radiates heat more efficiently, resulting in perfectly crisp, blistered crusts and evenly baked goods in
less time.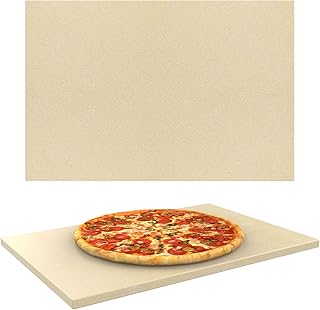 Purpose: A baking stone is a thick, flat slab—typically made of ceramic,
cordierite, or other heat-retentive materials—used to mimic the dry, even heat of a traditional brick oven. Its purpose
is to create a hot, stable surface that evenly distributes heat and absorbs moisture from the bottom of baked goods. This
results in crispier crusts on pizzas, artisan breads, and pastries, while helping to prevent soggy or underbaked
bottoms.
Purpose: A baking stone is a thick, flat slab—typically made of ceramic,
cordierite, or other heat-retentive materials—used to mimic the dry, even heat of a traditional brick oven. Its purpose
is to create a hot, stable surface that evenly distributes heat and absorbs moisture from the bottom of baked goods. This
results in crispier crusts on pizzas, artisan breads, and pastries, while helping to prevent soggy or underbaked
bottoms.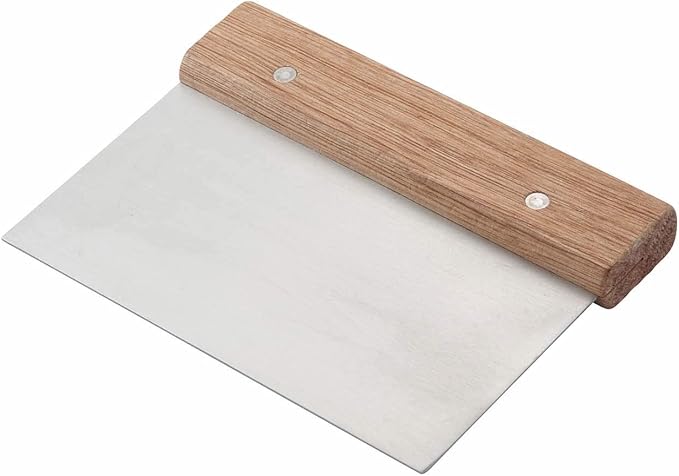 Purpose: A bench knife, also known as a dough scraper or pastry
scraper, is a versatile handheld tool used primarily in baking and pastry work. Featuring a flat, rectangular
metal blade with a sturdy handle, its main purpose is to divide and portion dough, scrape work surfaces clean,
and assist in folding or transferring ingredients. It helps maintain efficiency and cleanliness during prep
while offering precision when working with sticky or delicate doughs.
Purpose: A bench knife, also known as a dough scraper or pastry
scraper, is a versatile handheld tool used primarily in baking and pastry work. Featuring a flat, rectangular
metal blade with a sturdy handle, its main purpose is to divide and portion dough, scrape work surfaces clean,
and assist in folding or transferring ingredients. It helps maintain efficiency and cleanliness during prep
while offering precision when working with sticky or delicate doughs.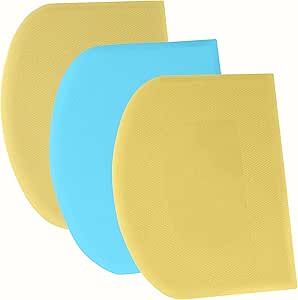 Purpose: A bowl scraper is a flexible, curved tool designed to efficiently scrape,
scoop, and clean the sides of mixing bowls, ensuring minimal waste and thorough mixing. Typically made of food-safe plastic or
silicone, its pliability allows it to conform to the shape of any container, making it ideal for handling sticky batters,
doughs, and creams. Its purpose is to maximize yield, reduce mess, and make transferring ingredients faster and cleaner.
Purpose: A bowl scraper is a flexible, curved tool designed to efficiently scrape,
scoop, and clean the sides of mixing bowls, ensuring minimal waste and thorough mixing. Typically made of food-safe plastic or
silicone, its pliability allows it to conform to the shape of any container, making it ideal for handling sticky batters,
doughs, and creams. Its purpose is to maximize yield, reduce mess, and make transferring ingredients faster and cleaner. Purpose: A combo cooker is a cast iron baking vessel made of two parts: a deep
skillet and a shallow skillet (often used as a lid), both oven-safe and heavy-duty. Like a Dutch oven, it's used to trap
steam and radiate heat evenly during baking—ideal for achieving maximum oven spring and a blistered, crackly crust in
sourdough loaves. What sets the combo cooker apart is its flexibility: the dough is typically loaded into the shallow half,
and the deep pan is inverted on top as the lid, making loading easier and safer, especially with high-hydration or delicate
doughs.
Purpose: A combo cooker is a cast iron baking vessel made of two parts: a deep
skillet and a shallow skillet (often used as a lid), both oven-safe and heavy-duty. Like a Dutch oven, it's used to trap
steam and radiate heat evenly during baking—ideal for achieving maximum oven spring and a blistered, crackly crust in
sourdough loaves. What sets the combo cooker apart is its flexibility: the dough is typically loaded into the shallow half,
and the deep pan is inverted on top as the lid, making loading easier and safer, especially with high-hydration or delicate
doughs.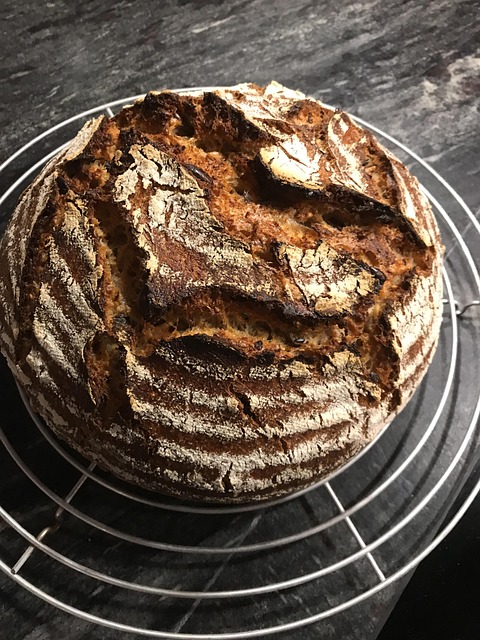 Purpose: A cooling rack is an essential tool for the home baker. Once the
bread is baked, it must have enough air circulation around it to adequately cool it and pull away any residual moisture
in the loaf. We have mentioned the following fact before, but it bears repeating: the bread loses an additional
2%+ of weight in water while it is cooling. Without proper airflow around the loaf, the baker risks compromising the
crust and crumb of the bread.
Purpose: A cooling rack is an essential tool for the home baker. Once the
bread is baked, it must have enough air circulation around it to adequately cool it and pull away any residual moisture
in the loaf. We have mentioned the following fact before, but it bears repeating: the bread loses an additional
2%+ of weight in water while it is cooling. Without proper airflow around the loaf, the baker risks compromising the
crust and crumb of the bread.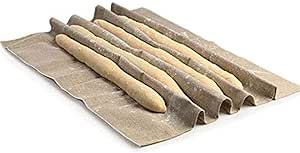 Purpose: A couche is a heavy linen cloth used in artisan bread baking to support
and shape loaves—particularly baguettes and batards—during their final proofing stage. Its stiff, textured surface helps hold
dough in place, encouraging upward rise rather than spreading, while also drawing a small amount of moisture from the dough's
surface to promote a crisp crust. The couche prevents sticking and allows loaves to develop proper structure and definition
before baking.
Purpose: A couche is a heavy linen cloth used in artisan bread baking to support
and shape loaves—particularly baguettes and batards—during their final proofing stage. Its stiff, textured surface helps hold
dough in place, encouraging upward rise rather than spreading, while also drawing a small amount of moisture from the dough's
surface to promote a crisp crust. The couche prevents sticking and allows loaves to develop proper structure and definition
before baking.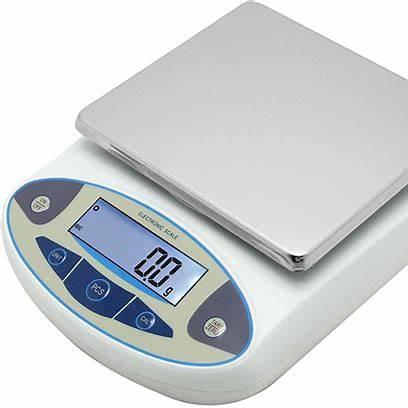 Purpose: A digital weigh scale is an essential tool in sourdough baking, where
precision is key to consistent results. Unlike volume measurements, which can vary greatly depending on ingredient density and
handling, a digital scale ensures accurate weight-based measurements of flour, water, starter, and salt. This level of control
is critical for maintaining proper hydration levels, fermentation timing, and overall dough structure—especially in recipes
where a small mass difference can have a noticeable effect o the outcome of the bake.
Purpose: A digital weigh scale is an essential tool in sourdough baking, where
precision is key to consistent results. Unlike volume measurements, which can vary greatly depending on ingredient density and
handling, a digital scale ensures accurate weight-based measurements of flour, water, starter, and salt. This level of control
is critical for maintaining proper hydration levels, fermentation timing, and overall dough structure—especially in recipes
where a small mass difference can have a noticeable effect o the outcome of the bake. Purpose: A digital thermometer is a vital tool in sourdough baking, used to monitor
both dough and water temperatures to ensure proper fermentation and consistent results. Since sourdough fermentation is driven
by natural yeast and bacteria, small temperature changes can significantly affect rise times, flavor development, and dough
behavior. A digital thermometer provides quick, accurate readings that help bakers stay within optimal temperature ranges
for mixing, proofing, and baking. If you do not have a digiatl thermometer, a standard, analog version will suffice. The
point is to not ignore the Temeperature of Water, Flour, Dough, etc. during the baking process.
Purpose: A digital thermometer is a vital tool in sourdough baking, used to monitor
both dough and water temperatures to ensure proper fermentation and consistent results. Since sourdough fermentation is driven
by natural yeast and bacteria, small temperature changes can significantly affect rise times, flavor development, and dough
behavior. A digital thermometer provides quick, accurate readings that help bakers stay within optimal temperature ranges
for mixing, proofing, and baking. If you do not have a digiatl thermometer, a standard, analog version will suffice. The
point is to not ignore the Temeperature of Water, Flour, Dough, etc. during the baking process.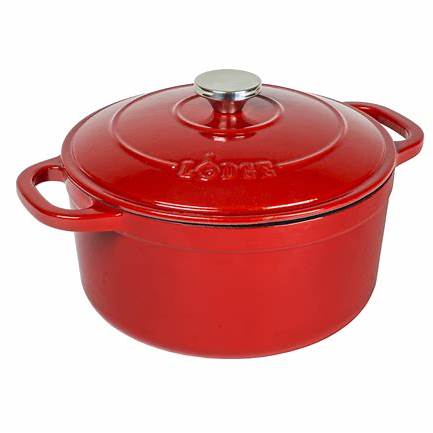 Purpose: A Dutch oven is a heavy, lidded cast iron pot used in sourdough baking to
create the ideal environment for oven spring and crust development. The term "Dutch oven" dates back to the 1700s, when an
Englishman named Abraham Darby traveled to the Netherlands to learn a casting technique using dry sand molds. He brought the
method back to England and began producing cast iron pots, which became known as "Dutch ovens." In modern sourdough baking,
the Dutch oven's thick walls and tight-fitting lid trap steam released from the dough during the first part of baking,
mimicking the effects of a professional steam-injected oven. This steam delays crust formation, allowing the loaf to expand
fully and develop a glossy, blistered, artisan-style crust.
Purpose: A Dutch oven is a heavy, lidded cast iron pot used in sourdough baking to
create the ideal environment for oven spring and crust development. The term "Dutch oven" dates back to the 1700s, when an
Englishman named Abraham Darby traveled to the Netherlands to learn a casting technique using dry sand molds. He brought the
method back to England and began producing cast iron pots, which became known as "Dutch ovens." In modern sourdough baking,
the Dutch oven's thick walls and tight-fitting lid trap steam released from the dough during the first part of baking,
mimicking the effects of a professional steam-injected oven. This steam delays crust formation, allowing the loaf to expand
fully and develop a glossy, blistered, artisan-style crust.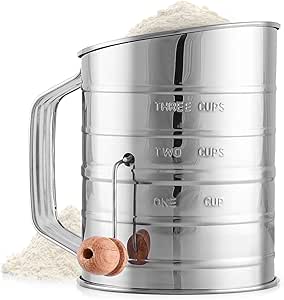 Purpose: A flour sifter is a baking tool designed to aerate flour, break up clumps,
and ensure even distribution of dry ingredients like baking powder, cocoa, or spices. In sourdough baking and beyond, sifting
flour helps create lighter, more uniform doughs and batters, improving texture and consistency. While not always essential for
rustic loaves, it's particularly useful when working with delicate pastries, enriched doughs, or when blending multiple dry
ingredients evenly. It also helps remove impurities from bulk-milled or whole grain flours.
Purpose: A flour sifter is a baking tool designed to aerate flour, break up clumps,
and ensure even distribution of dry ingredients like baking powder, cocoa, or spices. In sourdough baking and beyond, sifting
flour helps create lighter, more uniform doughs and batters, improving texture and consistency. While not always essential for
rustic loaves, it's particularly useful when working with delicate pastries, enriched doughs, or when blending multiple dry
ingredients evenly. It also helps remove impurities from bulk-milled or whole grain flours. Purpose: A good glass jar is an important part of maintaining a
healthy sourdough starter. It serves as the home for your wild yeast and beneficial bacteria, allowing you to feed, mix,
monitor, and discard with ease. An ideal jar should be made of clear glass so you can track fermentation activity, bubbles,
and rise levels at a glance. It should also have a wide mouth to accommodate easy mixing, scraping, and cleaning, as well as
enough headroom to allow the starter to double or triple in size without overflowing.
Purpose: A good glass jar is an important part of maintaining a
healthy sourdough starter. It serves as the home for your wild yeast and beneficial bacteria, allowing you to feed, mix,
monitor, and discard with ease. An ideal jar should be made of clear glass so you can track fermentation activity, bubbles,
and rise levels at a glance. It should also have a wide mouth to accommodate easy mixing, scraping, and cleaning, as well as
enough headroom to allow the starter to double or triple in size without overflowing.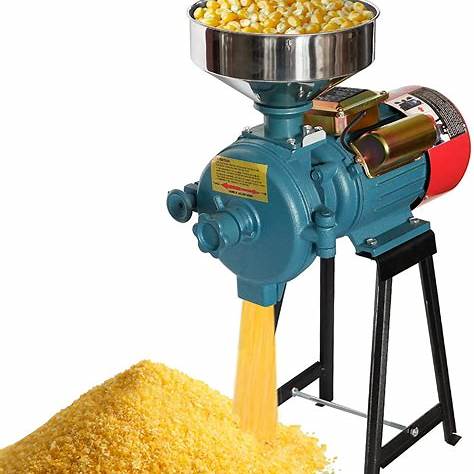 Purpose: A grain mill is a tool used to grind whole grains—such as wheat, rye,
spelt, or barley—into fresh flour, unlocking superior flavor, nutrition, and control over texture. In sourdough baking, using
freshly milled flour can dramatically enhance the depth of flavor and fermentation activity, as it retains the grain's natural
oils, enzymes, and nutrients often lost in commercial flours. Grain mills can be manual or electric and typically allow bakers
to adjust the coarseness of the grind to suit everything from fine bread flour to coarser meal.
Purpose: A grain mill is a tool used to grind whole grains—such as wheat, rye,
spelt, or barley—into fresh flour, unlocking superior flavor, nutrition, and control over texture. In sourdough baking, using
freshly milled flour can dramatically enhance the depth of flavor and fermentation activity, as it retains the grain's natural
oils, enzymes, and nutrients often lost in commercial flours. Grain mills can be manual or electric and typically allow bakers
to adjust the coarseness of the grind to suit everything from fine bread flour to coarser meal. Purpose: A loaf pan provides structure and support for sourdough bread as it proofs
and bakes, particularly for enriched or sandwich-style loaves that benefit from a uniform shape. Unlike free-form artisan
loaves baked on a stone or in a Dutch oven, dough baked in a loaf pan rises upward rather than outward, producing a tidy,
sliceable loaf with a soft crumb and even crust. This is especially useful for high-hydration doughs, rye blends, or bakers
seeking a more compact and practical loaf for daily use.
Purpose: A loaf pan provides structure and support for sourdough bread as it proofs
and bakes, particularly for enriched or sandwich-style loaves that benefit from a uniform shape. Unlike free-form artisan
loaves baked on a stone or in a Dutch oven, dough baked in a loaf pan rises upward rather than outward, producing a tidy,
sliceable loaf with a soft crumb and even crust. This is especially useful for high-hydration doughs, rye blends, or bakers
seeking a more compact and practical loaf for daily use.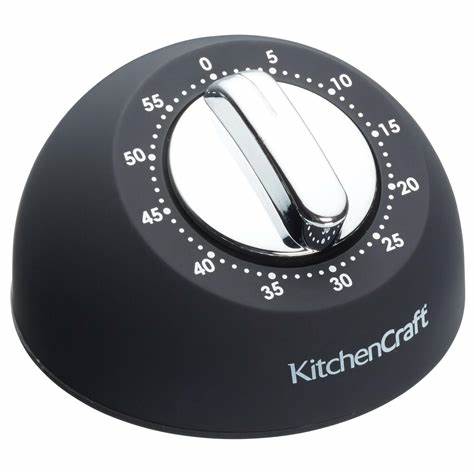 Purpose: You don't realy need to buy a mechanical or electronic Timer - USE THE Sourjoe App!
A kitchen timer is a simple yet essential tool in sourdough baking, where timing is critical to the success of each stage—from autolyse
and bulk fermentation to stretch-and-fold intervals, proofing, and baking. Unlike conventional bread, sourdough relies on slow, natural
fermentation, which demands close attention to timing to balance flavor development, dough structure, and rise. A reliable timer helps
bakers stay organized and consistent, especially during long, multi-step processes.
Purpose: A lame (pronounced lahm) is a specialized tool used to score or slash the
surface of sourdough loaves just before baking. Equipped with a sharp blade—often curved—it allows bakers to control how and
where the bread expands in the oven. Scoring is not only functional, directing the oven spring and preventing unpredictable
splitting, but also artistic, enabling decorative patterns that showcase craftsmanship. Though traditional lames are designed
to hold replaceable razor blades, many bakers also use sharp knives or scalpels for the same purpose.
Purpose: You don't realy need to buy a mechanical or electronic Timer - USE THE Sourjoe App!
A kitchen timer is a simple yet essential tool in sourdough baking, where timing is critical to the success of each stage—from autolyse
and bulk fermentation to stretch-and-fold intervals, proofing, and baking. Unlike conventional bread, sourdough relies on slow, natural
fermentation, which demands close attention to timing to balance flavor development, dough structure, and rise. A reliable timer helps
bakers stay organized and consistent, especially during long, multi-step processes.
Purpose: A lame (pronounced lahm) is a specialized tool used to score or slash the
surface of sourdough loaves just before baking. Equipped with a sharp blade—often curved—it allows bakers to control how and
where the bread expands in the oven. Scoring is not only functional, directing the oven spring and preventing unpredictable
splitting, but also artistic, enabling decorative patterns that showcase craftsmanship. Though traditional lames are designed
to hold replaceable razor blades, many bakers also use sharp knives or scalpels for the same purpose.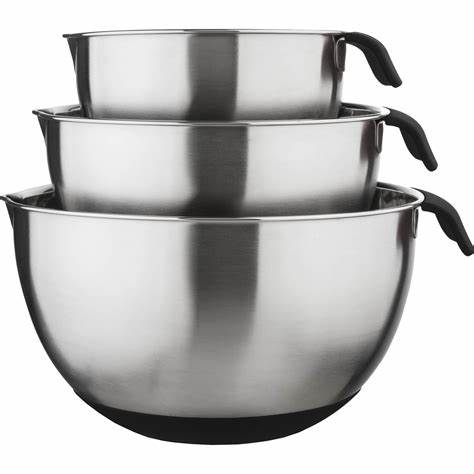 Purpose: Mixing bowls are foundational tools in the baking process, used
for everything from initial ingredient combining and autolyse to stretch-and-folds and bulk fermentation. In
sourdough baking especially, the right bowl helps support the dough's development, offers visibility during rise, and
allows comfortable handling during mixing and shaping. Available in a range of materials—glass, stainless steel,
ceramic, and plastic—each brings its own strengths depending on the task and baker preference.
Purpose: Mixing bowls are foundational tools in the baking process, used
for everything from initial ingredient combining and autolyse to stretch-and-folds and bulk fermentation. In
sourdough baking especially, the right bowl helps support the dough's development, offers visibility during rise, and
allows comfortable handling during mixing and shaping. Available in a range of materials—glass, stainless steel,
ceramic, and plastic—each brings its own strengths depending on the task and baker preference. Purpose: Oven mitts are essential for protecting your hands and forearms
from high heat when handling hot bakeware, especially in sourdough baking where Dutch ovens, loaf pans, and preheated
baking steels or stones can reach temperatures of 450°F (230°C) or more. A reliable pair of oven mitts isn't just
about comfort—they're critical for safety, allowing you to confidently transfer heavy, hot items in and out of the
oven without risk of burns or dropped bakes.
Purpose: Oven mitts are essential for protecting your hands and forearms
from high heat when handling hot bakeware, especially in sourdough baking where Dutch ovens, loaf pans, and preheated
baking steels or stones can reach temperatures of 450°F (230°C) or more. A reliable pair of oven mitts isn't just
about comfort—they're critical for safety, allowing you to confidently transfer heavy, hot items in and out of the
oven without risk of burns or dropped bakes.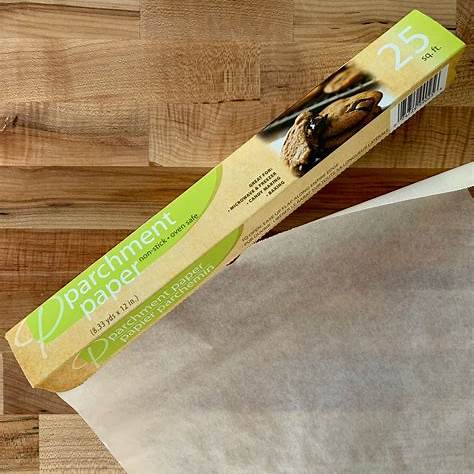 Purpose: Parchment paper is a nonstick, heat-resistant paper used to line
baking surfaces, making it easier to transfer dough, prevent sticking, and simplify cleanup. In sourdough baking,
it's especially helpful when transferring delicate, high-hydration doughs from proofing baskets into Dutch ovens or
onto baking stones. It acts as a gentle support system for shaping and handling, while also reducing the risk of
tearing or deflating the loaf during the critical pre-bake stage.
Purpose: Parchment paper is a nonstick, heat-resistant paper used to line
baking surfaces, making it easier to transfer dough, prevent sticking, and simplify cleanup. In sourdough baking,
it's especially helpful when transferring delicate, high-hydration doughs from proofing baskets into Dutch ovens or
onto baking stones. It acts as a gentle support system for shaping and handling, while also reducing the risk of
tearing or deflating the loaf during the critical pre-bake stage.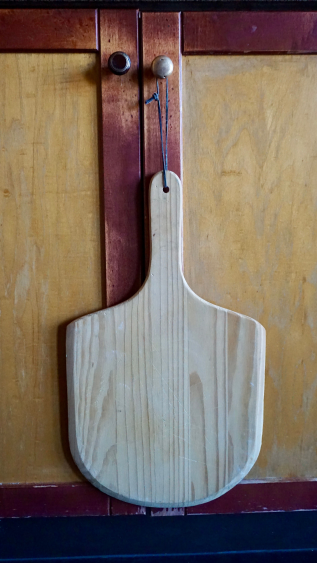 Purpose: A peel is a flat, paddle-like tool used to transfer bread,
pizza, or pastries to and from hot surfaces like baking stones, steels, or oven racks. In sourdough baking, it's
especially useful for moving delicate, proofed dough into a blazing-hot Dutch oven or directly onto a preheated
surface without deflating or disturbing its shape. Peels come in wood or metal, with each offering specific benefits
depending on the stage of baking.
Purpose: A peel is a flat, paddle-like tool used to transfer bread,
pizza, or pastries to and from hot surfaces like baking stones, steels, or oven racks. In sourdough baking, it's
especially useful for moving delicate, proofed dough into a blazing-hot Dutch oven or directly onto a preheated
surface without deflating or disturbing its shape. Peels come in wood or metal, with each offering specific benefits
depending on the stage of baking.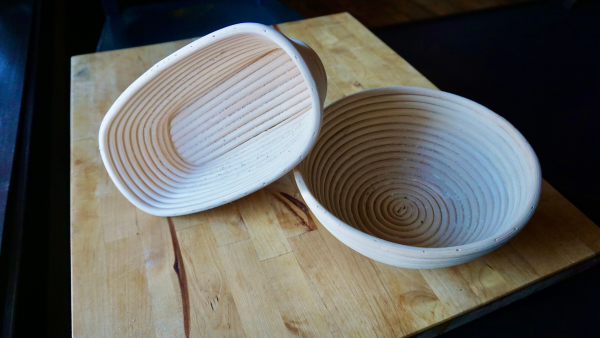 Purpose: Proofing baskets—also known as bannetons or brotforms—are used
during the final rise (proofing) of sourdough dough to help it maintain its shape, develop structure, and create a
beautiful, rustic exterior. These baskets support the dough as it rests and rises, especially important for
high-hydration sourdoughs that might otherwise spread out and lose form. Typically made of natural materials like
rattan, cane, or lined wicker, proofing baskets allow airflow and wick a small amount of moisture from the dough's
surface, encouraging a thin, dry skin that leads to a crisp, blistered crust.
Purpose: Proofing baskets—also known as bannetons or brotforms—are used
during the final rise (proofing) of sourdough dough to help it maintain its shape, develop structure, and create a
beautiful, rustic exterior. These baskets support the dough as it rests and rises, especially important for
high-hydration sourdoughs that might otherwise spread out and lose form. Typically made of natural materials like
rattan, cane, or lined wicker, proofing baskets allow airflow and wick a small amount of moisture from the dough's
surface, encouraging a thin, dry skin that leads to a crisp, blistered crust.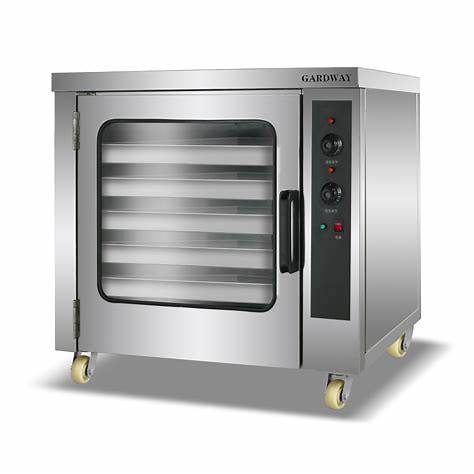 Purpose: A proofing oven—also called a proofing box or dough proofer—is a
specialized appliance or enclosure designed to maintain consistent, warm, and humid conditions ideal for yeast
fermentation and dough proofing. Professional bakers rely on these to control temperature and humidity precisely,
ensuring reliable rise times and consistent results regardless of the ambient kitchen environment. In sourdough
baking, a proofing box can optimize bulk fermentation and final proofing, especially in cooler or fluctuating
climates, promoting better oven spring and crumb structure.
Purpose: A proofing oven—also called a proofing box or dough proofer—is a
specialized appliance or enclosure designed to maintain consistent, warm, and humid conditions ideal for yeast
fermentation and dough proofing. Professional bakers rely on these to control temperature and humidity precisely,
ensuring reliable rise times and consistent results regardless of the ambient kitchen environment. In sourdough
baking, a proofing box can optimize bulk fermentation and final proofing, especially in cooler or fluctuating
climates, promoting better oven spring and crumb structure.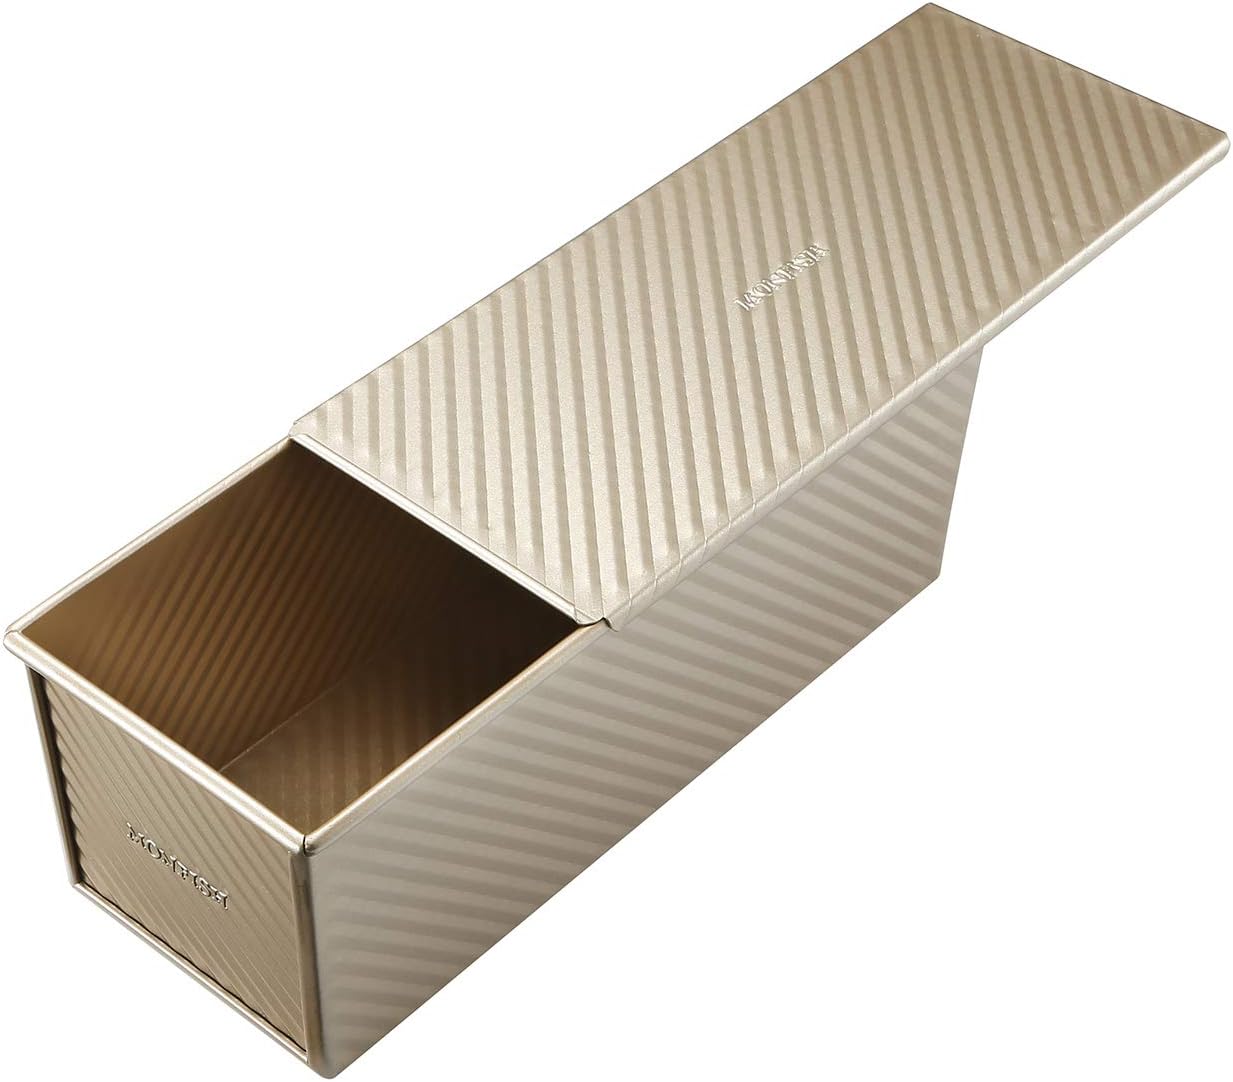 Purpose: A Pullman pan—also known as a pain de mie pan—is a lidded loaf pan
designed to produce perfectly square, straight-sided loaves with a fine, tender crumb and minimal crust. Originally
developed for Pullman railway dining cars to save space and stack loaves easily, this pan is now a favorite among home
and professional bakers for sandwich breads and enriched sourdough loaves. The lid traps steam and limits oven spring,
yielding a soft, uniform structure that slices cleanly and toasts beautifully.
Purpose: A Pullman pan—also known as a pain de mie pan—is a lidded loaf pan
designed to produce perfectly square, straight-sided loaves with a fine, tender crumb and minimal crust. Originally
developed for Pullman railway dining cars to save space and stack loaves easily, this pan is now a favorite among home
and professional bakers for sandwich breads and enriched sourdough loaves. The lid traps steam and limits oven spring,
yielding a soft, uniform structure that slices cleanly and toasts beautifully.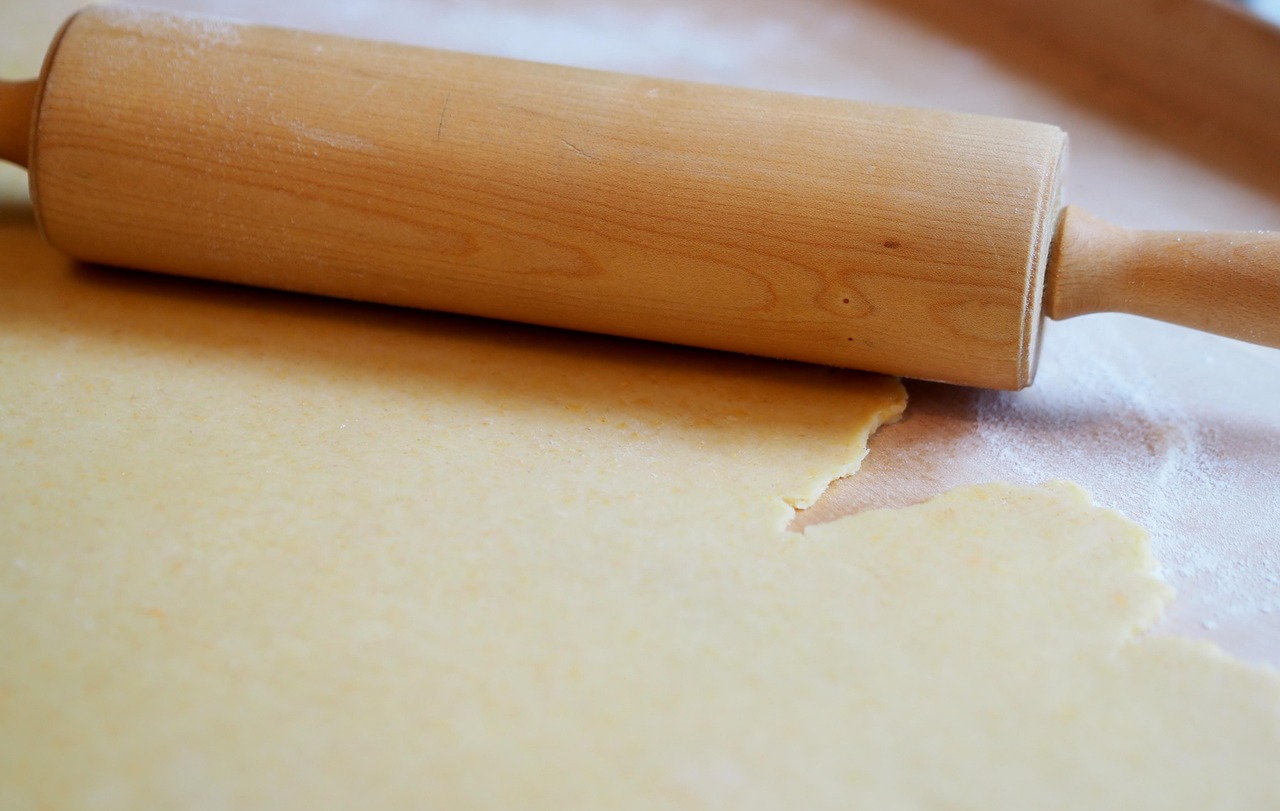 Purpose: While not typically used in shaping classic artisan sourdough
loaves, a rolling pin is a versatile tool with valuable peripheral applications in sourdough baking and beyond. It's
essential for evenly flattening dough when making laminated sourdough (like sourdough croissants or danishes),
crackers, tart bases, or enriched doughs such as cinnamon rolls and babka. The rolling pin helps create uniform
thickness, which ensures even baking and professional-looking results.
Purpose: While not typically used in shaping classic artisan sourdough
loaves, a rolling pin is a versatile tool with valuable peripheral applications in sourdough baking and beyond. It's
essential for evenly flattening dough when making laminated sourdough (like sourdough croissants or danishes),
crackers, tart bases, or enriched doughs such as cinnamon rolls and babka. The rolling pin helps create uniform
thickness, which ensures even baking and professional-looking results.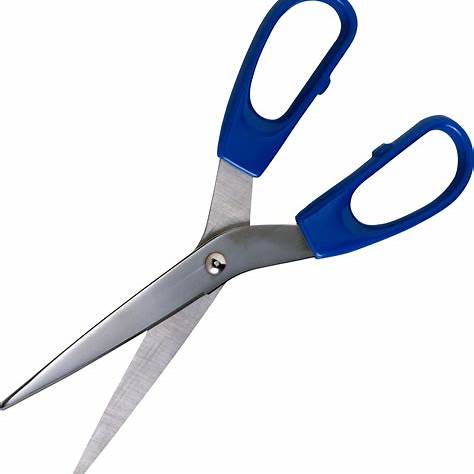 Purpose: Scissors can be an effective and creative alternative to a lame
for scoring sourdough, especially for bakers looking to achieve bold, controlled expansion or decorative flourishes.
With their precise cutting action, scissors allow for clean snips rather than shallow slashes, which can create
dramatic “ears,” patterns, or even floral-style scoring on your dough. While they don't slice the surface quite the
same way a razor blade does, scissors offer more depth and lift, particularly useful on high-hydration or stiff
doughs.
Purpose: Scissors can be an effective and creative alternative to a lame
for scoring sourdough, especially for bakers looking to achieve bold, controlled expansion or decorative flourishes.
With their precise cutting action, scissors allow for clean snips rather than shallow slashes, which can create
dramatic “ears,” patterns, or even floral-style scoring on your dough. While they don't slice the surface quite the
same way a razor blade does, scissors offer more depth and lift, particularly useful on high-hydration or stiff
doughs.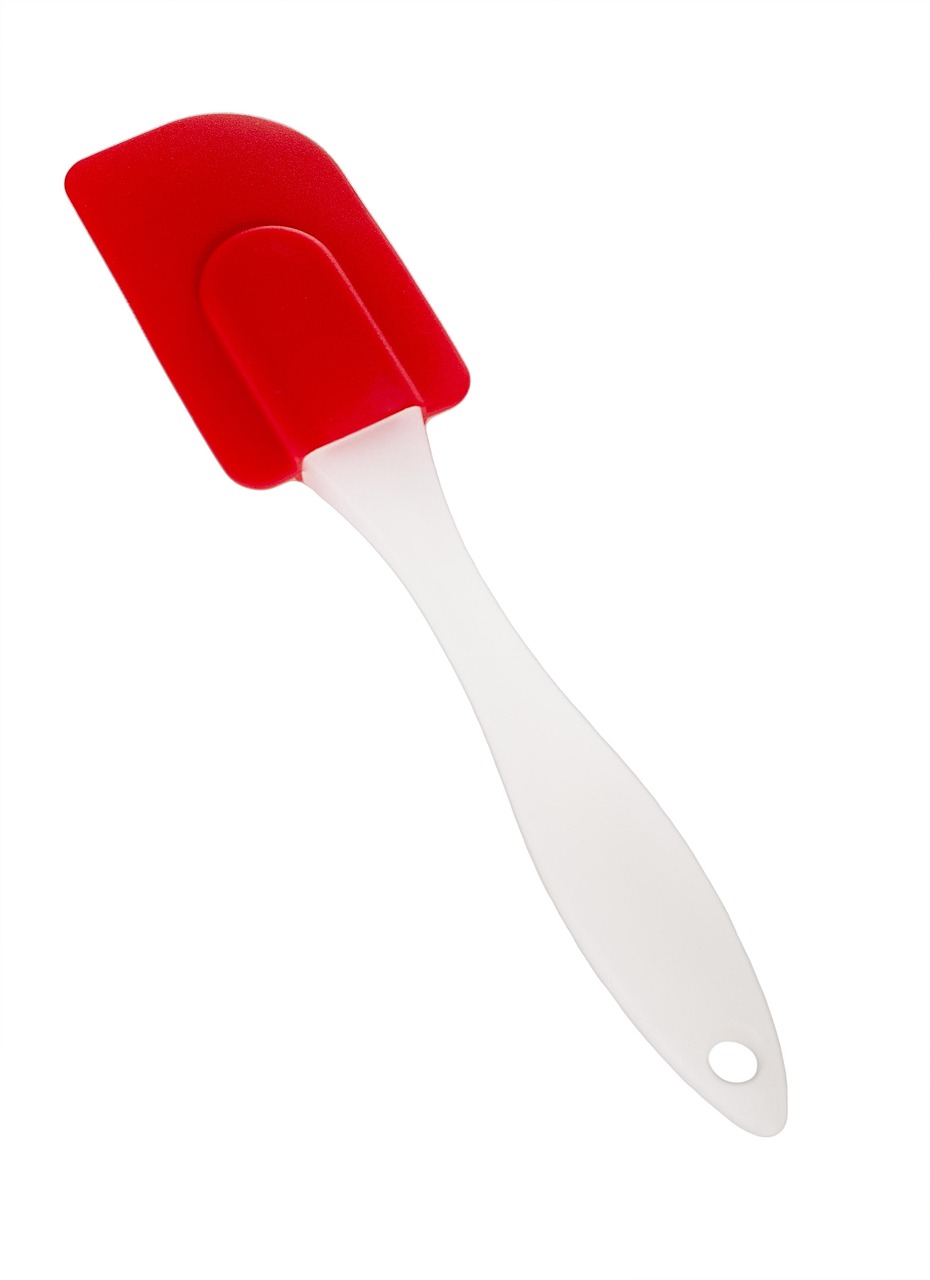 Purpose: A spatula is a flexible, multi-use tool that plays a key role
in various stages of sourdough baking—from mixing and maintaining your starter to incorporating ingredients and
scraping down bowls. In starter care, a silicone or rubber spatula is ideal for gently stirring, folding in flour and
water, and scraping clean the sides of jars without wasting any of your culture. During dough mixing, especially in
the early stages like autolyse or initial incorporation, it allows you to mix thoroughly while keeping your hands
clean.
Purpose: A spatula is a flexible, multi-use tool that plays a key role
in various stages of sourdough baking—from mixing and maintaining your starter to incorporating ingredients and
scraping down bowls. In starter care, a silicone or rubber spatula is ideal for gently stirring, folding in flour and
water, and scraping clean the sides of jars without wasting any of your culture. During dough mixing, especially in
the early stages like autolyse or initial incorporation, it allows you to mix thoroughly while keeping your hands
clean.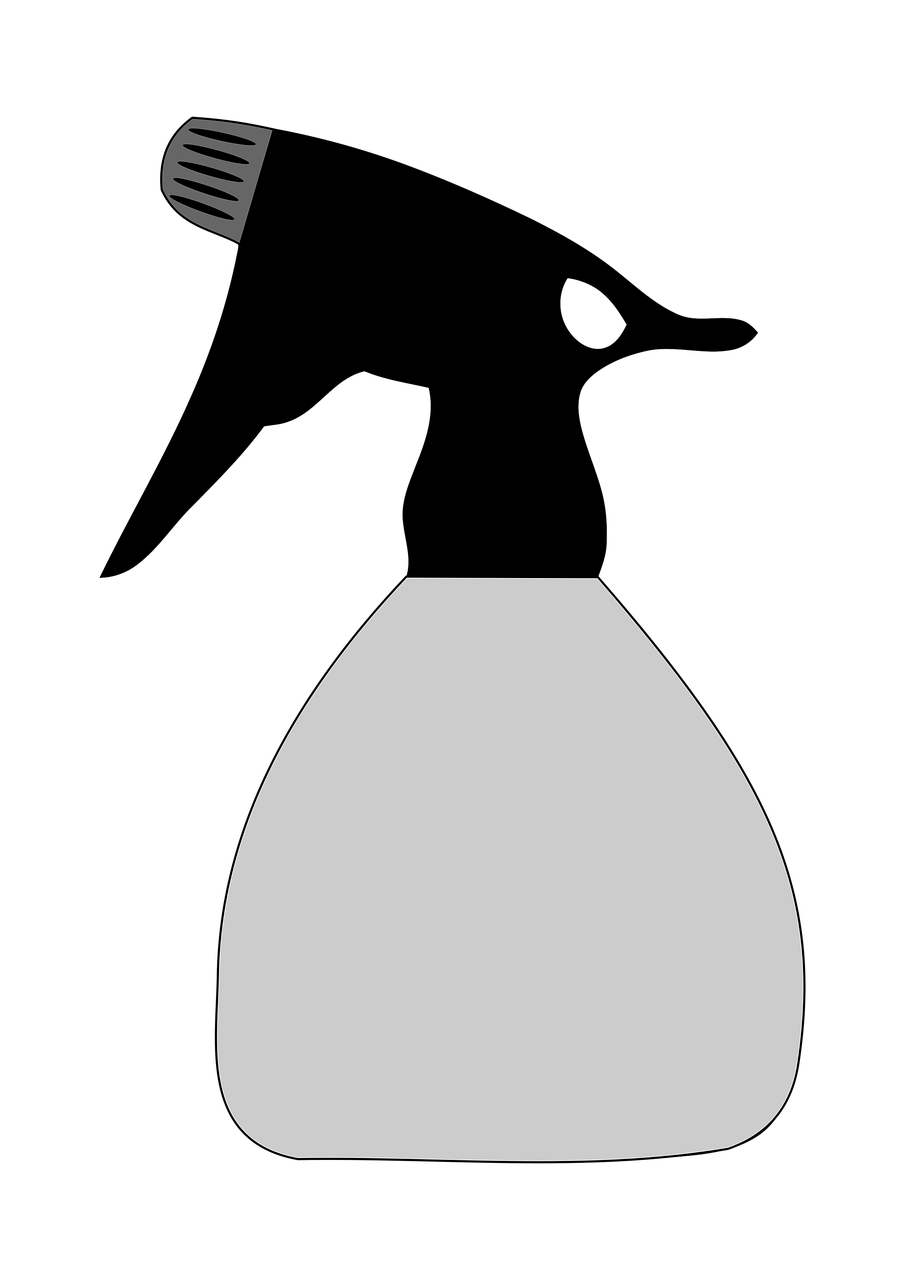 Purpose: A spray bottle is a simple yet highly effective tool in
sourdough baking, primarily used to control moisture during key baking stages. Its main role is to mist the dough or
the oven interior to create steam during the early minutes of baking. Steam is essential for achieving optimal oven
spring and developing a crisp, glossy crust, especially when baking on a stone or steel without a Dutch oven. A spray
bottle is also useful during shaping and scoring to keep dough supple and prevent surface drying.
Purpose: A spray bottle is a simple yet highly effective tool in
sourdough baking, primarily used to control moisture during key baking stages. Its main role is to mist the dough or
the oven interior to create steam during the early minutes of baking. Steam is essential for achieving optimal oven
spring and developing a crisp, glossy crust, especially when baking on a stone or steel without a Dutch oven. A spray
bottle is also useful during shaping and scoring to keep dough supple and prevent surface drying.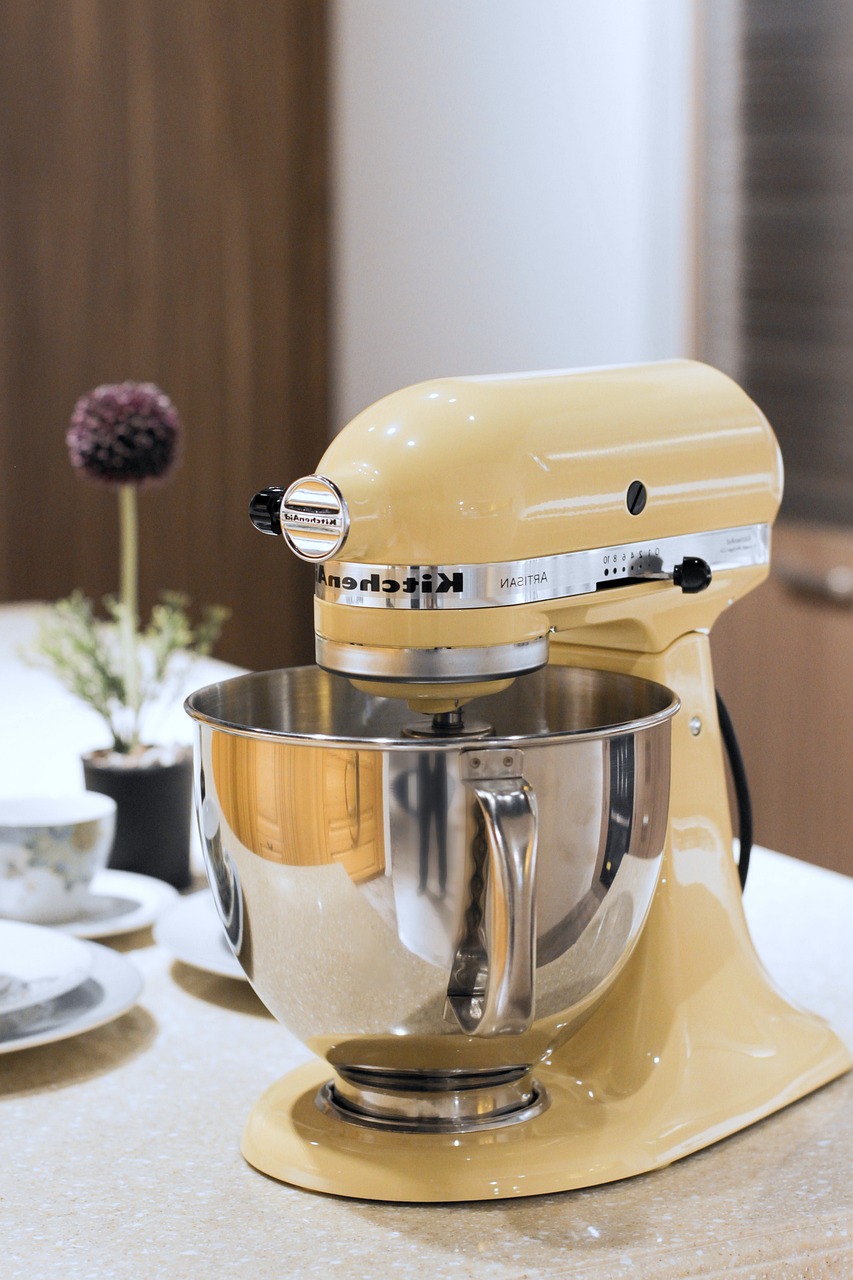 Purpose: A stand mixer is a powerful, hands-free appliance that can
streamline many tasks in sourdough baking, especially mixing and kneading. While traditional sourdough methods often
rely on hand mixing and stretch-and-fold techniques to gently develop gluten, a stand mixer offers speed,
consistency, and convenience—particularly useful for larger batches or enriched doughs with eggs, butter, or sugar.
It's also a time-saver for initial mixing and incorporating stiff or sticky ingredients evenly, which can be
challenging by hand.
Purpose: A stand mixer is a powerful, hands-free appliance that can
streamline many tasks in sourdough baking, especially mixing and kneading. While traditional sourdough methods often
rely on hand mixing and stretch-and-fold techniques to gently develop gluten, a stand mixer offers speed,
consistency, and convenience—particularly useful for larger batches or enriched doughs with eggs, butter, or sugar.
It's also a time-saver for initial mixing and incorporating stiff or sticky ingredients evenly, which can be
challenging by hand.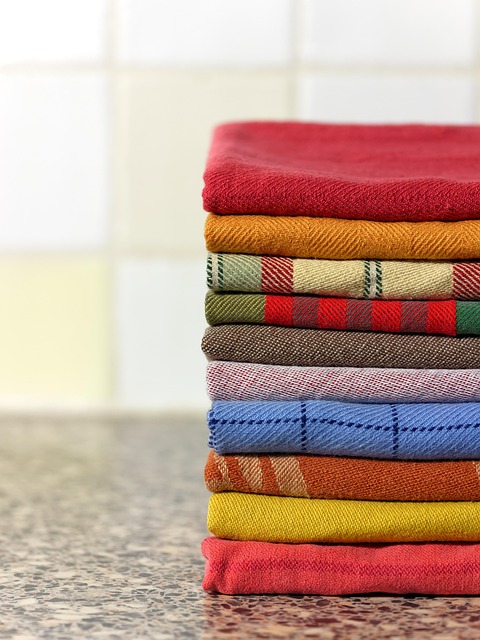 Purpose: Kitchen towels are a humble yet essential tool in bread baking,
serving multiple purposes throughout the sourdough process. Most commonly, they're used to cover dough during proofing,
helping maintain humidity and prevent the surface from drying out. They also line proofing baskets or bowls when bannetons
aren't available, offering gentle support and shaping assistance. Additionally, towels are handy for wiping down floured
surfaces, drying tools, or shielding resting loaves from drafts—all while keeping the workspace clean and efficient.
Purpose: Kitchen towels are a humble yet essential tool in bread baking,
serving multiple purposes throughout the sourdough process. Most commonly, they're used to cover dough during proofing,
helping maintain humidity and prevent the surface from drying out. They also line proofing baskets or bowls when bannetons
aren't available, offering gentle support and shaping assistance. Additionally, towels are handy for wiping down floured
surfaces, drying tools, or shielding resting loaves from drafts—all while keeping the workspace clean and efficient.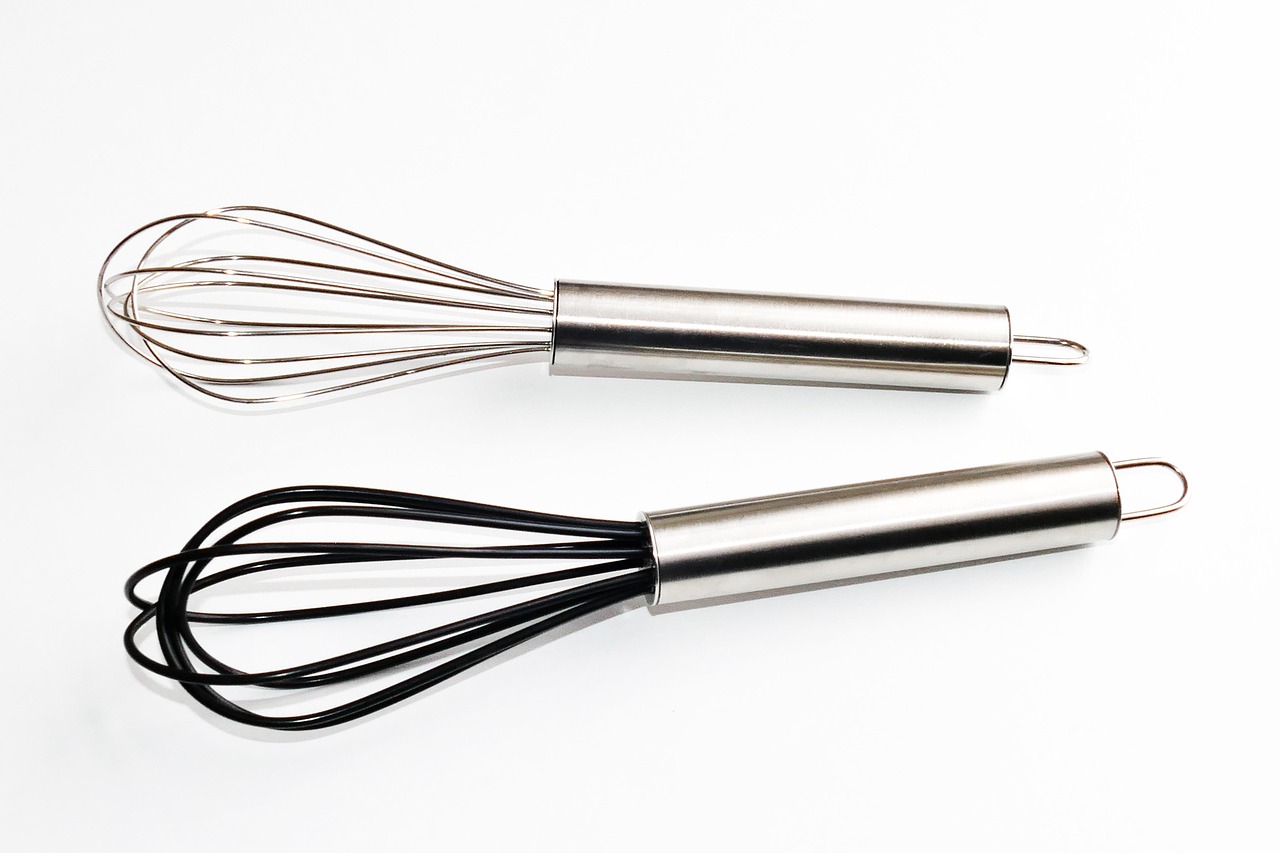 Purpose: While a whisk isn't typically used for kneading or shaping, it
plays a helpful supporting role in sourdough baking—especially in the early stages of mixing and in maintaining your
sourdough starter. A sturdy whisk is ideal for thoroughly combining flour and water during starter feedings, quickly
dissolving clumps and incorporating air into the mixture to help promote fermentation. It's also useful for mixing
preferments, dry ingredients, or hydration steps like the autolyse phase when working with lower-hydration doughs.
Purpose: While a whisk isn't typically used for kneading or shaping, it
plays a helpful supporting role in sourdough baking—especially in the early stages of mixing and in maintaining your
sourdough starter. A sturdy whisk is ideal for thoroughly combining flour and water during starter feedings, quickly
dissolving clumps and incorporating air into the mixture to help promote fermentation. It's also useful for mixing
preferments, dry ingredients, or hydration steps like the autolyse phase when working with lower-hydration doughs. Purpose: A wooden spoon is a classic, reliable tool in the early stages
of sourdough baking, especially when initially combining flour, water, and starter. Its sturdy construction makes it
ideal for mixing thick, sticky doughs before gluten has developed—particularly during the autolyse or first mixing
phase. It allows bakers to thoroughly incorporate ingredients with control and force, without relying on hands right
away, helping to keep things tidy and less messy during early mixing.
Purpose: A wooden spoon is a classic, reliable tool in the early stages
of sourdough baking, especially when initially combining flour, water, and starter. Its sturdy construction makes it
ideal for mixing thick, sticky doughs before gluten has developed—particularly during the autolyse or first mixing
phase. It allows bakers to thoroughly incorporate ingredients with control and force, without relying on hands right
away, helping to keep things tidy and less messy during early mixing.Understanding your tools is the bridge between a "recipe follower" and a Master Baker. This guide explores the science of your gear and how to thrive even without a professional kitchen.
The material of your tool affects the Thermal Equilibrium and the Microbial Health of your dough.
You don't need a massive budget to bake professional loaves. Use these everyday substitutes:
Sourdough tools require specific maintenance to avoid "off" flavors or mold:
When starting, prioritize your budget in this order: Digital Scale > Dutch Oven > Bench Knife. Look for "factory seconds" or "used" cast iron, as these items often last for generations and perform better with age.
?
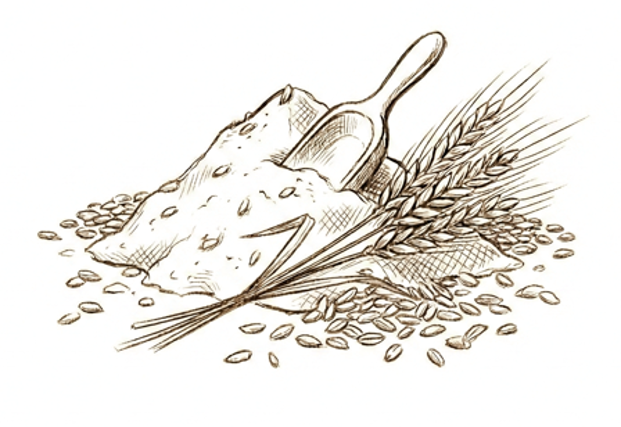
The Grains A to Z section is a compendium of the more common grains humans have used for millenia to bake bread. Most will be familiar to you, but others may be brand new. Each grain has a brief note on History, Bread Types the grain is commonly used for, Flavour Profile, a quick Nutrition profile, and finally an Interesting Fact about the grain.
This section also has the Rabbit Hole expanded section at the end. Have fun exploring!
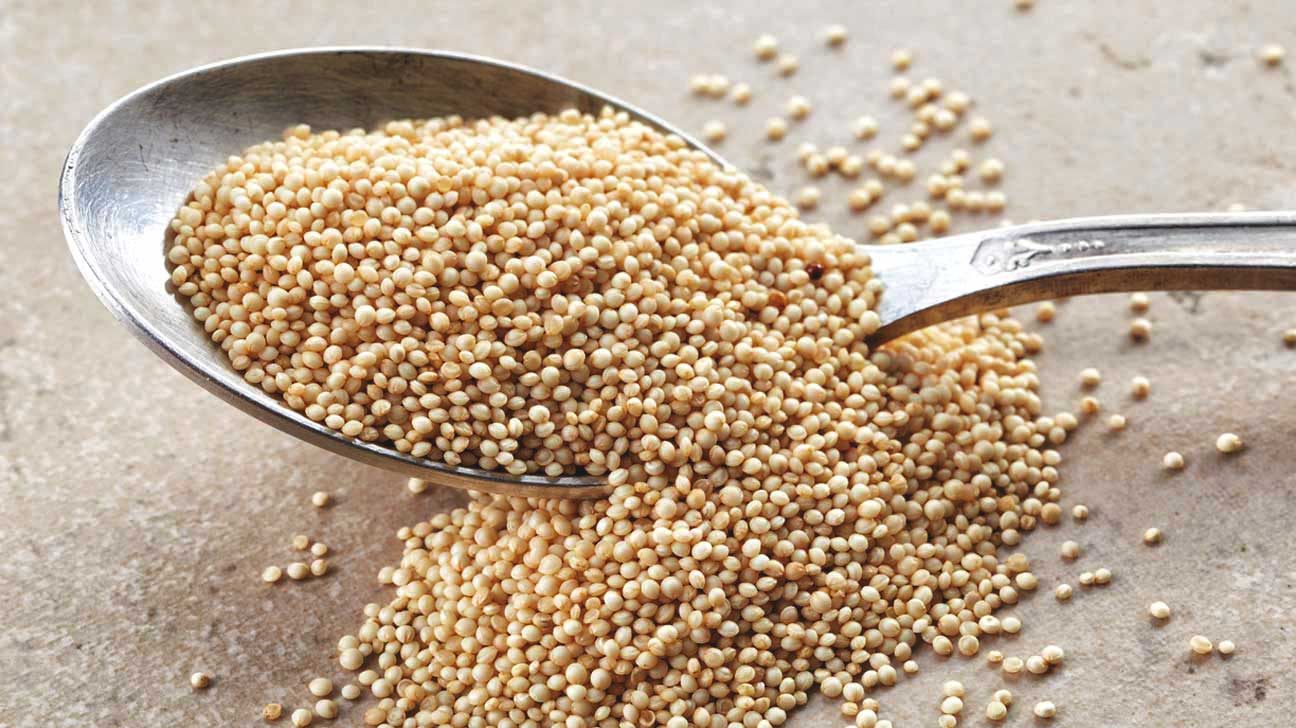 History: A staple of the Aztecs over 8,000 years ago, now grown in Central and South America.
 History: Atta is a finely ground whole wheat flour widely used in South Asia for making staple breads. The name "Atta" originates from Hindi and Urdu, and this flour has been a key component of Indian, Pakistani, and Bangladeshi cuisines for centuries. Unlike refined wheat flours, Atta is made by stone-grinding whole wheat kernels, preserving more bran and fiber.
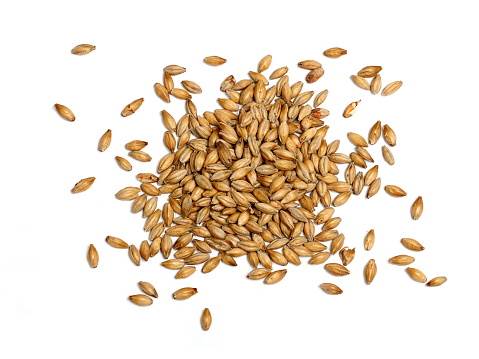 History: One of the first domesticated grains, barley has been grown for over 10,000 years, originating in the Fertile Crescent.
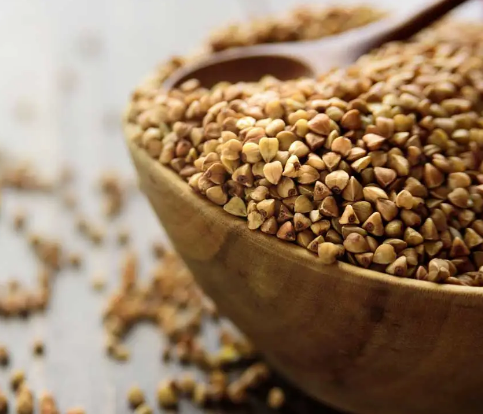 History: Domesticated in China around 6,000 years ago, buckwheat spread through Asia and Europe.
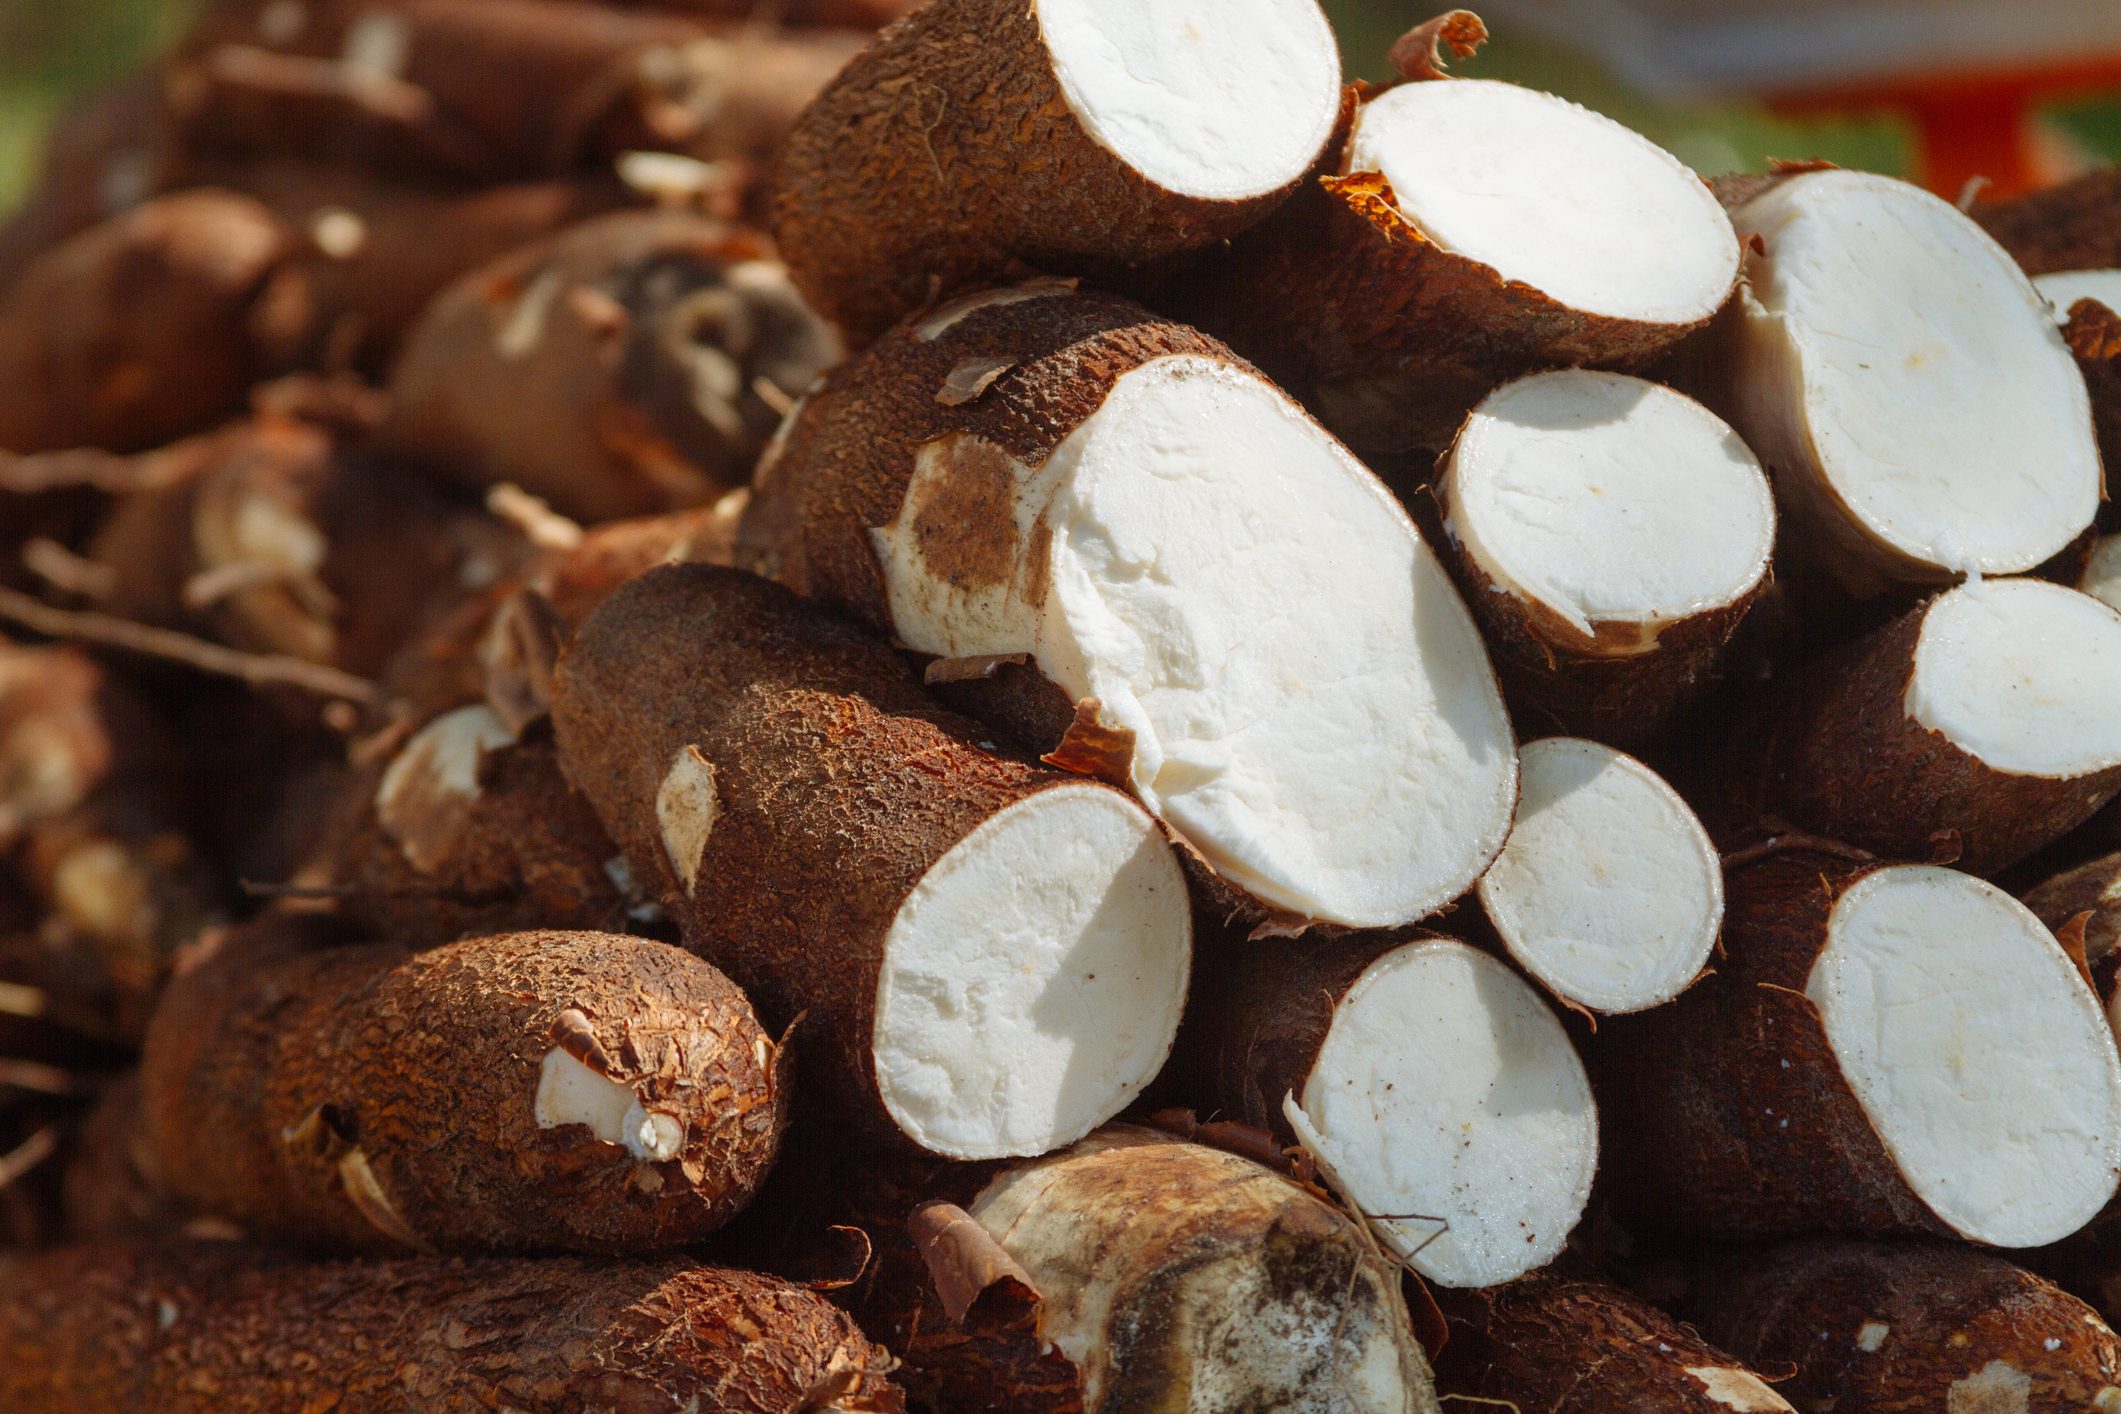 History: Native to South America, cultivated for over 8,000 years. It later spread to Africa and Asia.
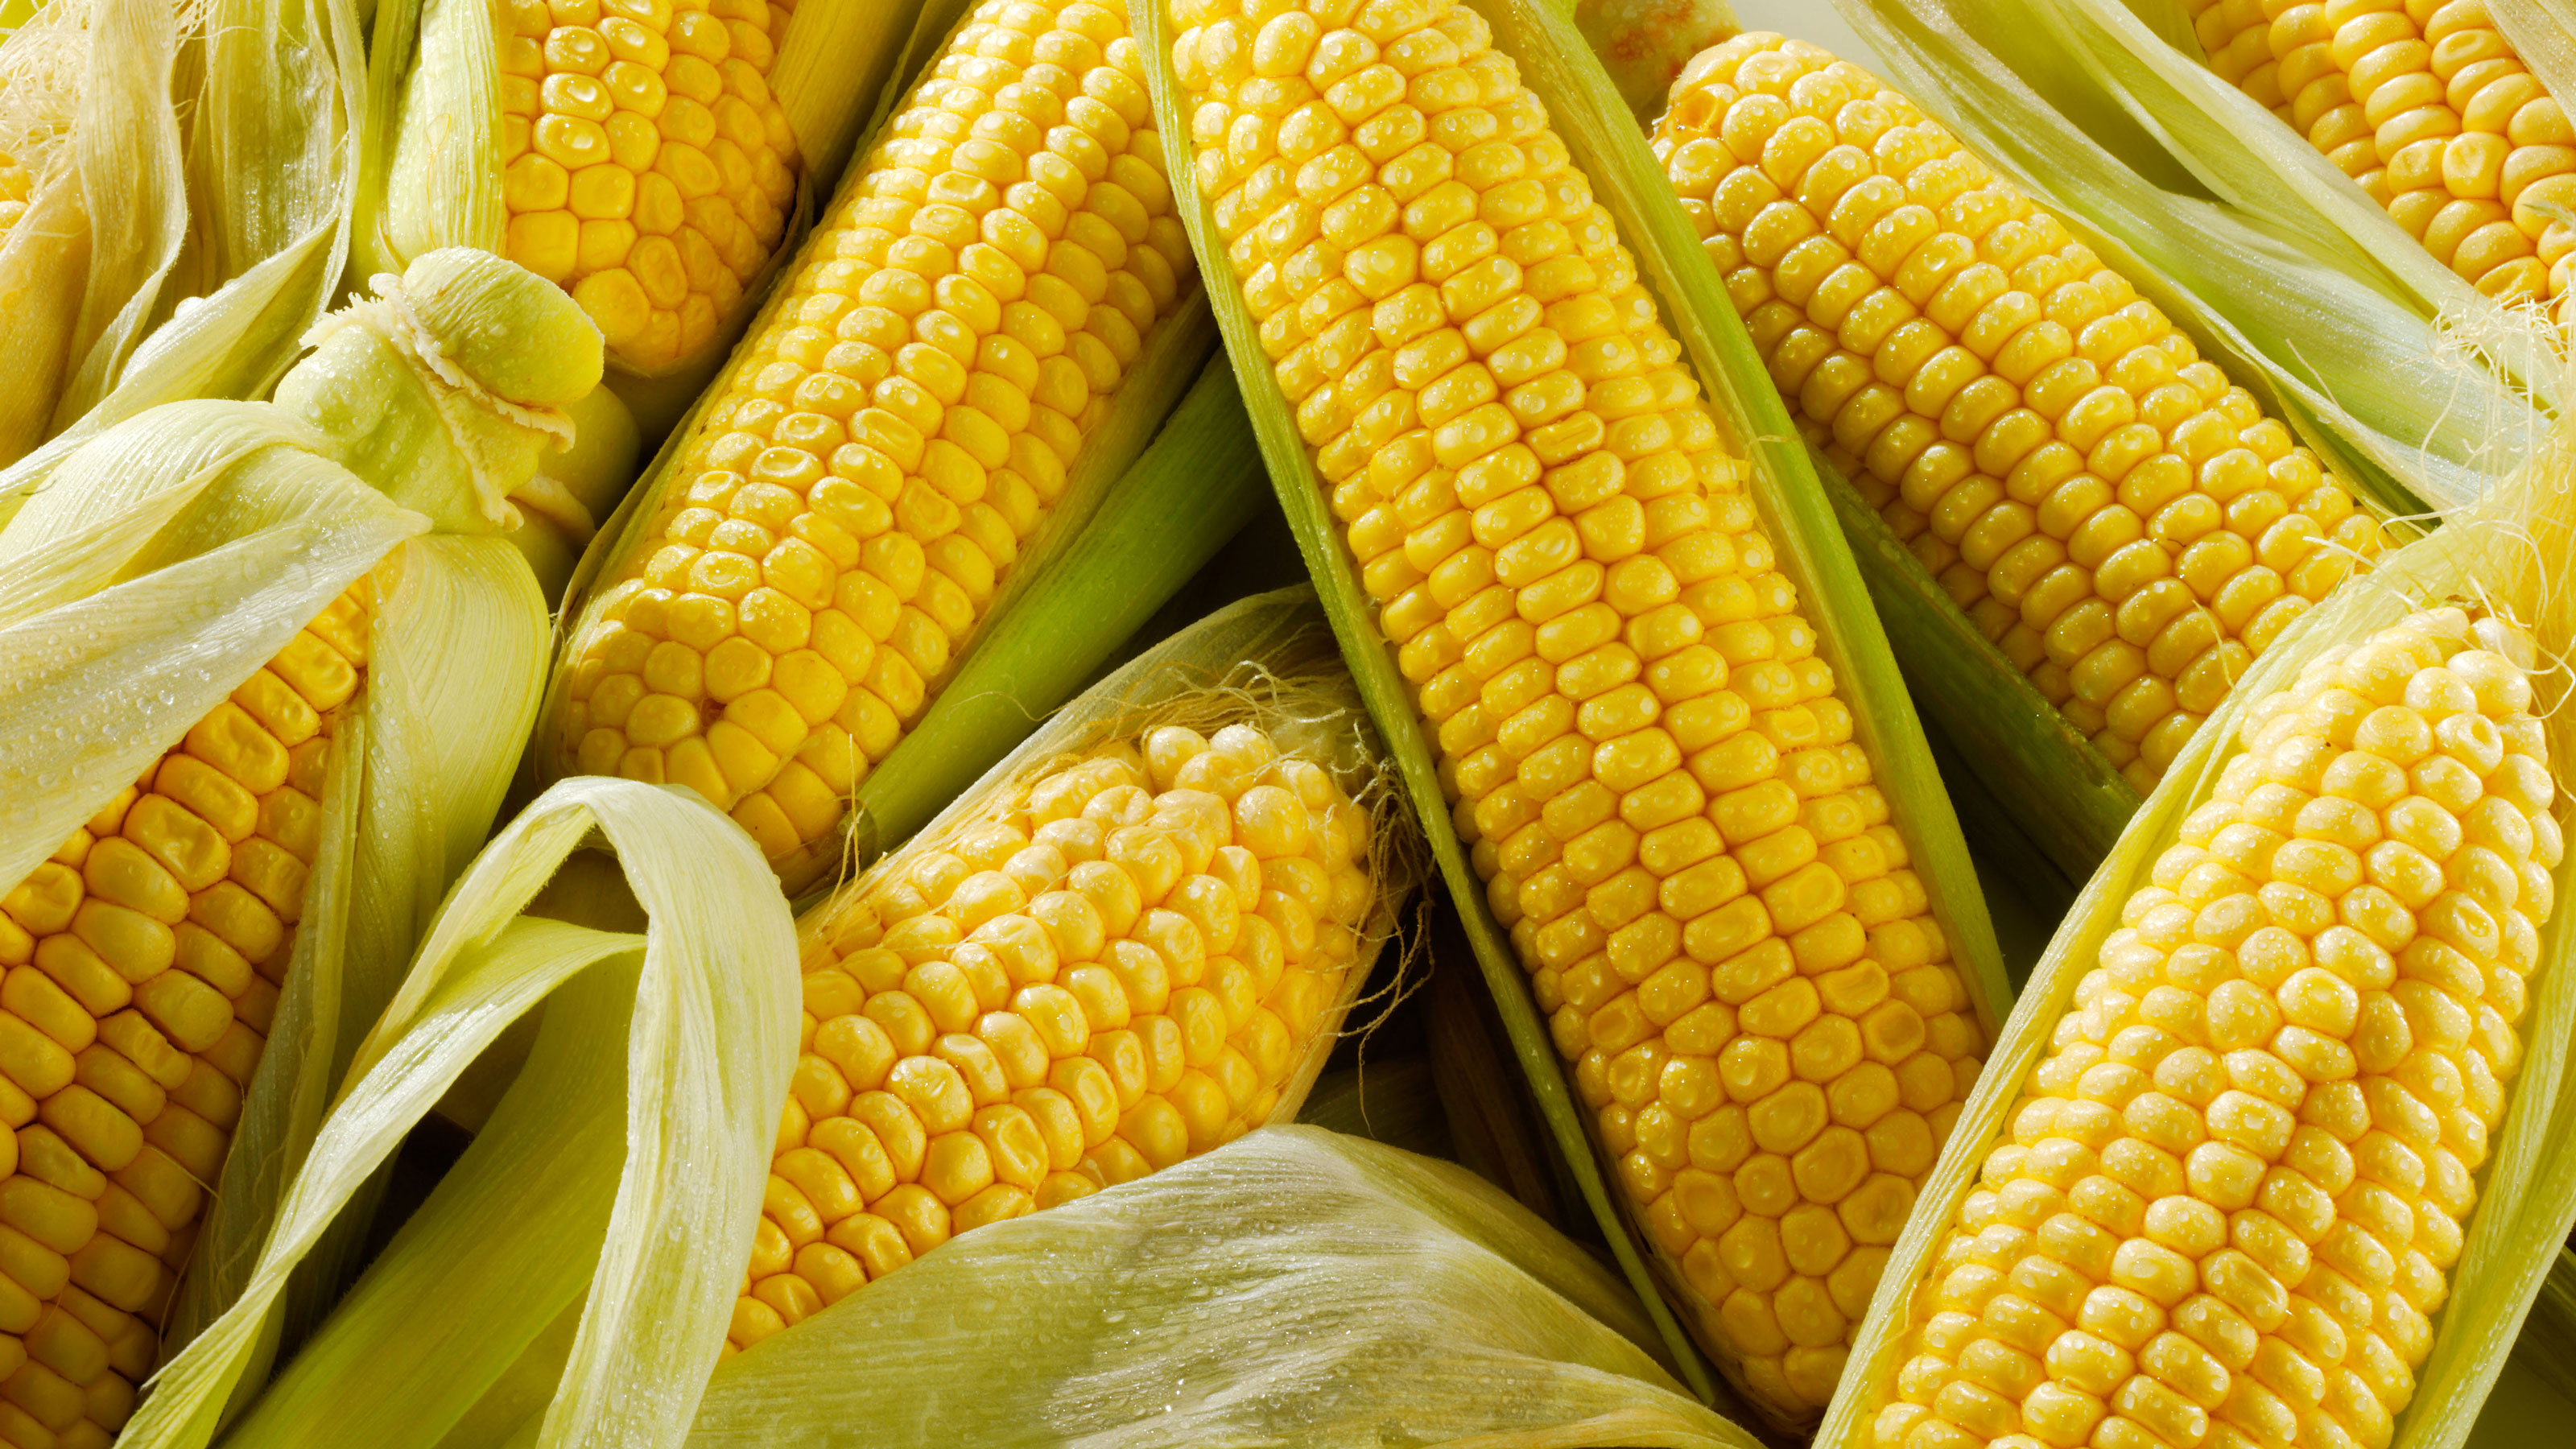 History: Domesticated in Mexico over 9,000 years ago, corn became a staple in the Americas.
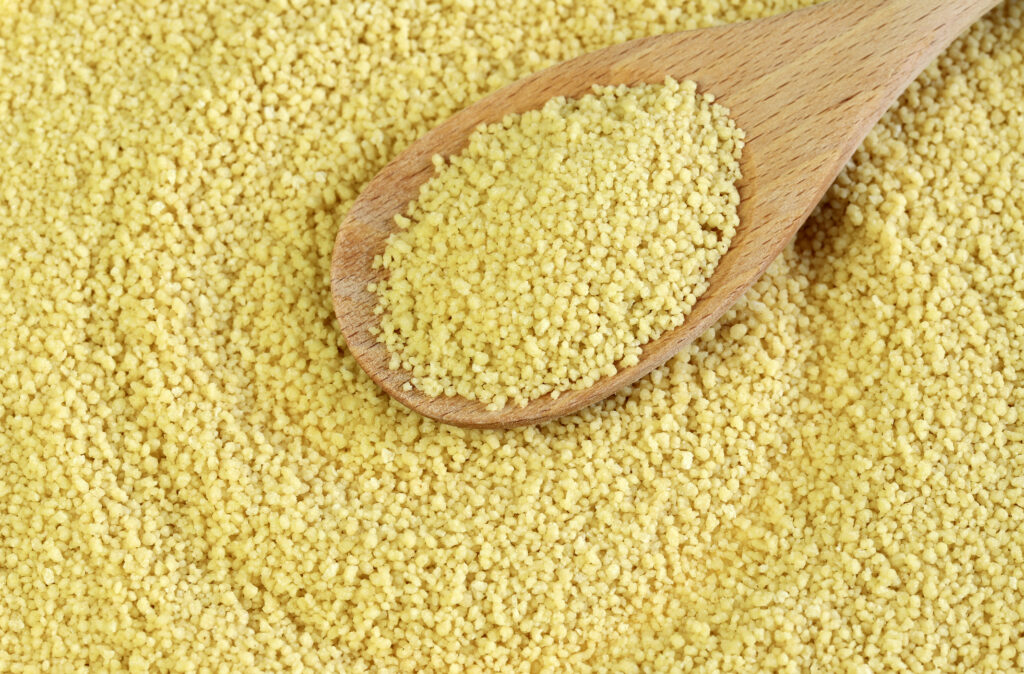 History: Originated in the Fertile Crescent and spread throughout the Mediterranean.
 History: The oldest cultivated wheat, domesticated over 12,000 years ago in the Fertile Crescent.
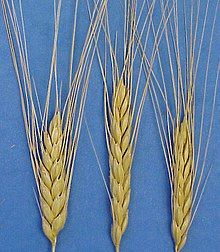 History: One of the earliest cultivated wheat species, a staple in ancient Egypt and Mesopotamia.
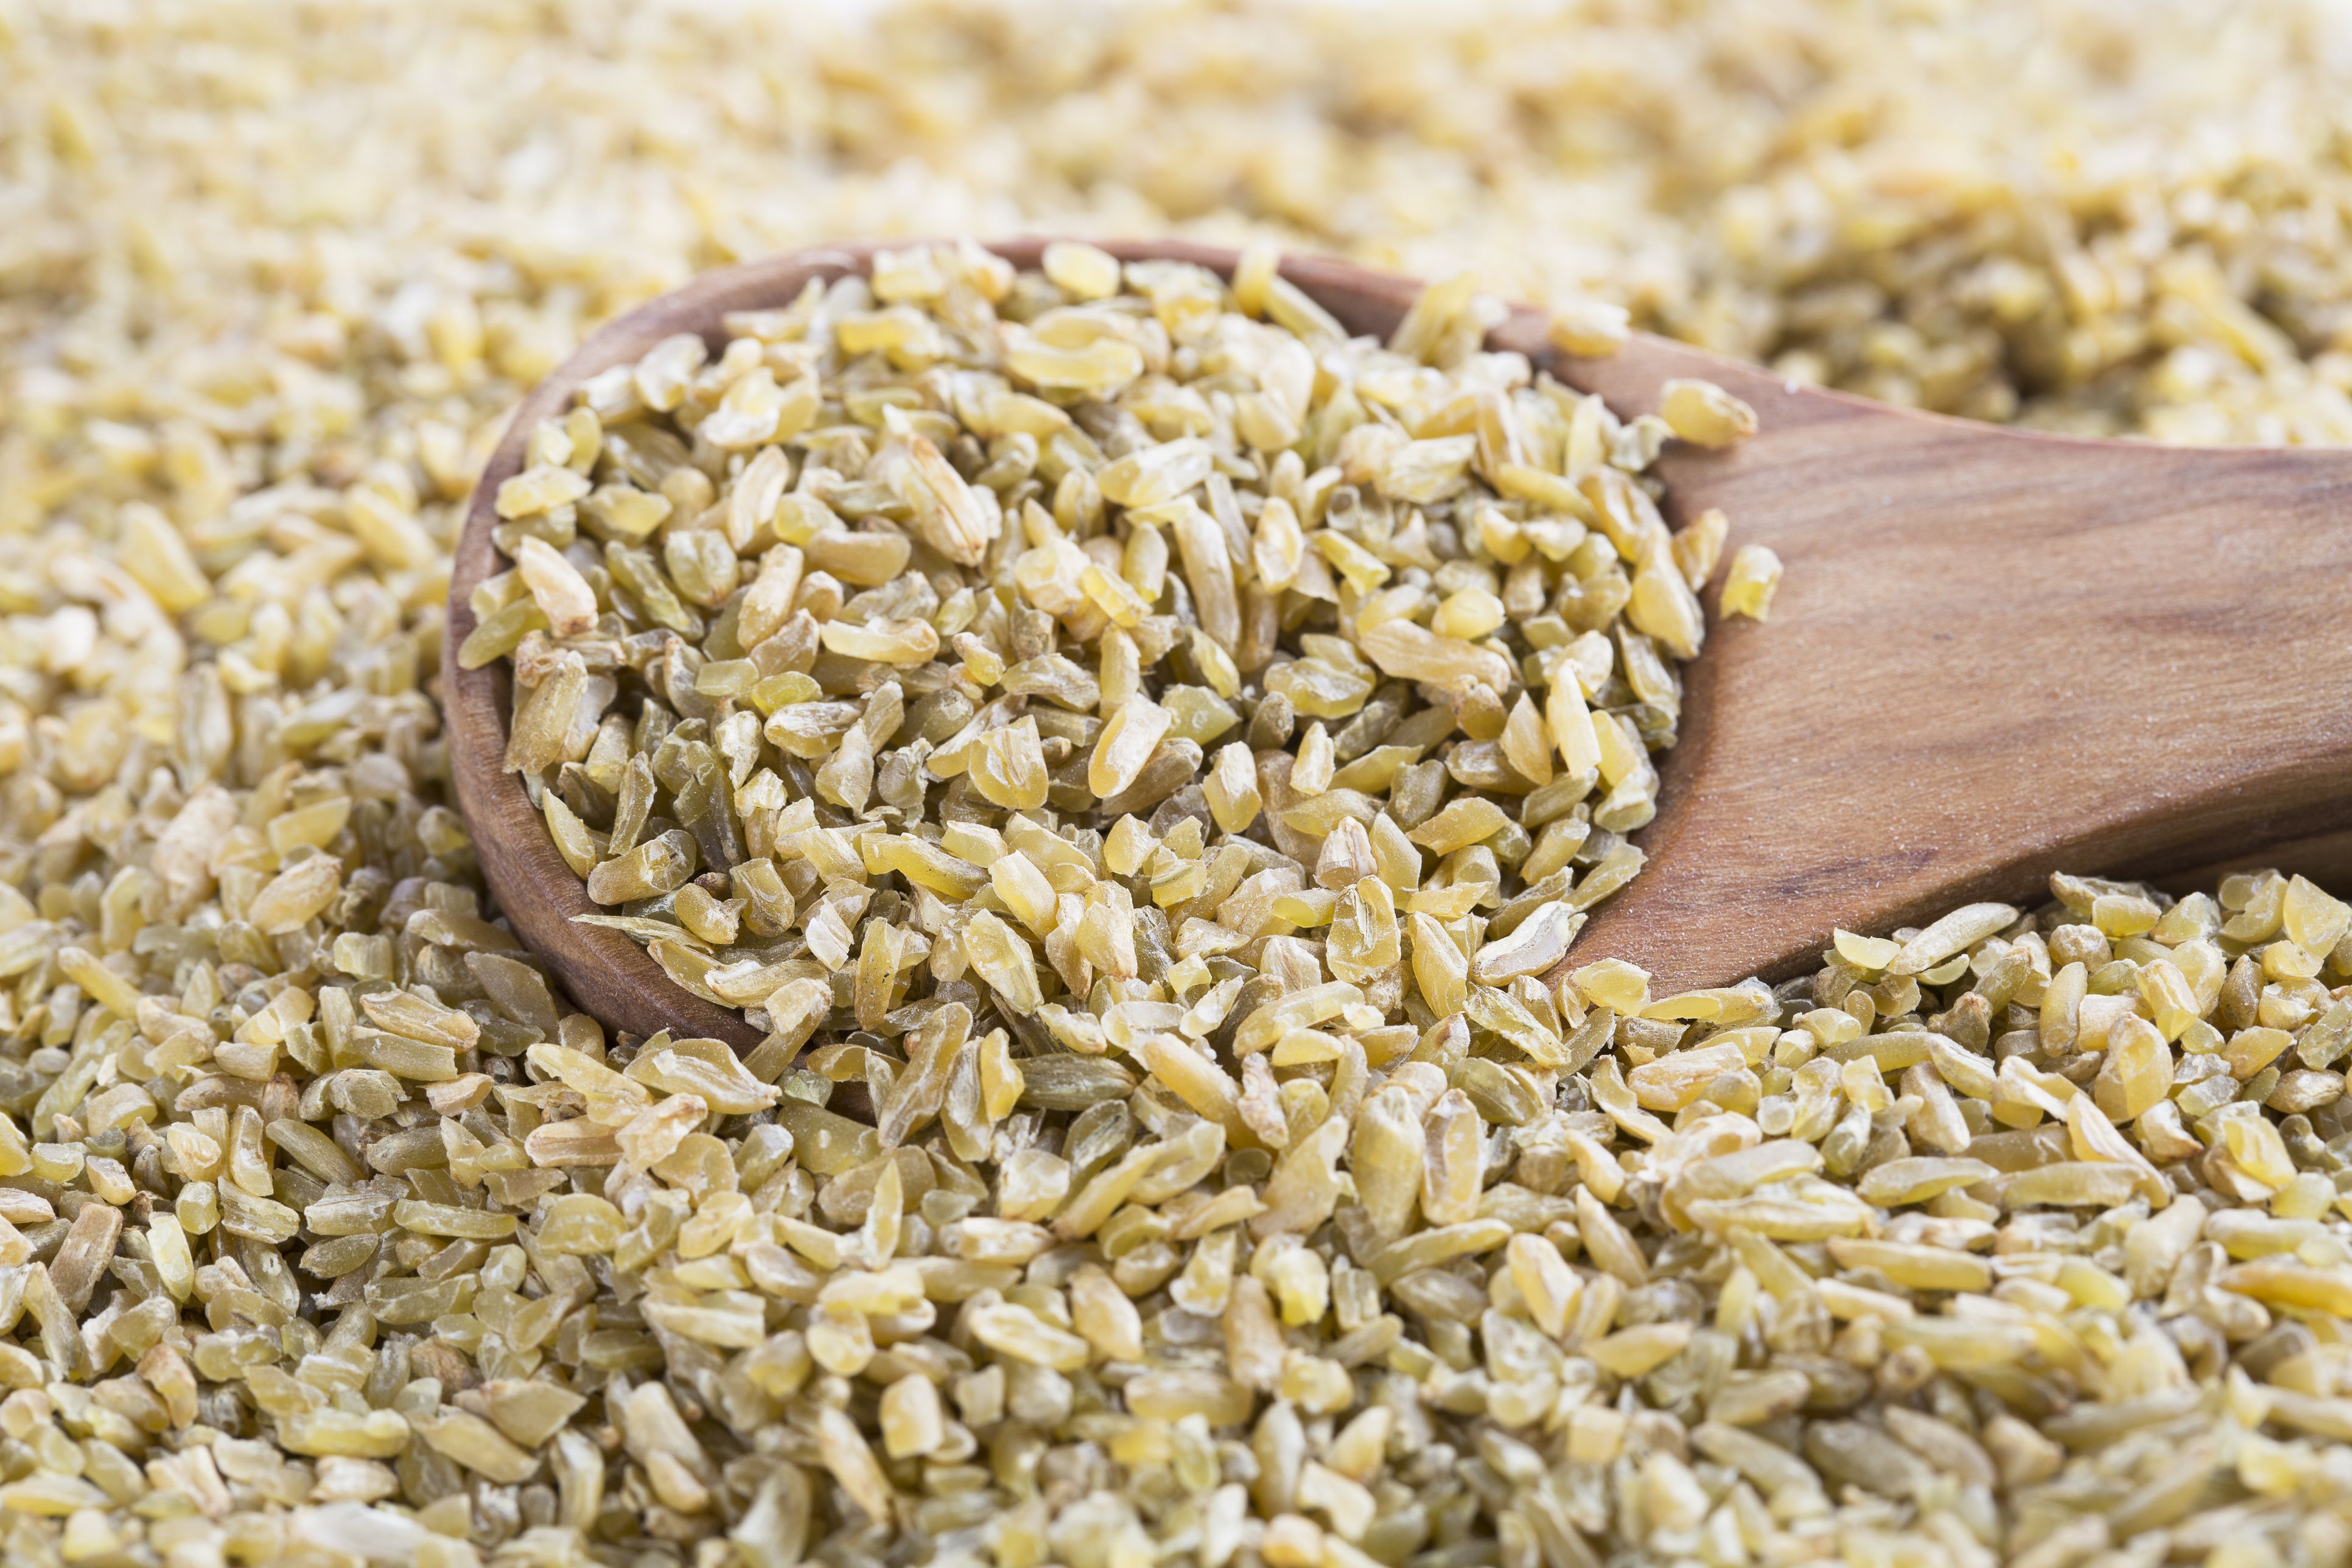 History: A Middle Eastern grain dating back at least 4,000 years.
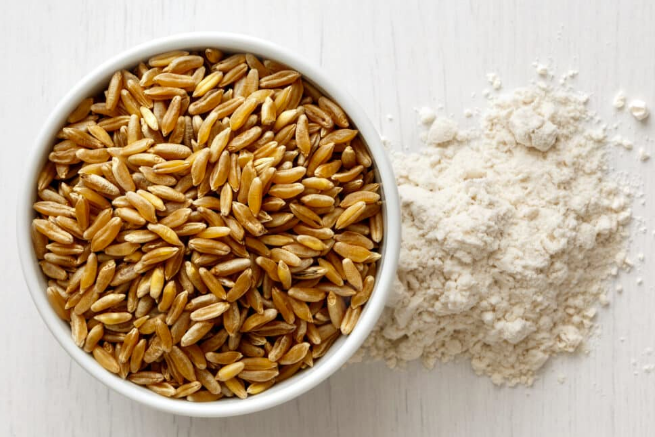 History: An ancient wheat variety from the Middle East, rediscovered in the 20th century.
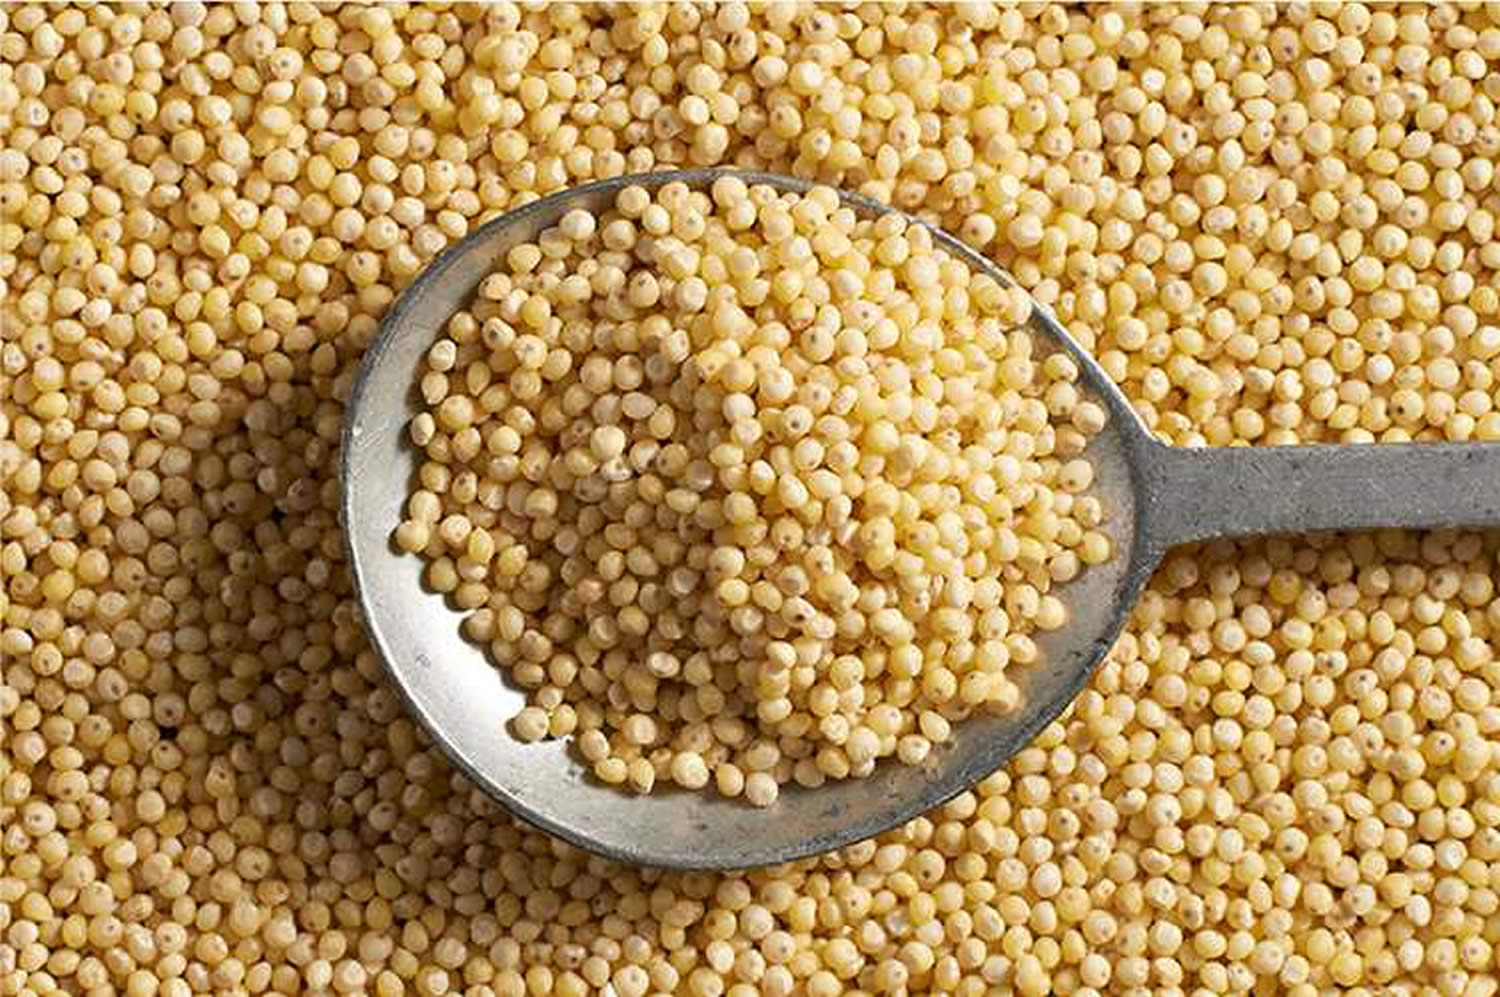 History: Cultivated in China, Africa, and India for over 7,000 years.
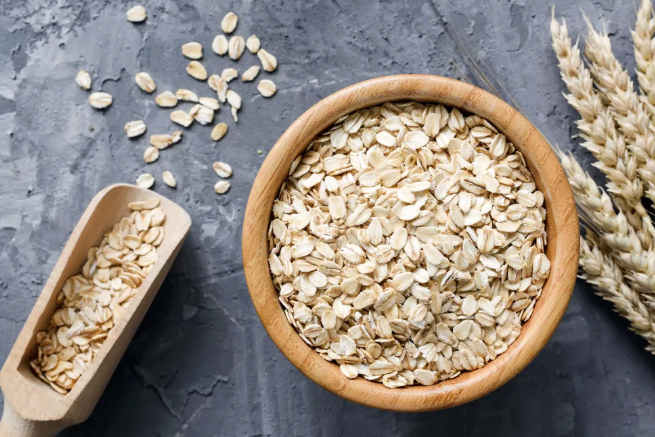 History: First cultivated in Europe and the Middle East over 4,000 years ago.
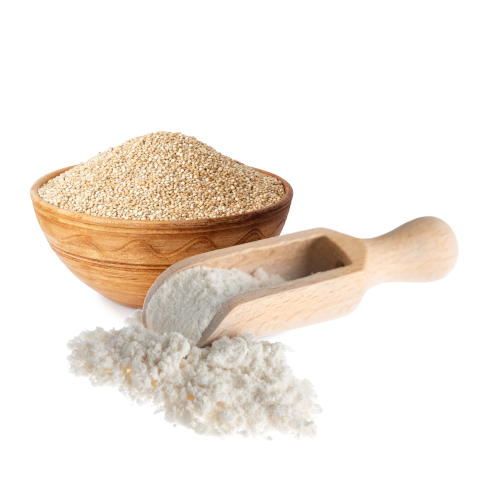 History: Domesticated in the Andes over 5,000 years ago, sacred to the Incas.
 History: Originating in Eastern Europe and Central Asia, rye has been cultivated for over 4,000 years.
History: Semolina is made from durum wheat (Triticum durum), one of the hardest wheat varieties, which has been cultivated in the Mediterranean and Middle East for over 2,000 years. Semolina is coarsely milled and has a distinct golden-yellow color due to its high carotenoid content.
History: Originating in Eastern Europe and Central Asia, rye has been cultivated for over 4,000 years.
History: Semolina is made from durum wheat (Triticum durum), one of the hardest wheat varieties, which has been cultivated in the Mediterranean and Middle East for over 2,000 years. Semolina is coarsely milled and has a distinct golden-yellow color due to its high carotenoid content.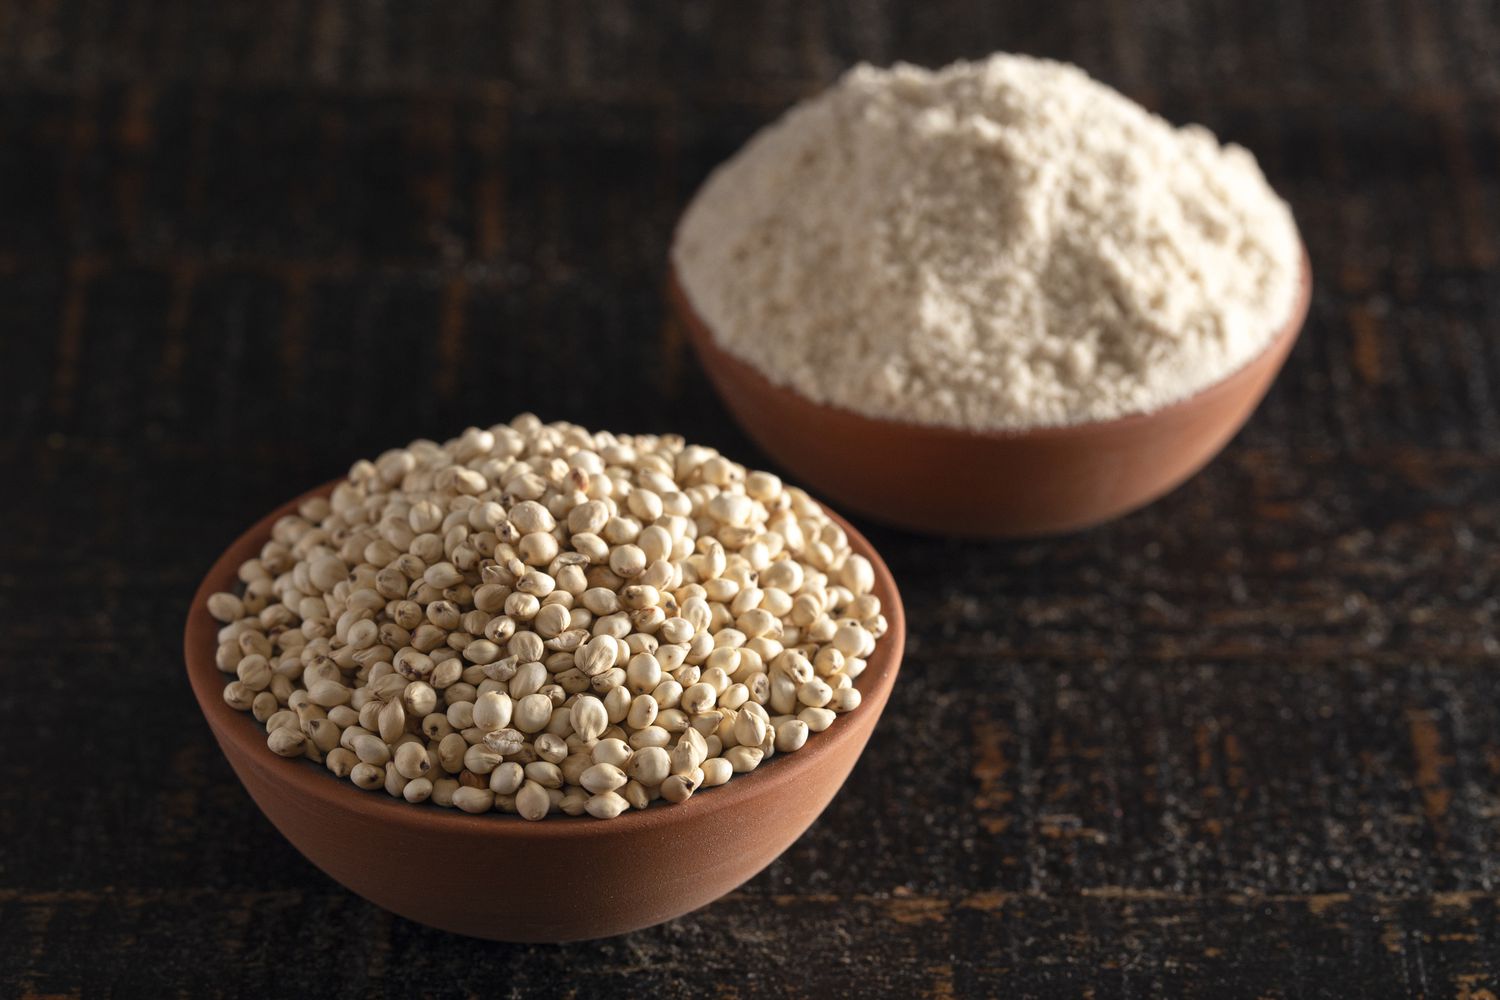 History: One of the oldest grains, dating back over 5,000 years in Africa.
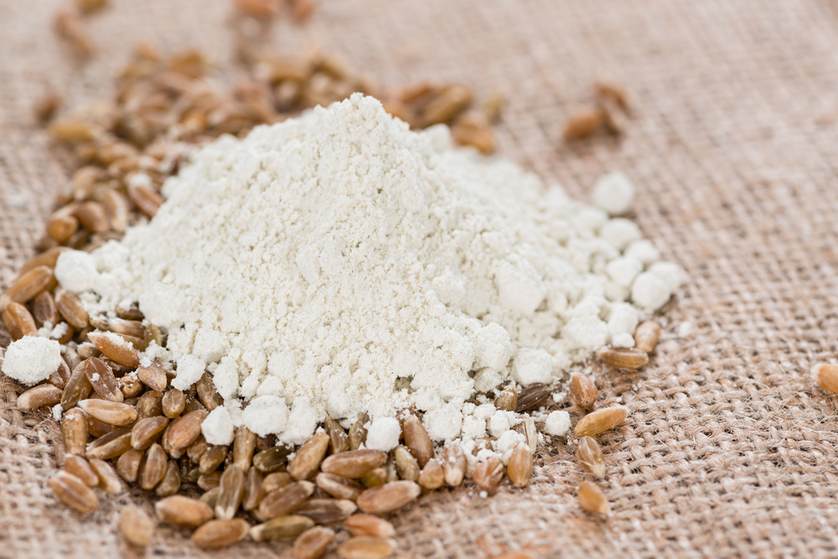 History: An ancient wheat variety dating back to 5,000 BCE.
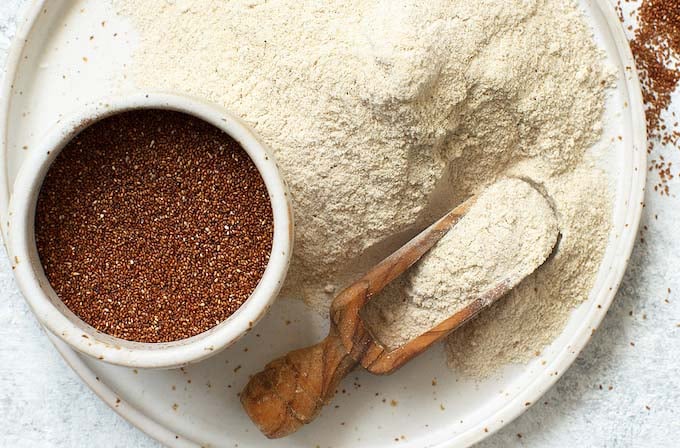 History: Native to Ethiopia, cultivated for at least 3,000 years.
History: One of the oldest cultivated grains, dating back over 10,000 years.
History: Native to Ethiopia, cultivated for at least 3,000 years.
History: One of the oldest cultivated grains, dating back over 10,000 years.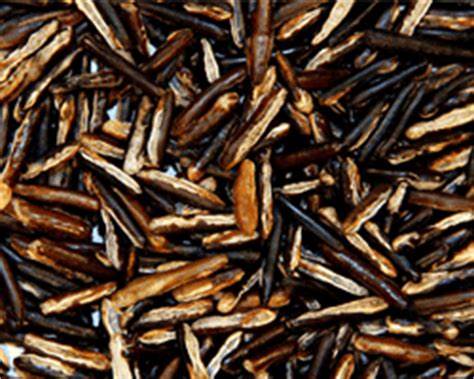 History: Native to North America, used by Indigenous tribes.
To master sourdough, one must understand that flour is not a static ingredient; it is the result of millennia of agricultural evolution and mechanical engineering.
The way a grain is turned into flour dictates its performance in your kitchen. Historically, this evolution followed two distinct paths:
Grain characteristics are determined by the soil and climate in which they are grown. This is often referred to as the terroir of the wheat.
Conventional modern grain production often relies on chemical intervention to maximize yield.
Is ancient wheat actually better? Science says yes, specifically regarding Secondary Metabolites. Ancient grains like Amaranth and Buckwheat (pseudocereals) provide a complete protein profile, including amino acids like lysine that are missing from standard wheat. Furthermore, the long fermentation of sourdough helps neutralize phytic acid in these whole grains, unlocking minerals for better absorption.
Before modern hybrid dwarf wheat dominated the globe, a diverse roster of grains sustained early civilizations. Baking with these "ancient grains" is essentially time travel. Here is the chronological path of domestication that led to the flour in your banneton:
?
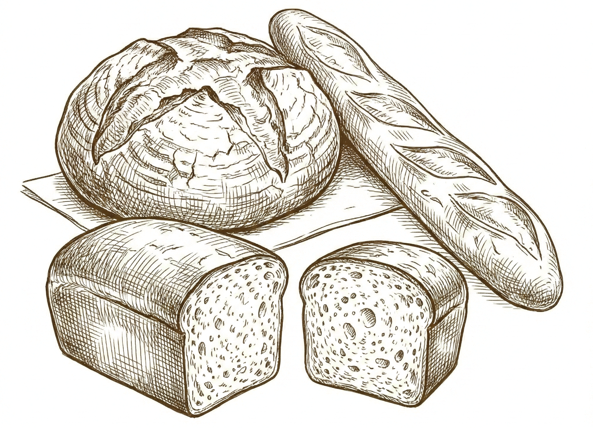
The world is filled with a variety of bread types. In this Chapter, we will highlight a sampling of breads. The bread types are organized in sections: Leavened Breads, Rye & Hearty Breads, Flatbreads, Enriched Breads and Traditional Breads. We have used a connection to Wikipedia since they can provide greusome detail on any of these breads. For an exhaustive list of bread types, check out Wikipedia's List of breads
It is worth a few minutes to scan even the few breads we have highlighted in our list. There are some interesting facts and surprising human connections with most bread type. Afterall, we have been consuming bread of some kind for over 10,000 years.
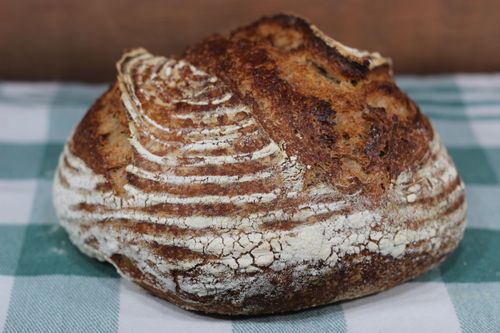
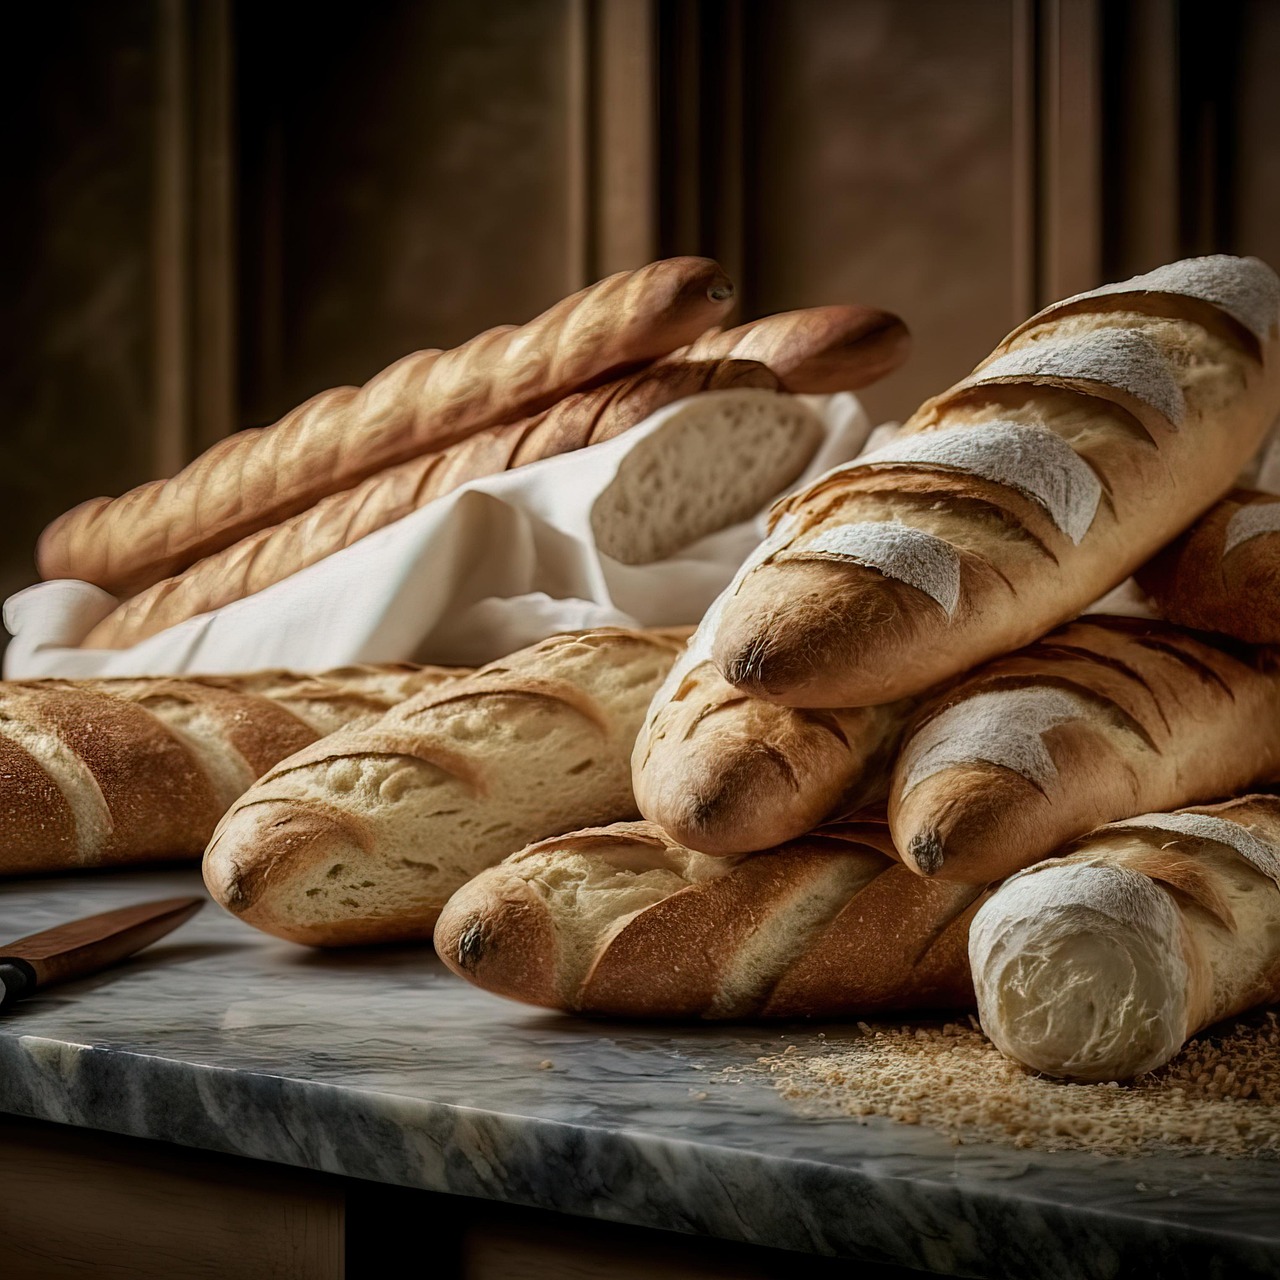
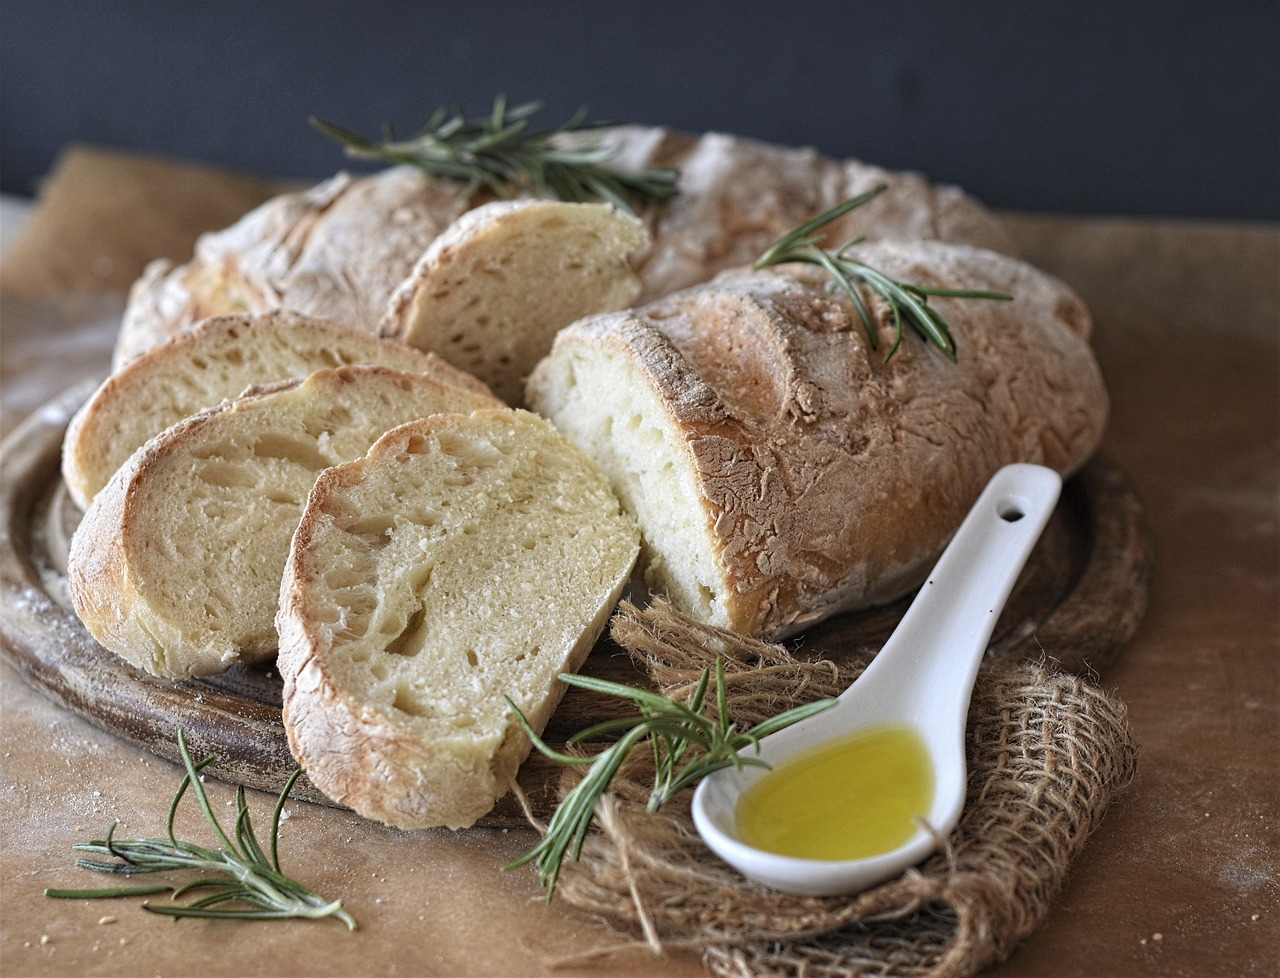
Focaccia
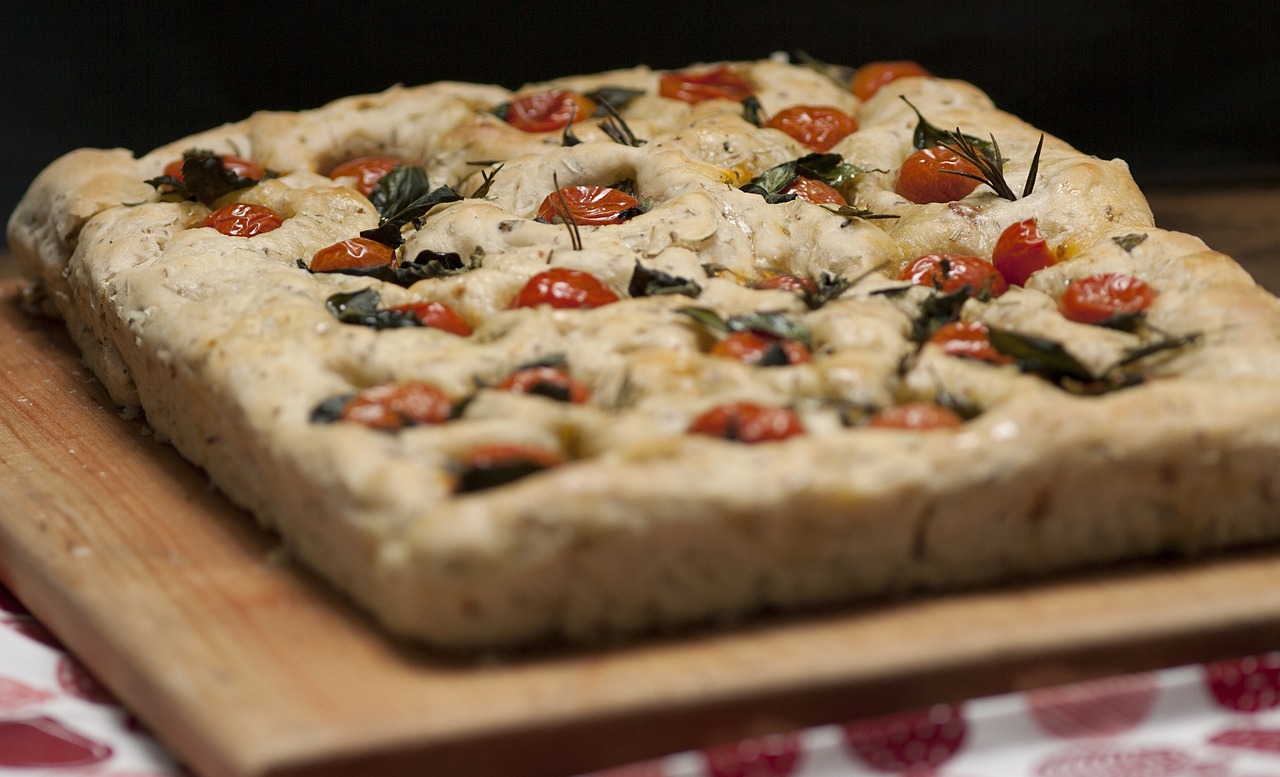
Bagel
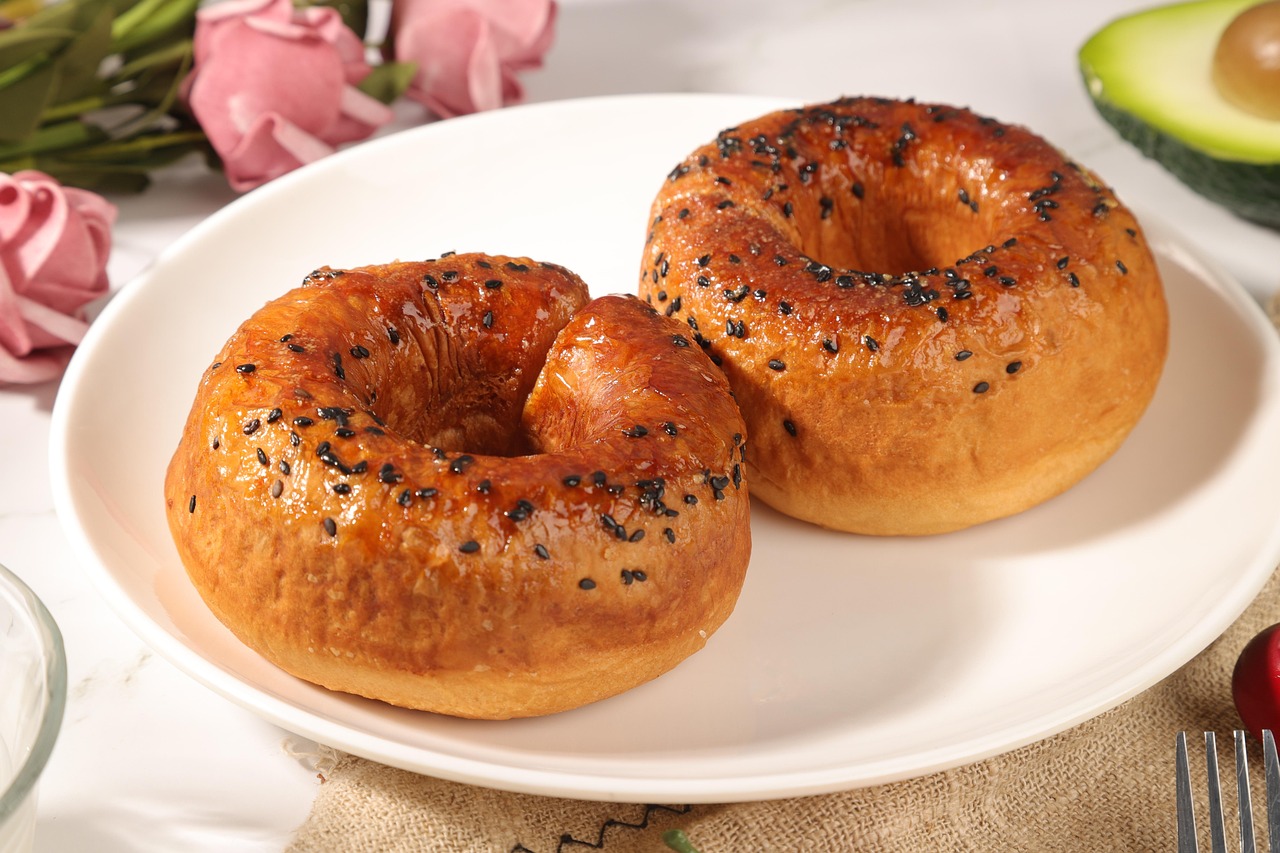
Pretzel
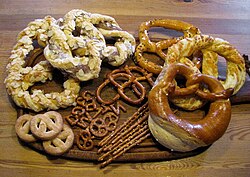
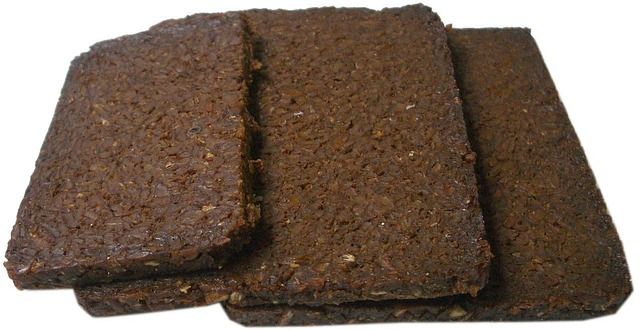
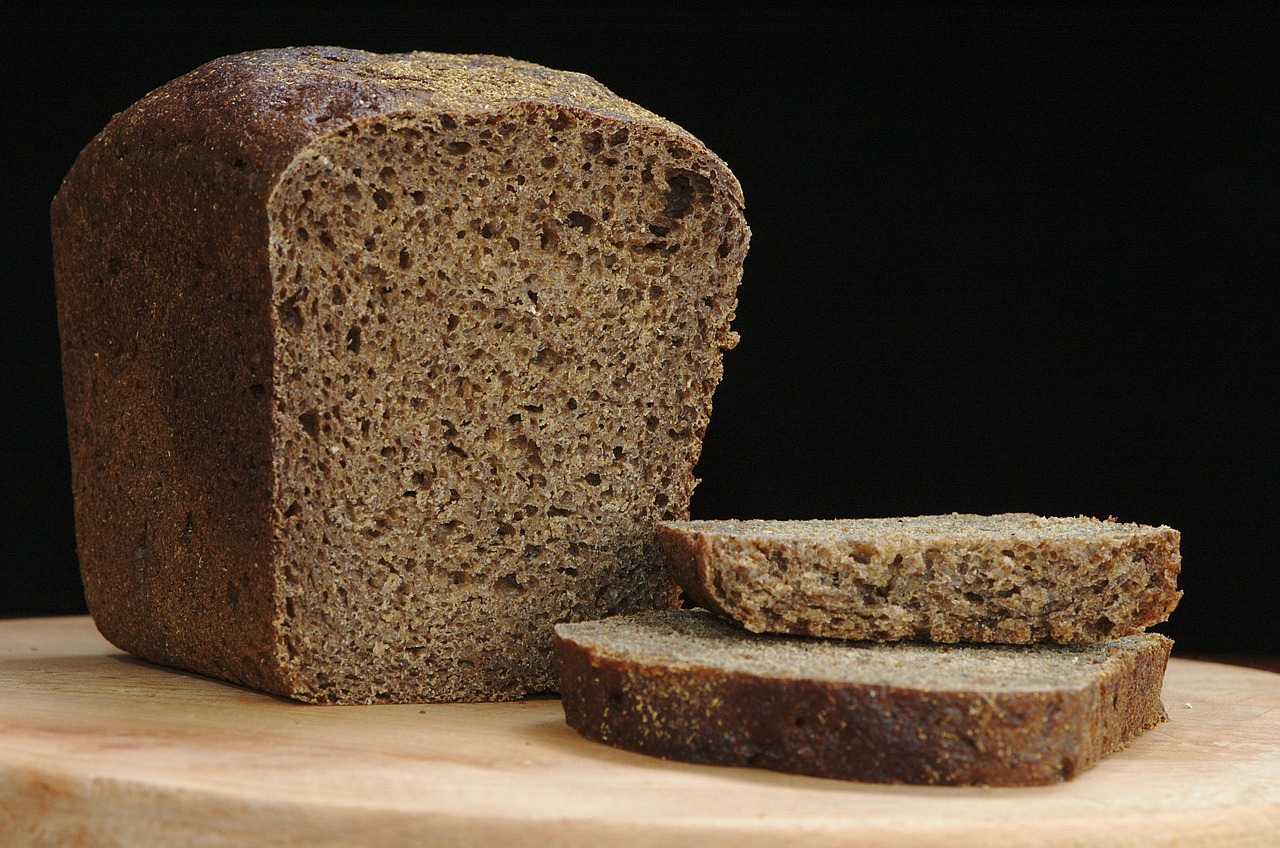

Irish Soda Bread
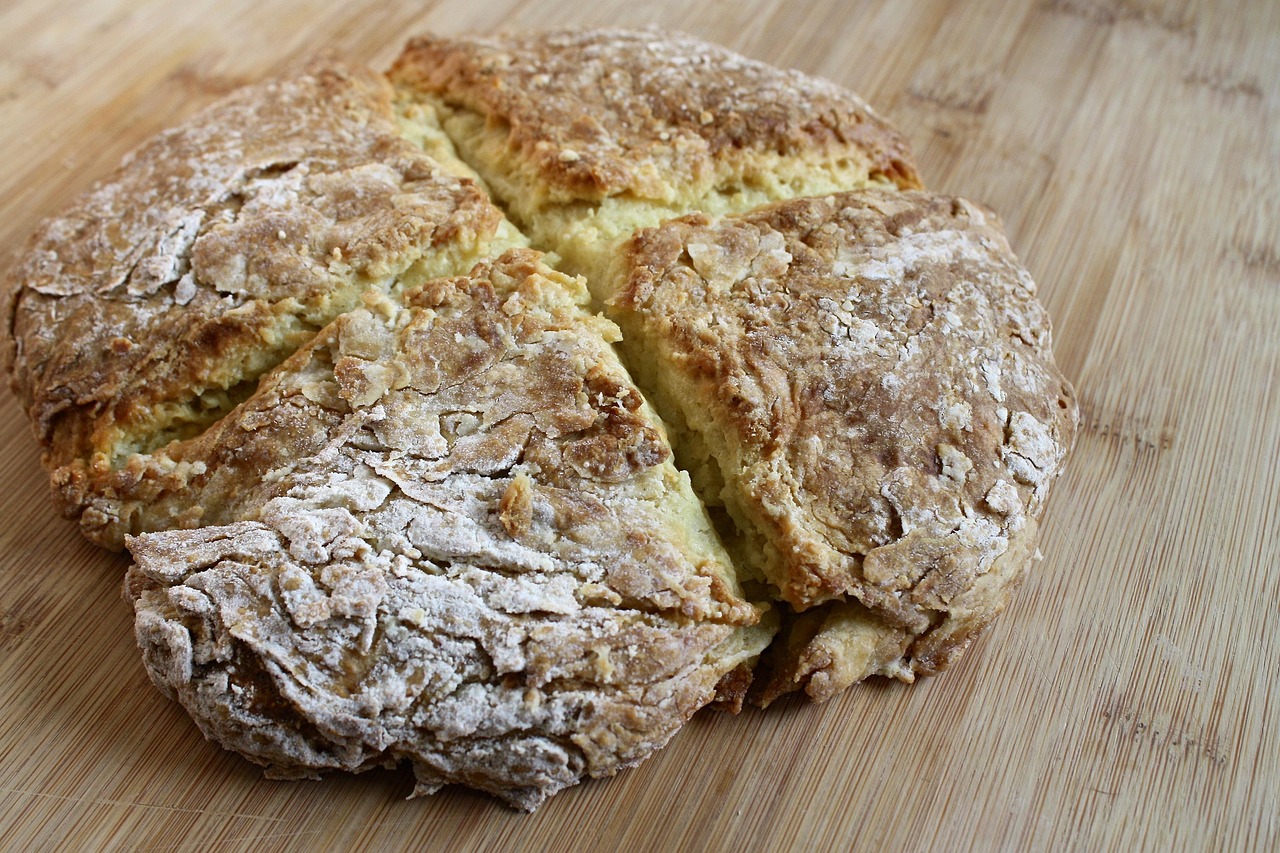

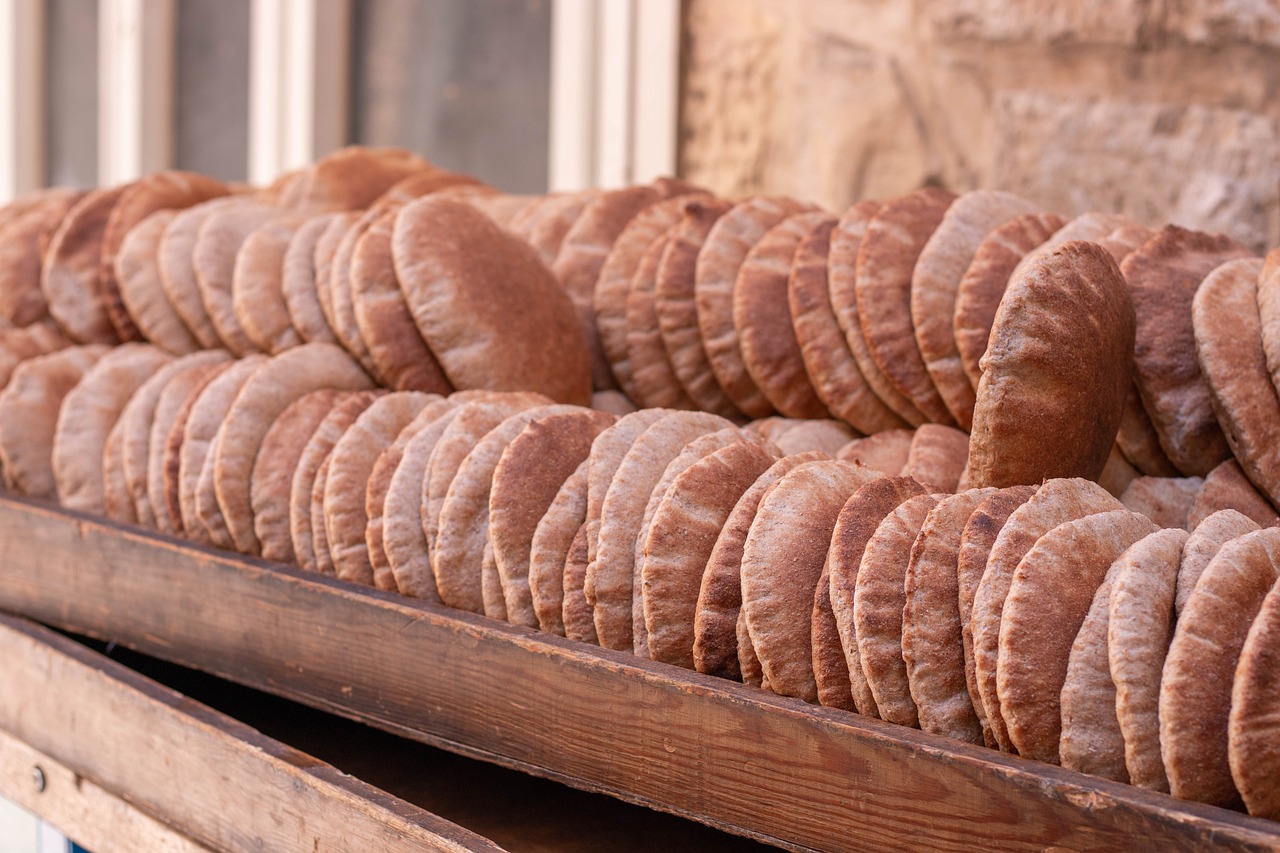
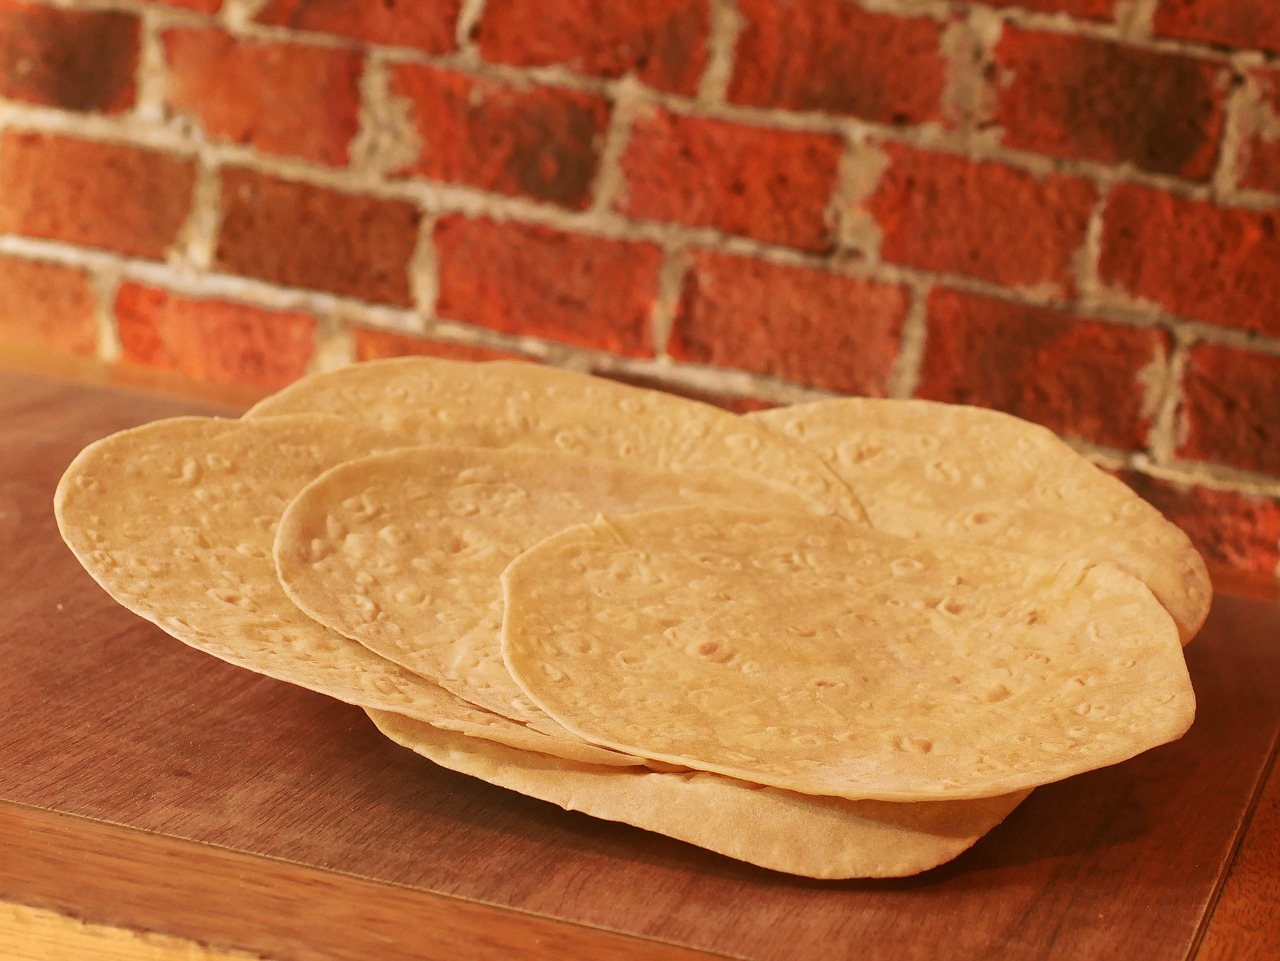
Injera
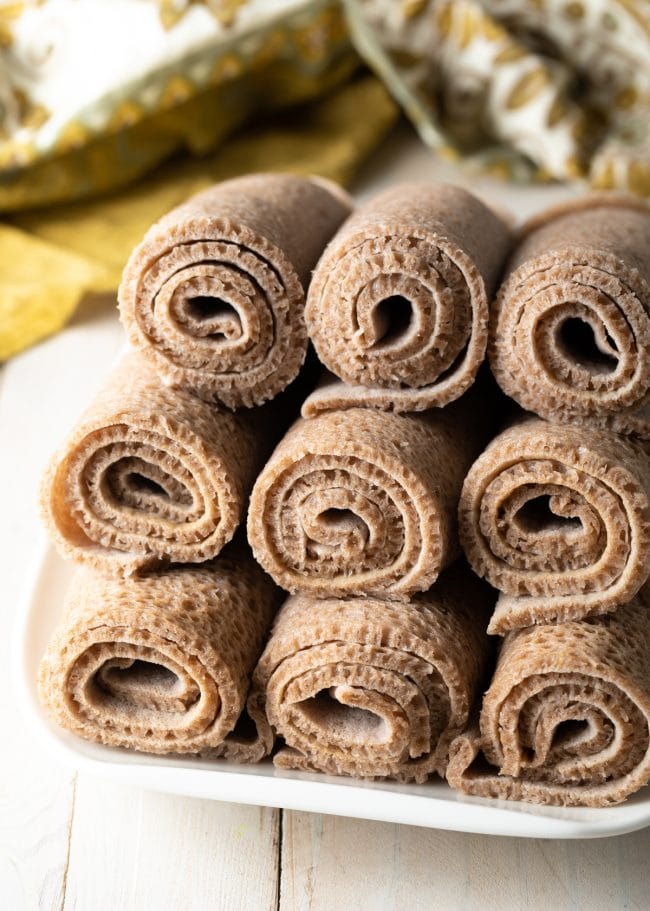
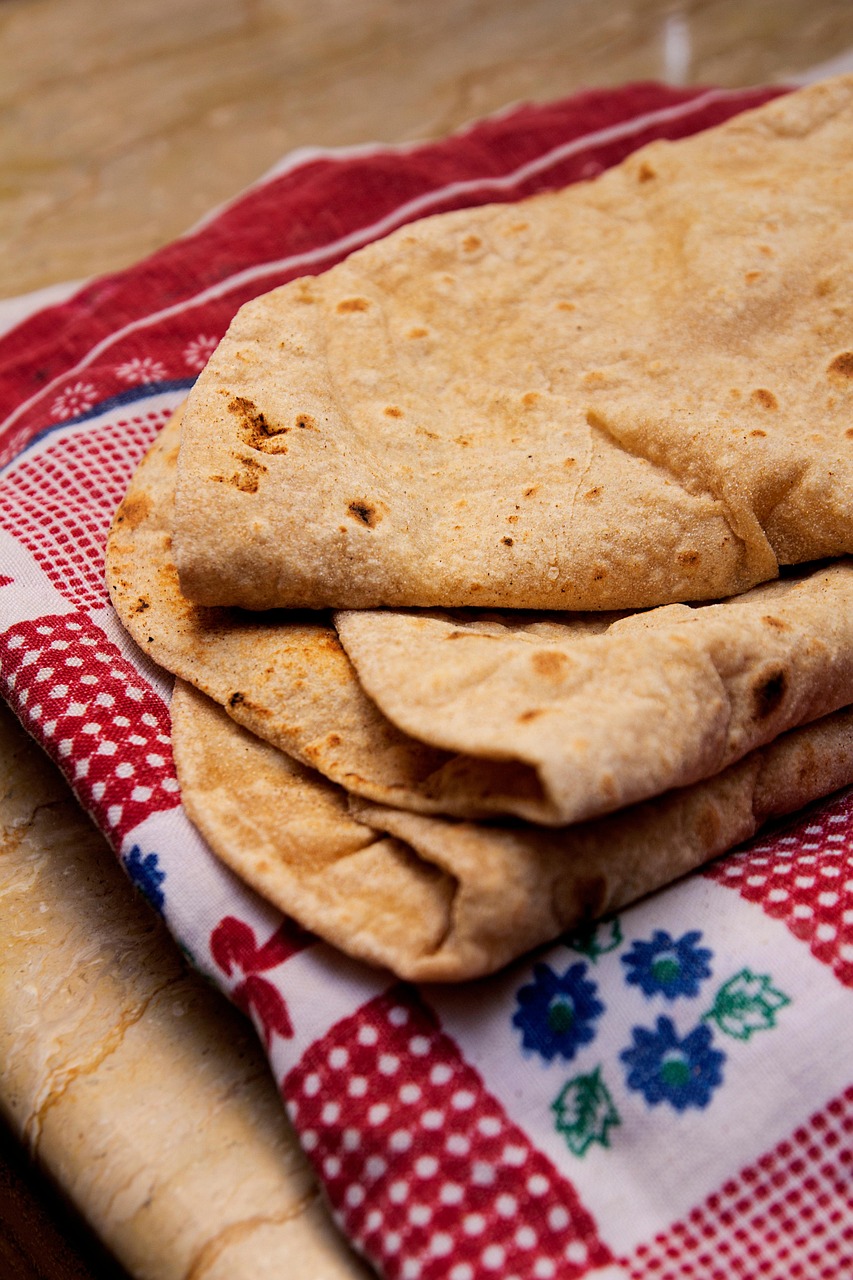
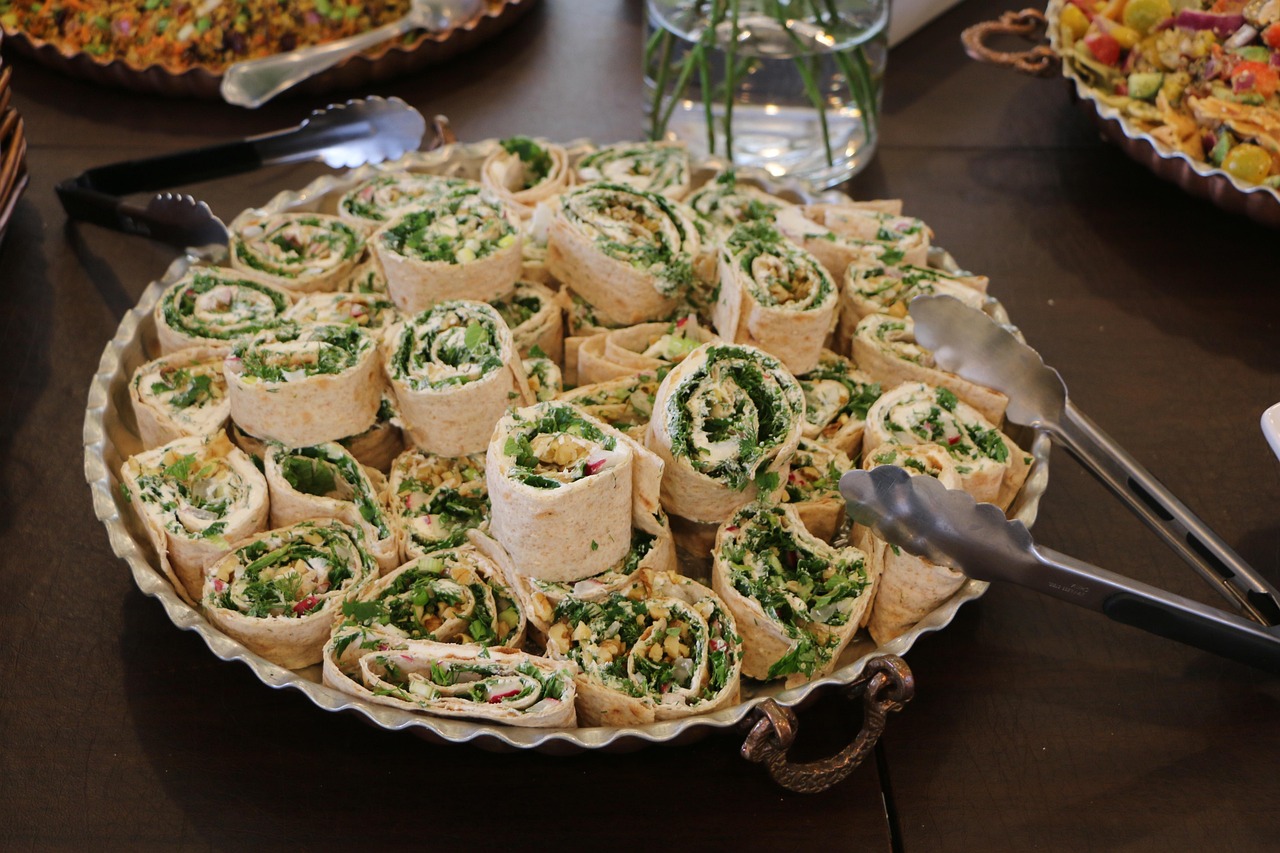
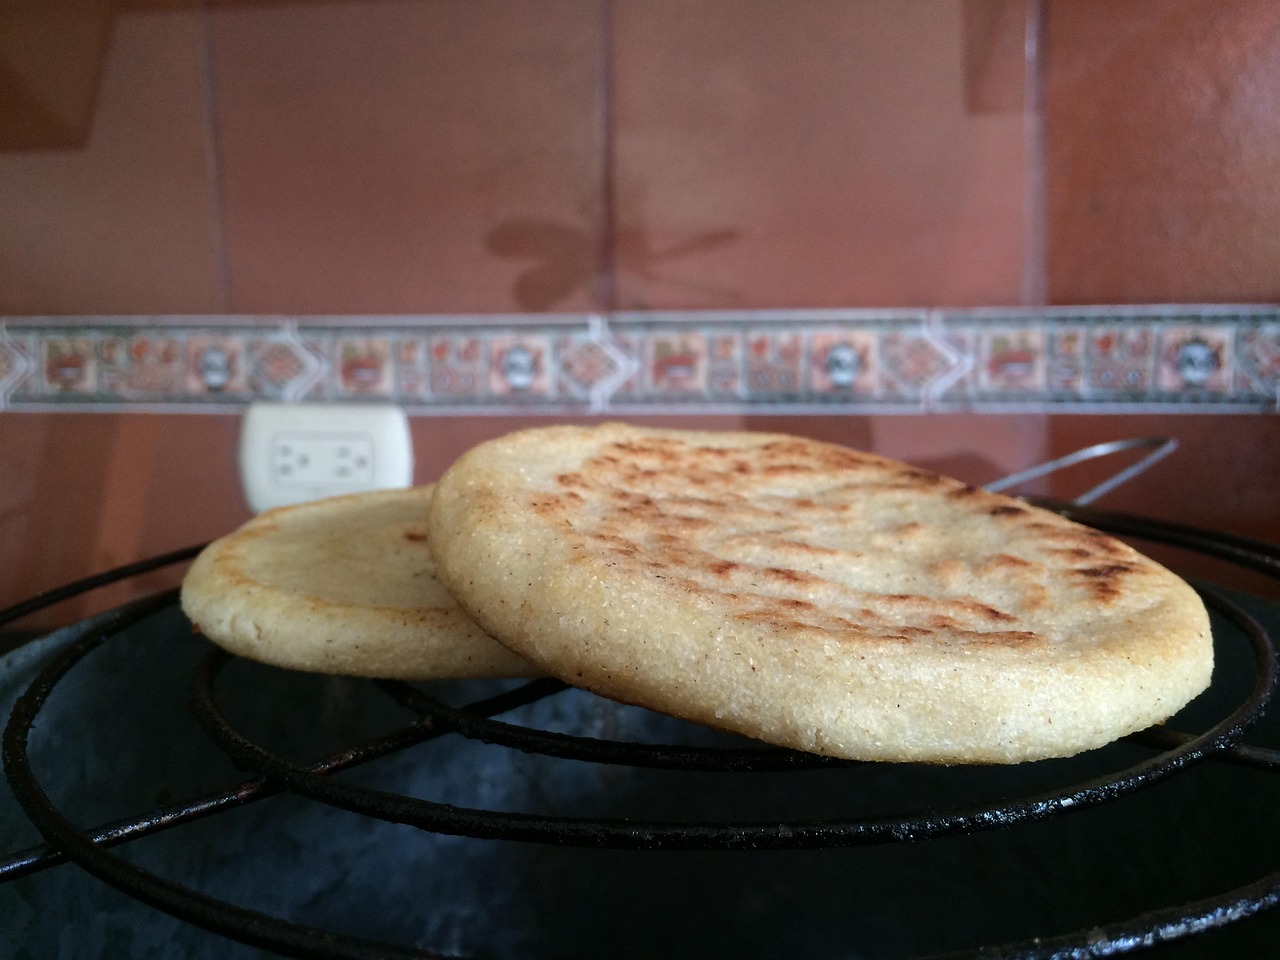
Matzah
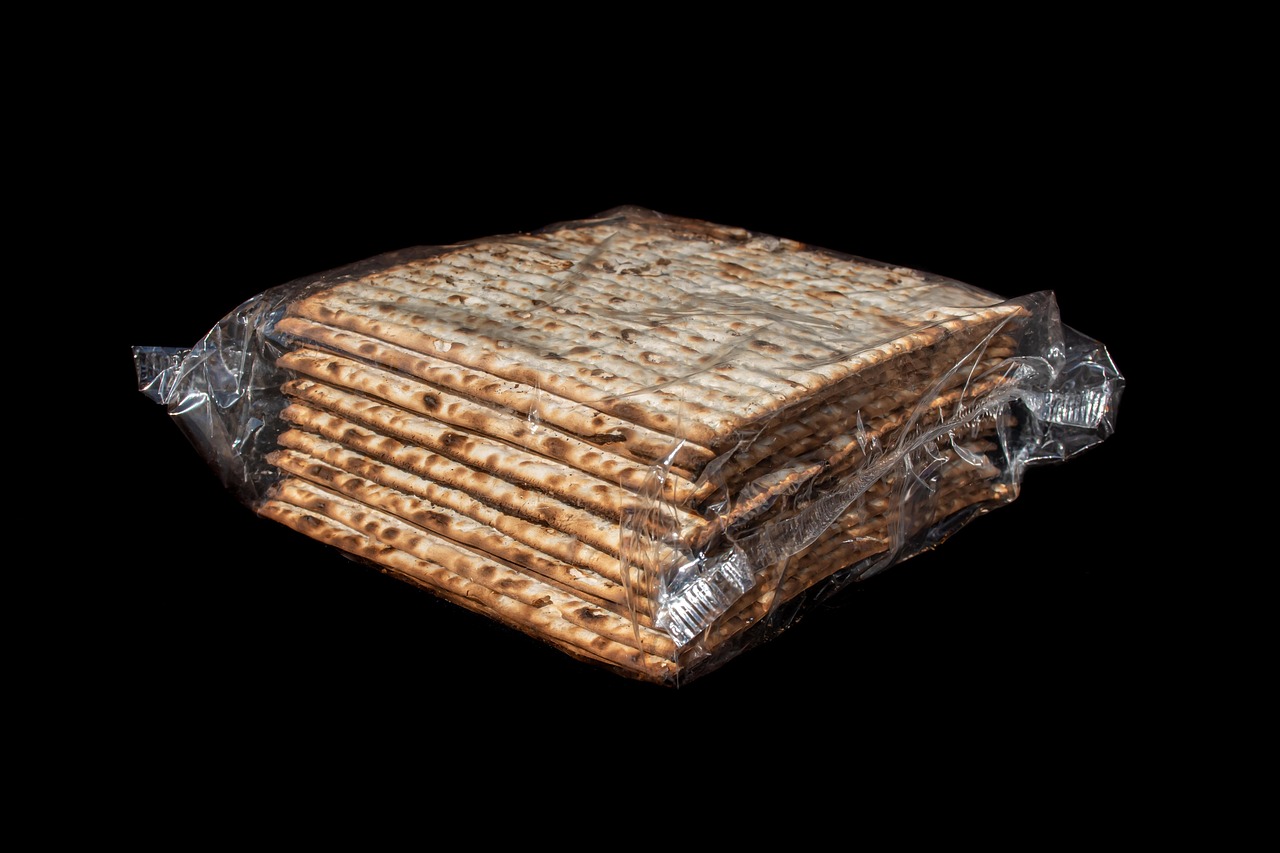
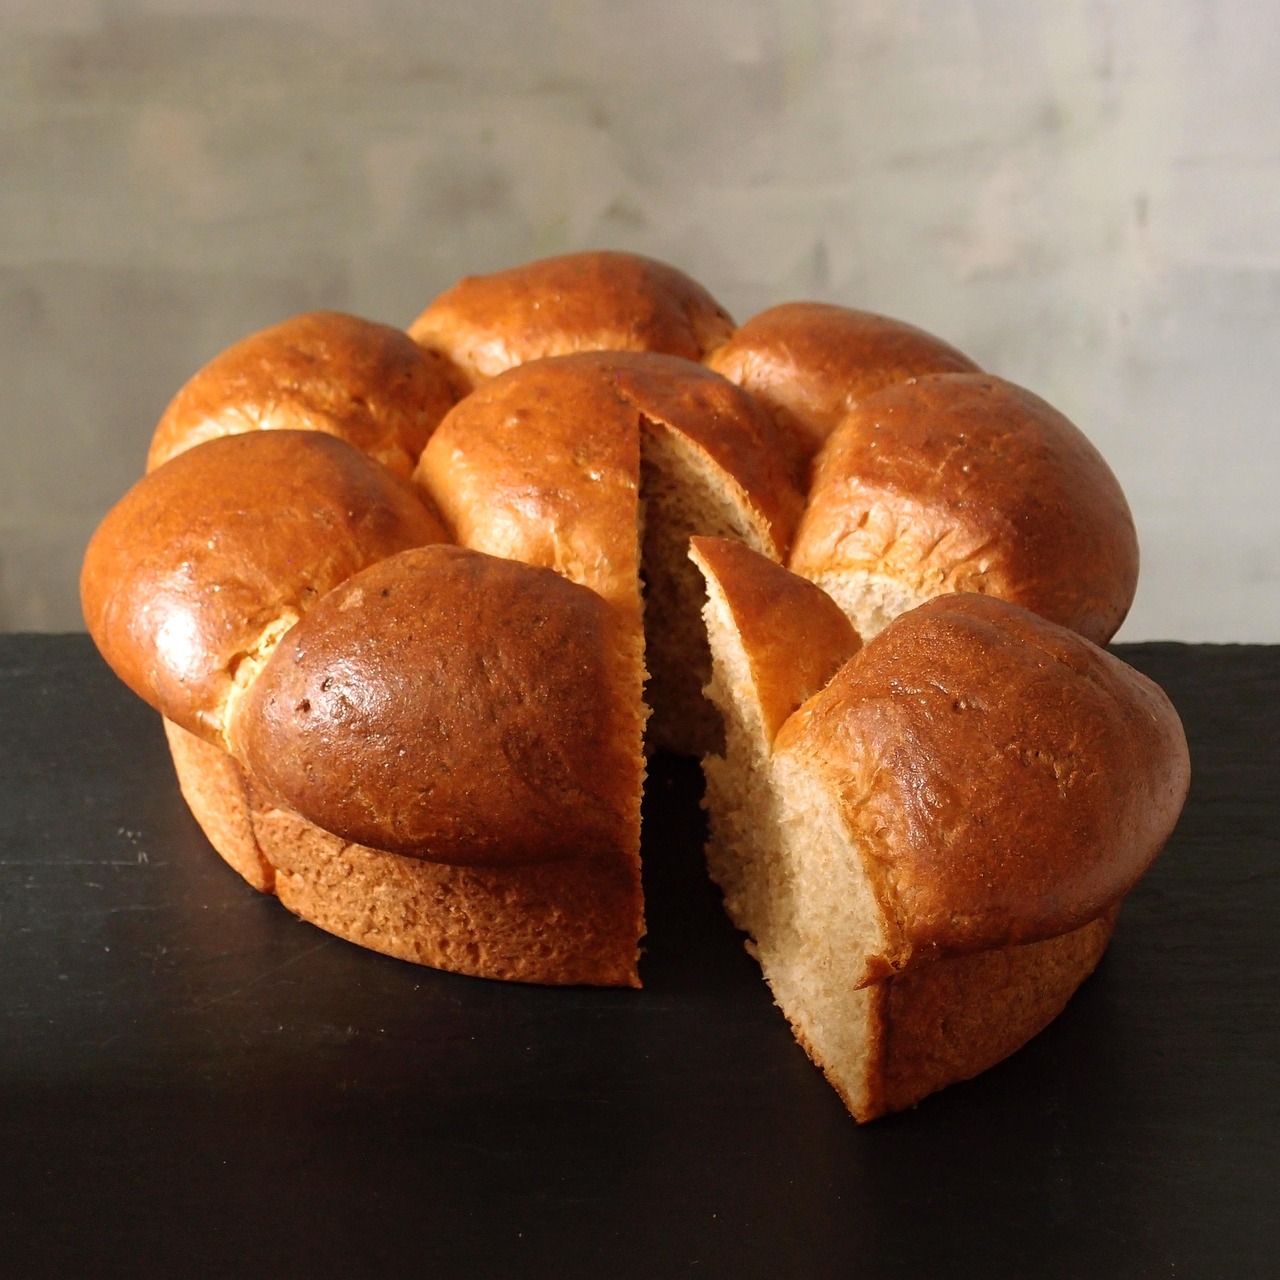
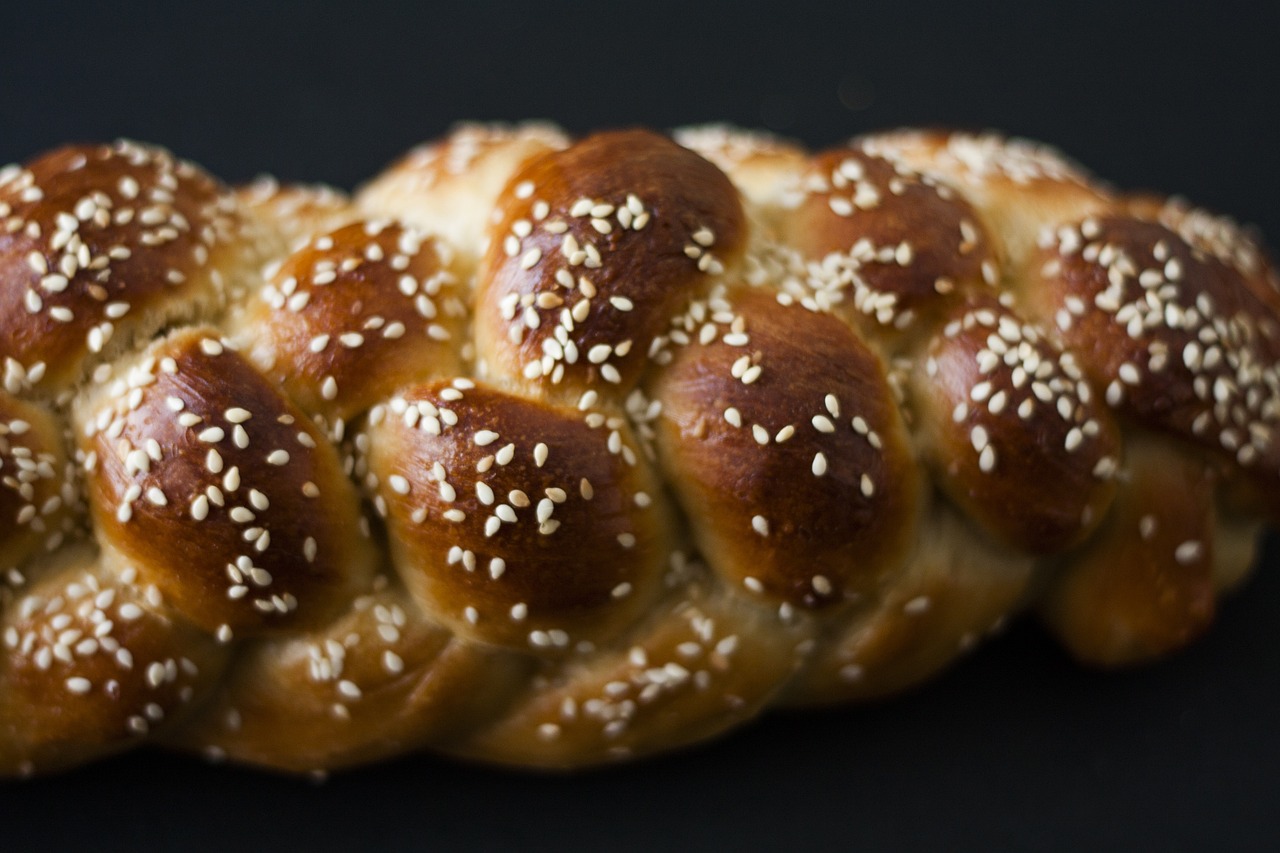
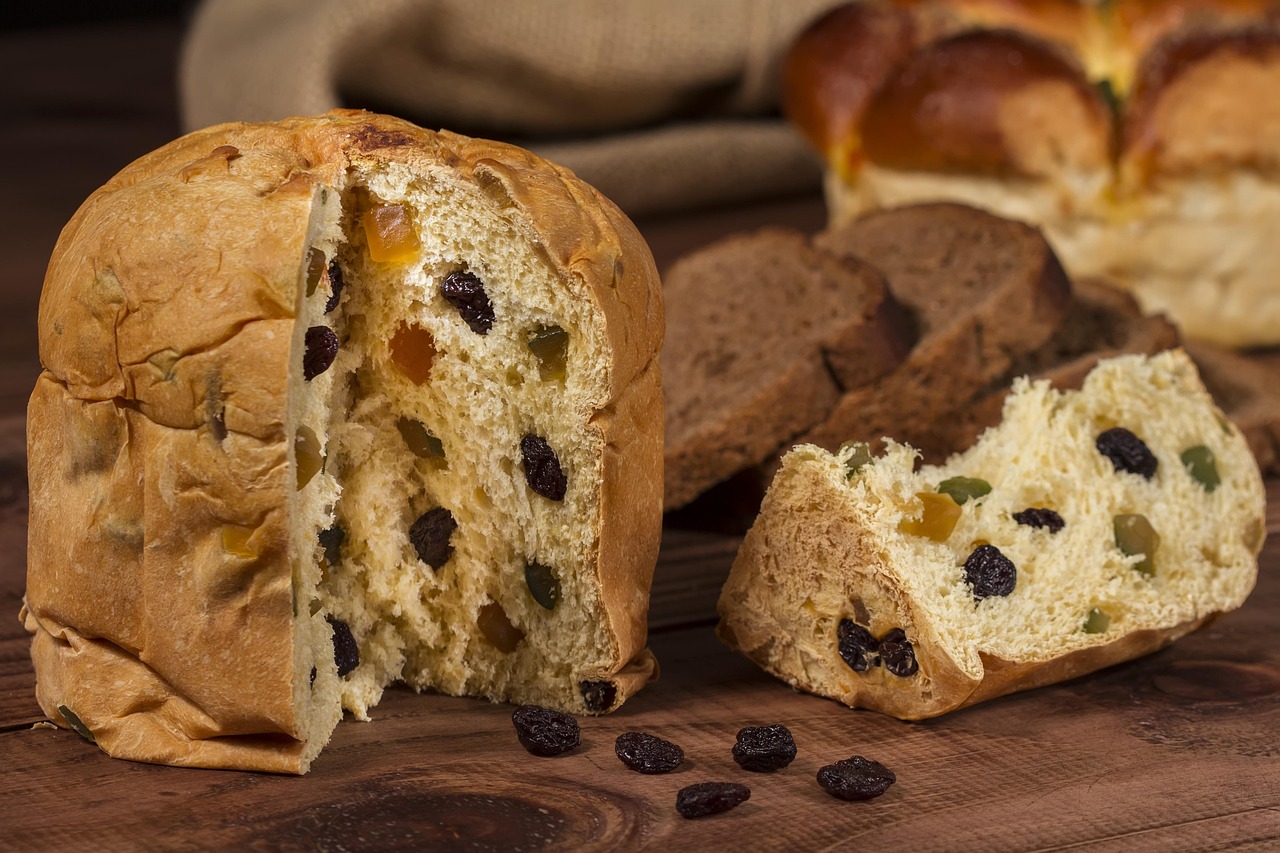
Stollen
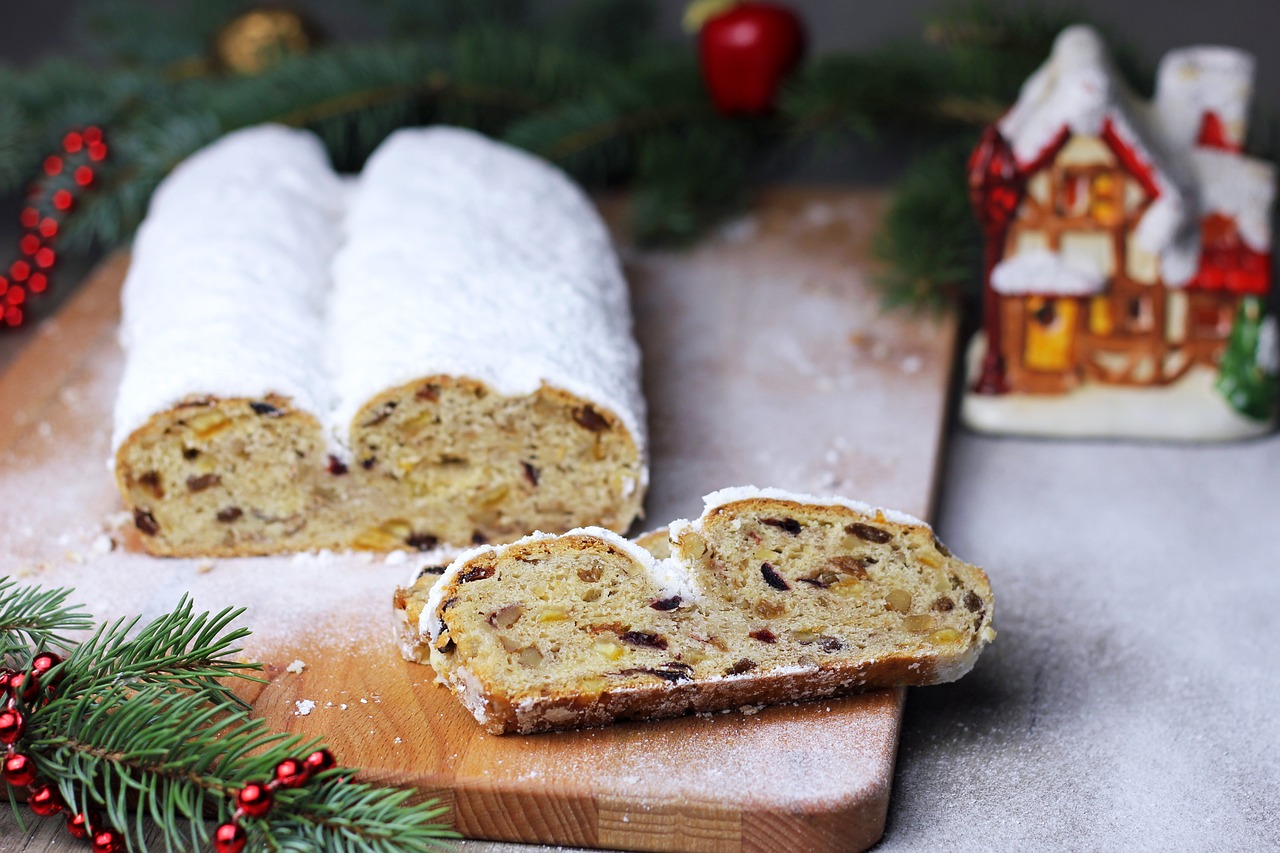
Pan de Muerto
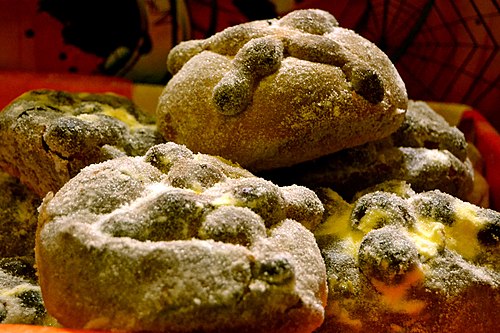

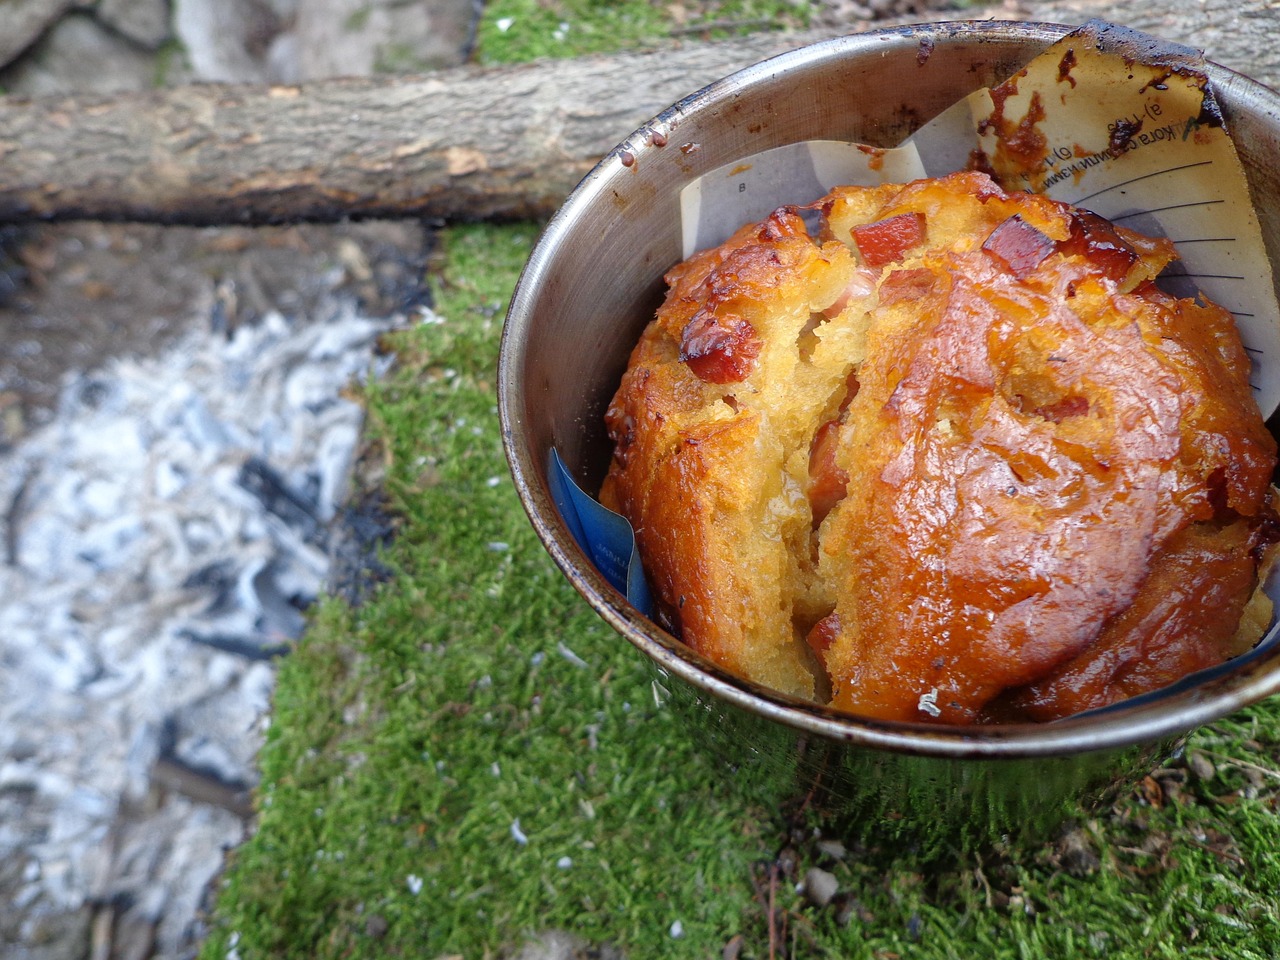
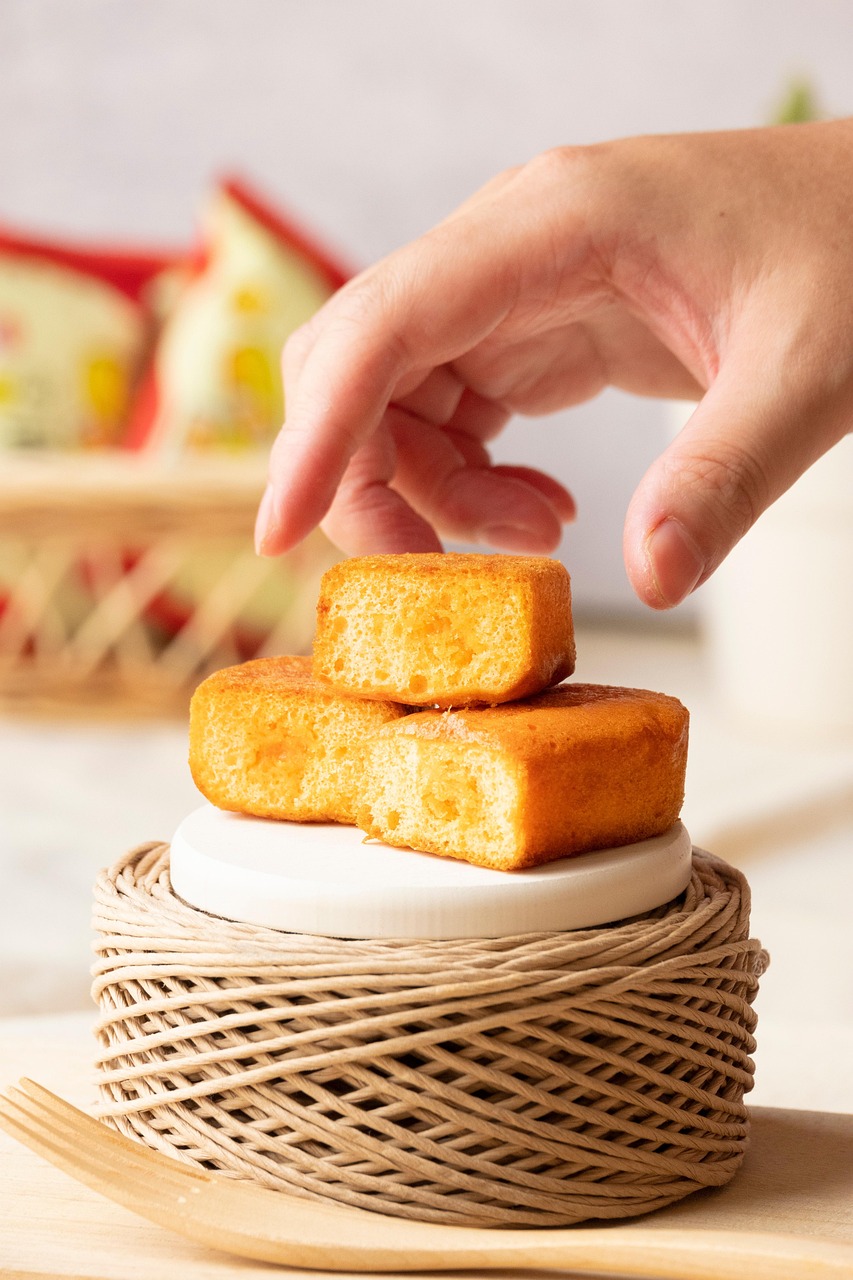
Mantou
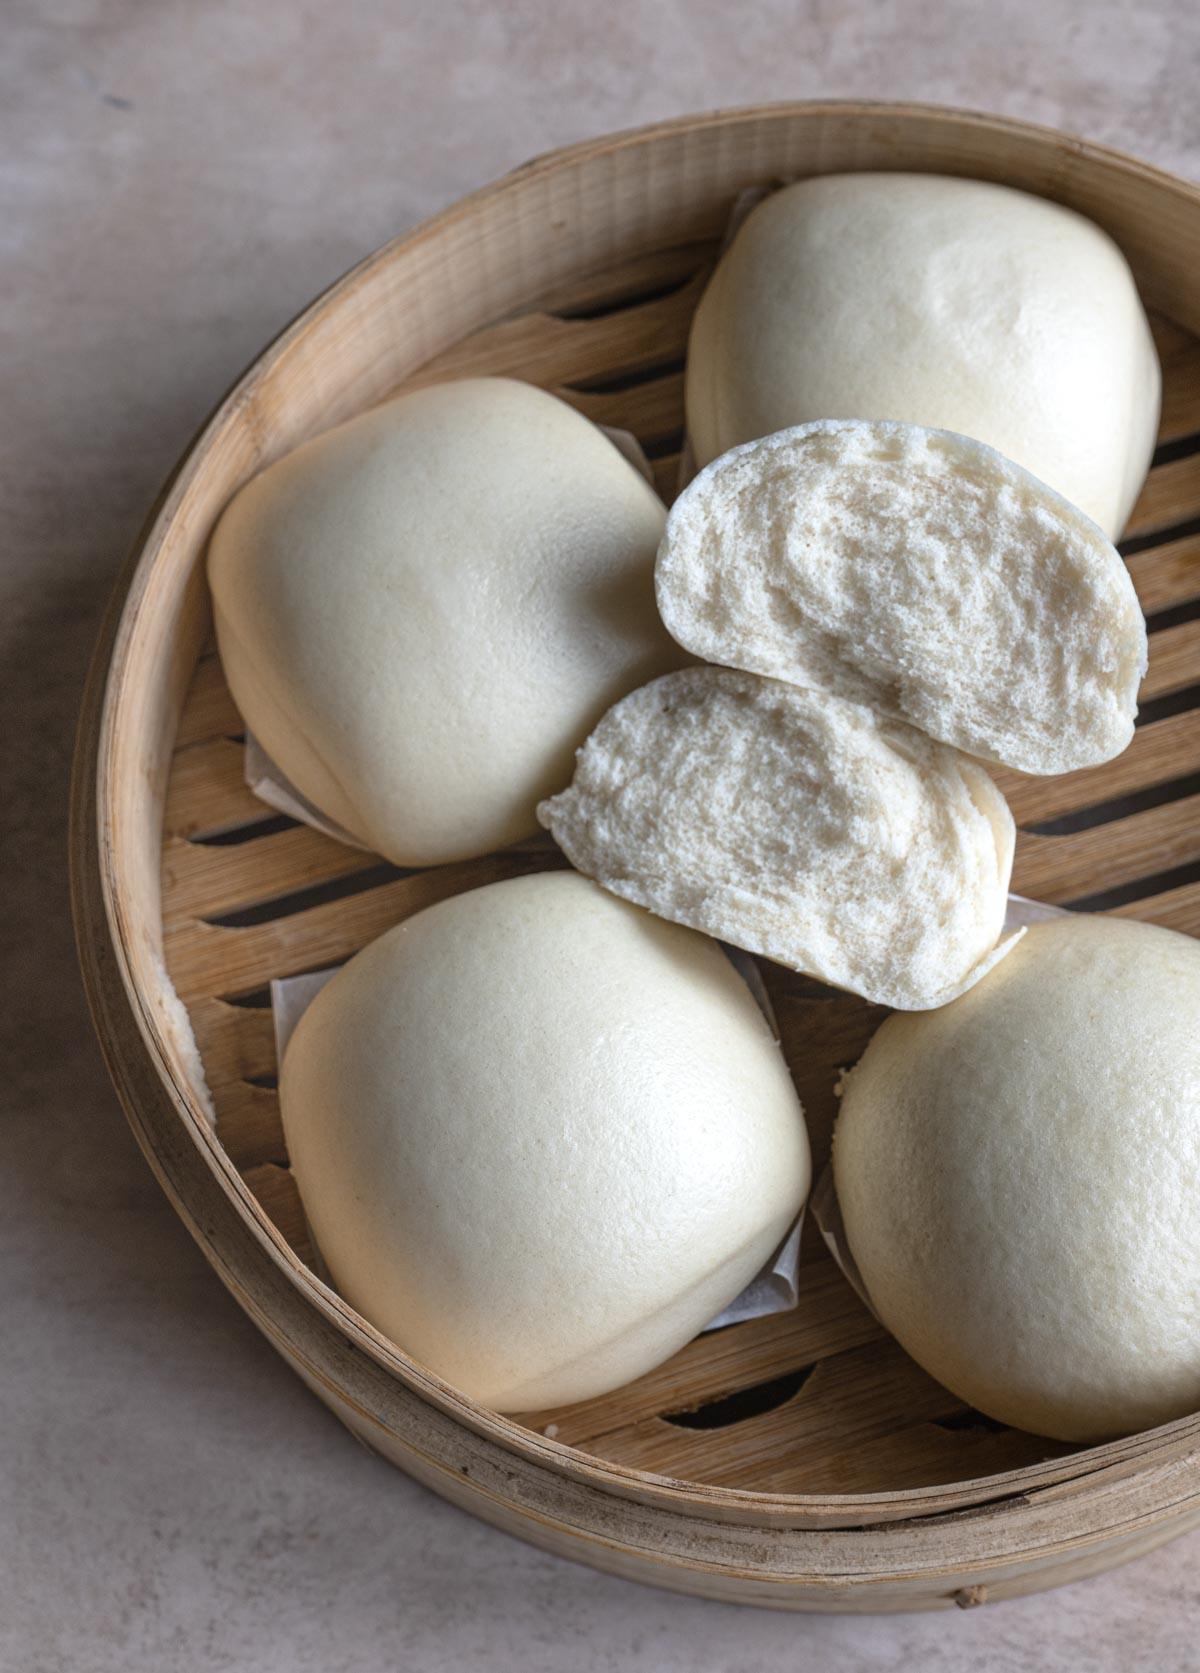
Frybread
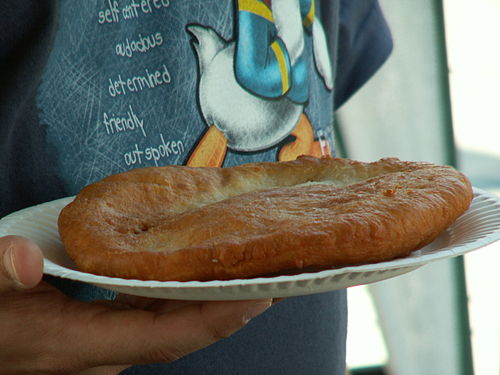
No Rabbit Hole content...yet!
Recipe Factoids chapter includes Nutrition and bread-nerd facts for all Sourjoe Recipes. Each Recipe card in the App has a link to these factoid cards. In some cases, a more detailed description of the Recipe or bread results is given. Live and Learn!

| Ingredient | Type | Amount | Baker's % |
|---|---|---|---|
| Total | |||
| Item | Value |
|---|---|
| Total Recipe Weight | |
| Total Recipe Flour | |
| Total Recipe Water | |
| Recipe Hydration | |
| Levain Flour % | |
| Levain % | |
| Room Temp. Bread Weight | g |
| Weight Loss | g |
| Total Loaf Calories | |
| Calories/gram |
A step-by-step video for your selected recipe will appear here.
More Factoids to come...
Here is a sample of the Recipes section. Recipes are added and/or updated regularly. There are Beginner, Intermediate and Advanced recipes to choose from.

All Recipes are organized as recipe cards. Example below. Multiple recipes can be in progress in the app.

Preview of a Recipe Step as it appears in the Recipes section of app.sourjoe.com. Every Step in every Recipe conforms to this structure:

This suite of sourdough baking-oriented calculators are useful tools for the home baker. Use them to learn about the subject each calculator addresses and to run what-if scenarios when designing a custom recipe, such as hydration or target temperatures.
More stuff coming soon...
More Factoids to come...
Baking is most repeatable by weight, but recipes still mix cups, spoons, ounces, grams, millilitres, oven temperatures, and butter sticks. Use these as practical North American baking references. Ingredient cup weights are approximate because flour type, grind, packing, brand, and humidity all matter.
| 1 cup | 16 Tbsp = 48 tsp = 8 fl oz = about 240 mL |
|---|---|
| 3/4 cup | 12 Tbsp = 36 tsp = 6 fl oz = about 180 mL |
| 2/3 cup | 10 Tbsp + 2 tsp = about 160 mL |
| 1/2 cup | 8 Tbsp = 24 tsp = 4 fl oz = about 120 mL |
| 1/3 cup | 5 Tbsp + 1 tsp = about 80 mL |
| 1/4 cup | 4 Tbsp = 12 tsp = 2 fl oz = about 60 mL |
| 1/8 cup | 2 Tbsp = 6 tsp = 1 fl oz = about 30 mL |
| 1 Tbsp | 3 tsp = 1/2 fl oz = about 15 mL |
| 1 tsp | about 5 mL |
| 1/2 tsp | about 2.5 mL |
| 1/4 tsp | about 1.25 mL |
| 1 kilogram | 1,000 g = about 2.205 lb |
|---|---|
| 1 pound | 16 oz = about 454 g |
| 1 ounce | about 28.35 g |
| 1 gram | about 0.035 oz |
| 100 g | about 3.53 oz |
| 500 g | about 1.10 lb |
| 1 litre water | about 1 kg |
| 1 mL water | about 1 g |
| 1 fluid ounce | about 30 mL |
|---|---|
| 1 cup liquid | about 240 mL |
| 1 pint | 2 cups = 16 fl oz = about 480 mL |
| 1 quart | 4 cups = 32 fl oz = about 950 mL |
| 1 gallon | 16 cups = 128 fl oz = about 3.84 L |
| 1 cup water | about 227 g in many baking charts |
| 1 Tbsp water | about 14 to 15 g |
| 1 tsp water | about 5 g |
| 1 stick | 1/2 cup = 8 Tbsp = about 113 to 115 g = 4 oz |
|---|---|
| 2 sticks | 1 cup = 16 Tbsp = about 227 g = 8 oz |
| 4 sticks | 2 cups = 32 Tbsp = about 454 g = 1 lb |
| 1 Tbsp butter | about 14 g = 1/2 oz |
| 1/4 cup butter | 4 Tbsp = about 57 to 58 g = 2 oz |
| 1/3 cup butter | 5 Tbsp + 1 tsp = about 76 g |
| 2/3 cup butter | 10 Tbsp + 2 tsp = about 151 g |
| Ingredient | Volume | Approx. weight |
|---|---|---|
| Water | 1 cup | 227 g / 8 oz |
| Milk / buttermilk / yogurt / sour cream | 1 cup | about 227 g |
| Sourdough starter / leaven | 1 cup | about 227 to 241 g |
| All-purpose flour | 1 cup | about 120 g |
| Bread flour | 1 cup | about 120 g |
| Whole wheat flour | 1 cup | about 113 g |
| Medium / white rye flour | 1 cup | about 106 g |
| Spelt flour | 1 cup | about 99 g |
| Semolina flour | 1 cup | about 163 g |
| Almond flour | 1 cup | about 96 g |
| Coconut flour | 1 cup | about 128 g |
| Granulated sugar | 1 cup | about 198 g |
| Brown sugar, packed | 1 cup | about 213 g |
| Confectioners' sugar, unsifted | 1 cup | about 113 g |
| Honey | 1 Tbsp | about 21 g |
| Molasses | 1/4 cup | about 85 g |
| Table salt | 1 Tbsp | about 18 g |
| Kosher salt, Morton | 1 Tbsp | about 16 g |
| Kosher salt, Diamond Crystal | 1 Tbsp | about 8 g |
| Instant yeast | 2 1/4 tsp | about 7 g |
| Baking powder | 1 tsp | about 4 g |
| Baking soda | 1/2 tsp | about 3 g |
| Vegetable oil | 1 cup | about 198 g |
| 300°F | about 150°C | 375°F | about 190°C |
|---|---|---|---|
| 325°F | about 165°C | 400°F | about 205°C |
| 350°F | about 175°C | 425°F | about 220°C |
| 450°F | about 230°C | 500°F | about 260°C |
?
? Enter any two baker's-math values and choose which third value Sourjoe should calculate.
A cup of flour can weigh anywhere from 120 g to 160 g depending on how it is scooped, so volume recipes drift. Baker's math fixes this by weighing everything and expressing each ingredient relative to the total flour, which is always set to 100%. Two things fall out of that one convention: any recipe can be scaled to any size with simple multiplication, and any two recipes can be compared at a glance — a 75% hydration dough is wetter than a 65% one no matter how many loaves either makes.
A sourdough formula written in baker's math looks like this — every line is a percentage of the 500 g flour:
Each option in Calculate this field is one of the three everyday baker's-math questions:
A levain is itself flour + water, so a formula's stated hydration slightly understates the dough's true hydration. Example: 500 g flour, 375 g water, plus 100 g of a 100%-hydration levain (50 g flour + 50 g water) gives a true hydration of (375+50) ÷ (500+50) = 77%, not 75%. Casual baking can ignore this; formula development should not. Total flour also means all flours combined — in a 400 g bread flour + 100 g rye dough, rye is 20% and the flour basis is still 500 g.
?
? Calculate how much flour and water to add to a seed starter to build a target leaven.
| Parameter | Value |
|---|---|
| ? Target Leaven Amount | |
| ? Target Leaven Hydration | % |
| ? Seed Starter Amount | |
| ? Seed Starter Hydration | % |
| ? Water to Add | -- |
| ? Flour to Add | -- |
You keep a small "seed" of mature starter and grow it into the larger leaven a recipe needs. The trick: your seed already contains flour and water, so to hit a target leaven at a target hydration you must add flour and water in the right amounts — accounting for what's already in the seed. That's the whole job of this calculator.
Leaven hydration changes far more than texture — it shifts fermentation speed, acidity balance, and which breads the leaven naturally suits. Lower hydration favours acetic (vinegary, sharp) acid and slower, cooler-tolerant ripening; higher hydration favours lactic (yogurt-tangy, mild) acid and faster ripening. Here is what each band typically means and makes:
| Leaven Style | Hydration | Breads normally made with it | Why bakers choose it |
|---|---|---|---|
| Lievito madre | ~45–50% | Panettone, pandoro, colomba and other enriched Italian celebration breads. | A very firm, sweet-leaning culture that stays mild and strong enough to lift heavy butter-and-egg doughs. Kept stiff to restrain acidity so the crumb tastes delicate, not sour. |
| Stiff leaven | 50–65% | Rye-blend loaves, bagels, some baguettes, doughs wanting extra structure. | Slower, more controlled ripening and a stronger gluten build. Tends toward a rounder, more acetic tang and gives a longer window before over-ripening — handy in warm kitchens. |
| Medium leaven | 70–85% | Everyday pan loaves and mixed-flour sourdoughs. | A practical compromise: easier to mix than a stiff build, less quick-souring than 100%. Balanced flavour and a forgiving schedule. |
| Liquid leaven | 100% | Classic country boules, pain au levain, most rustic open-crumb sourdough. | Equal flour and water — trivial to maintain, mix, and do baker's math with. Ripens at a moderate pace with a balanced lactic/acetic profile. The default for most home bakers. |
| High-hydration leaven | 110–125%+ | High-hydration ciabatta, focaccia, very open-crumb breads. | Loose and batter-like; ripens fast and leans mild/lactic. Adds extensibility (dough stretches easily) but the timing window is short, so it suits bakers watching the clock closely. |
Sourjoe note: hydration is not "better" or "worse" by itself. As a rule of thumb: stiffer → slower, sharper (acetic), more structure; wetter → faster, milder (lactic), more extensible. Match the leaven to the bread and the schedule you actually have.
?
? Calculate total bread recipe hydration, including water, other liquids, and leaven contribution.
| Parameter | Value |
|---|---|
| ? Recipe Water | |
| ? Other Liquids | |
| ? Recipe Flour | |
| ? Leaven Amount | |
| ? Leaven Hydration | % |
| ? Bread Recipe Hydration | -- % |
Where your dough lands on the hydration scale shapes handling, crumb, and which breads it suits. These are practical ranges, not hard rules — flour strength and milling shift them.
| Hydration | Feel & handling | Crumb | Typical breads |
|---|---|---|---|
| 50–57% | Stiff, firm, very easy to shape. Machine-friendly. | Tight, uniform, close. | Bagels, pretzels, some pan breads, grissini. |
| 58–65% | Firm but supple; forgiving for beginners. | Even, moderately close. | Baguettes, many sandwich loaves, enriched doughs, brioche-adjacent. |
| 66–72% | The everyday sweet spot; slightly tacky, workable by hand. | Moderately open, good structure. | Everyday sourdough, pain de campagne, most rustic loaves. |
| 73–80% | Slack and sticky; needs coil/stretch-and-folds and confidence. | Open, glossy, irregular holes. | Rustic country boules, higher-hydration sourdough, pizza. |
| 81–90%+ | Very wet, batter-leaning; demands skilled handling and strong flour. | Wild, very open, custardy. | Ciabatta, focaccia, some pan-supported ryes. |
Hydration is total water as a baker's percentage of total flour. But "total water" is sneakier than it looks: it includes the water hiding inside your leaven and any other liquids (milk, egg, oil-adjacent additions depending on how you account for them). This calculator adds those hidden contributions so the number reflects the real dough, not just what you poured from the jug.
| Range | Handling | Typical Crumb |
|---|---|---|
| Low (55–65%) | Stiff, easy to shape, forgiving. | Tighter, even crumb; sandwich-style. |
| Medium (65–75%) | The everyday rustic range; a workable balance. | Moderately open, good structure. |
| High (75–85%+) | Slack, sticky, needs coil folds and confident handling. | Open, glossy, irregular holes. |
Sourjoe note: higher hydration isn't a skill badge. Flour protein and milling matter — a strong bread flour carries 80% comfortably where a weak flour turns to soup at 70%.
?
? Estimate bulk rise, proof, and total rise time from dough temperature, inoculation, hydration, and salt.
| Parameter | Value |
|---|---|
| ? Dough Temperature | |
| ? Inoculation | % |
| ? Dough Hydration | % |
| ? Salt | % |
| ? Bulk Time | -- |
| ? Proof Time | -- |
| ? Total Rise Time | -- |
It predicts bulk, proof, and total rise time from four levers — dough temperature, inoculation (how much leaven relative to flour), hydration, and salt — measured against a reference bake. It is a field model, not a law of nature: a tunable starting point you calibrate to your own starter and kitchen.
| Lever | Direction | Why |
|---|---|---|
| Temperature | Warmer → faster | The strongest lever. Rate roughly doubles per ~10°C (the Q10 factor). |
| Inoculation | More leaven → faster | More active culture means more fermentation power per gram of flour. |
| Hydration | Wetter → slightly faster | Mobility helps enzyme and microbial activity, modestly. |
| Salt | More salt → slower | Salt restrains yeast and tightens gluten, damping the pace. |
Every constant is exposed below so you can tune the model to your bakes without it being a black box. The default reference point is 20°C, 20% inoculation, 65% hydration, 2% salt.
Model caution: this is not a fermentation law. Starter strength, flour mix, dough handling, and your chosen "done" point all move the real times. Calibrate against your own bakes.
?
? Estimate baked-and-cooled loaf volume, specific volume, density, and rise score from measured loaf dimensions.
| Parameter | Value |
|---|---|
| ? Weight | |
| ? Diameter | |
| ? Length | |
| ? Width | |
| ? Height | |
| ? Volume | -- cm³ |
| ? Scientific Rise Factor | -- cm³/g |
| ? Density | -- g/cm³ |
Rise factor here is specific volume — how many cubic centimetres of baked loaf you got per gram of dough. A denser brick has a low number; an airy, well-fermented loaf has a high one. Because it divides out weight, it lets you compare a 500 g loaf against a 1200 g one fairly. Measure after baking and full cooling, since a warm loaf is still setting.
Real loaves are domes, not boxes. Treating a boule as a hemisphere-like spherical cap and a batard as an elliptical cap gets much closer to true volume than a cylinder, which assumes the loaf fills its whole footprint at full height:
| Specific Volume | Interpretation |
|---|---|
| Below ~2.5 cm³/g | Dense — under-proofed, weak gluten, or low hydration. Tight crumb. |
| ~3–5 cm³/g | A healthy range for most rustic sourdough. Open but structurally sound. |
| Above ~6 cm³/g | Very airy — enriched or highly extensible doughs, or a slightly over-proofed loaf trading structure for volume. |
Sourjoe note: these bands are orientation, not judgment. A bagel and a ciabatta should not have the same rise factor — the "right" number depends on what you're baking.
| Model Type | What It Assumes | Best Use | Caution |
|---|---|---|---|
| Spherical cap boule | A round loaf is a domed cap, not a full cylinder. | Most realistic simple model for a round, domed boule. | Underestimates odd shapes and overhangs. |
| Elliptical cap batard | A long loaf is an elliptical domed cap. | Better than a box or cylinder for batards with rounded shoulders. | Still an approximation; batard ends vary a lot. |
| Cylinder / elliptical cylinder | The loaf fills its full footprint at full height. | Useful as an upper-bound comparison. | Usually overstates volume because real loaves dome and taper. |
| Density | Weight divided by estimated volume. | Good cross-check against the rise-factor number. | Depends directly on the chosen volume model. |
?
? Calculate the water temperature needed to reach a desired dough temperature after mixing.
| Ingredient | Amount | Temperature | Baker's % |
|---|---|---|---|
| ? Leaven | -- | ||
| ? Flour 1 | -- | ||
| ? Flour 2 | -- | ||
| ? Salt | -- | ||
| ? Other Liquids / Other | -- | ||
| ? Water | -- | -- |
Fermentation speed roughly doubles for every ~10°C rise, so two bakers with the identical formula get wildly different results if one mixes to 22°C and the other to 27°C. Desired Dough Temperature (DDT) is how you make bread repeatable: pick a target final dough temperature, then solve for the one input you can easily control on the day — the water temperature.
Each ingredient contributes heat in proportion to its mass and its specific heat capacity. Water carries far more heat per gram than flour, which is exactly why adjusting water temperature is the efficient lever.
This calculator offers four models via the DDT Model selector. They trade simplicity for precision. Each formula is shown below with a worked example so you can see exactly what it does.
| Model | Inputs used | Best for |
|---|---|---|
| Sourjoe heat-capacity (default) | Every ingredient mass & temperature | Most precise; multi-flour or unusual ingredient temperatures. |
| Classic ×3 (straight dough) | Target, room, flour, friction | Straight doughs with no preferment. Taught by King Arthur (see References). |
| Classic ×4 (with preferment) | + leaven/preferment temperature | Doughs built on a preferment. Taught by King Arthur and The Perfect Loaf (see References). |
| Rise (Smart DDT) | Ingredient masses & temps, mixing time | Thermodynamic model with mixing-time heat loss (Windmill, LLC). |
The most physically accurate: it balances the heat each ingredient carries (mass × specific heat × temperature) and solves for the water temperature that lands the whole mix at your target after mix heat.
The classic professional formula for doughs with no preferment. Multiply the target by 3 (room, flour, friction are the three non-water factors), then subtract each. King Arthur publishes this exact form (see References).
Also known as Reinhart's "240 method": in The Bread Baker's Apprentice, Peter Reinhart presents this same formula as "subtract the total of your known factors from 240." The 240 is simply the desired dough temperature × 3 for his book's standard 80°F dough (80 × 3 = 240) — so it is the Classic ×3 formula in disguise. Worked example from his book: flour 65°F + ambient 69°F + friction 30°F = 164; 240 − 164 = 76°F water. Reinhart, like King Arthur, educates bakers on this classic formula rather than having originated it (see References).
When a levain or preferment is used, the formula multiplies by 4 and adds the preferment temperature as a fourth factor to subtract.
The same ×4 formula is taught by Maurizio Leo in The Perfect Loaf as Water = (DDT × 4) − (Flour + Levain + Ambient + Friction). Worked example from the book (p.138): (78×4) − (72+78+72+0) = 312 − 222 = 90°F. It is the same maths as Classic ×4 above — both King Arthur and The Perfect Loaf educate bakers on this classic formula rather than having originated it (see References).
The most sophisticated option here, contributed by the open-source Rise app (Windmill, LLC; algorithm by John Scalo). Unlike every other model, Rise doesn't treat mixing as instantaneous — it models the heat lost during mixing over time with an exponential term, then applies empirically-fitted corrections derived from real dough measurements. Rise reports it is on average about 12× more accurate than the classic method.
Because it needs real ingredient masses, Rise uses the same detailed ingredient table as the Sourjoe model. It infers "using a mixer" from your Mixing Method selection (Stand Mixer / Slap & Fold). It's a genuinely different thermodynamic approach, included here so you can compare it against Sourjoe's heat-capacity model and the classic formulas side by side.
Full credit & disclosure: the Rise model's algorithm and all its constants are the work of Windmill, LLC and are used here with attribution. The code is published open-source by Rise; we have ported it faithfully without modification to the formula. See Rise's write-up and the Rise app.
The three classic models rely on a "friction factor" that is really an experimentally-determined fudge factor — measure your own by mixing once and back-solving. All three ignore ingredient mass, which is why a large water fraction or an unusually warm/cold flour is better handled by the Sourjoe heat-capacity model. John Scalo's open-source Rise calculator is a thermodynamic model in the same family as Sourjoe's.
| Component | Specific Heat (J/g°C) | Note |
|---|---|---|
| Water | 4.184 | Highest — the effective temperature lever. |
| Flour | ~1.80 | Large mass, moderate capacity. |
| Salt | ~0.86 | Small contribution. |
Leaven is split into its flour and water parts using its hydration before the heat balance is computed.
Mixing adds heat through friction — a stand mixer adds far more than a few gentle coil folds. The Mixing Method presets seed a typical friction factor; switch to Custom once you've measured your own kitchen. The presets:
These preset friction factors are a temperature rise in °C. The Mix Heat box shows them in whichever temperature unit you've selected (e.g. Stand Mixer 4 °C shows as 7.2 °F in Fahrenheit mode). Choose Custom to enter your own, measured by mixing once and back-solving.
Pair with DWT: DDT gives you the water temperature to aim for; the Desired Water Temperature calculator tells you how to blend hot and cool water to hit it.
?
? Calculate how much boiling water and regular water to mix to get a desired water amount at a desired temperature.
| Parameter | Value |
|---|---|
| ? Desired Water Amount | |
| ? Desired Water Temperature | |
| ? Boiling / Hot Water Temperature | |
| ? Regular Water Temperature | |
| ? Boiling / Hot Water to Use | -- |
| ? Regular Water to Use | -- |
You rarely have a tap that delivers exactly 35°C on demand, and reheating water to a precise temperature is fiddly. It is far easier to combine water you already have — hot (kettle/boiling) and cool (tap or room-temperature) — in the right ratio. This calculator finds that ratio. Think of it as a weighted average: the target sits somewhere between your two source temperatures, and its position decides how much of each you pour.
This assumes both waters share the same heat capacity and that heat lost to the bowl, air, thermometer, and spoon is small.
Two reasons. First, boiling water poured onto flour or a starter can kill yeast and lactic bacteria and prematurely gelatinise starch — you want warm dough, not scalded dough. Blending down to your true target protects the culture. Second, starting cool and nudging up with a measured shot of hot water is repeatable: you can hit 35°C the same way every bake, whereas "let the kettle cool for a bit" is guesswork.
At altitude, water boils cooler — roughly 0.5°C lower per 150 m of elevation — which is why the hot-water temperature is editable. A baker in Denver or the Andes enters their real boiling point instead of pretending every kitchen is at sea level.
Choose the way you would like to continue with the full Sourjoe baking workspace.
Start Here
Essentials
Starter and Leaven
Baker's Process
Reference
Recipe Facts
Calculators
Plans
About Sourjoe
Essentials Intro
Essential Tools
Essential Ingredients
Starter & Leaven Intro
Culture
Starter
Leaven
Introduction
Preparation
InitialMix
Bulk Fermentation
Divide & Shape
Proof
Bake
Post Bake
Advanced Topics Intro
Topic 1
Topic 2
Topic 3
Topic 4
Glossary A to Z
Tools A to Z
Grains A to Z
Breads A to Z
Reference
Letters A and B
Letters C to E
Letters F to L
Letters M to R
Letters S to Z
Reference
Tools A
Tools B
Tools C and D
Tools F to L
Tools M and O
Tools P to R
Tools S
Tools T to Z
Reference
Grains A and B
Grains C to E
Grains F to R
Grains S to Z
Breads Intro
Leavened Breads
Rye & Hearty Breads
Flatbreads
Enriched Breads
Misc. Breads
Recipe List
Unit Conversion Calculator
Baker's Math Calculator
Leaven Calculator
Bread Recipe Hydration Calculator
Rise Time Calculator
Rise Factor Calculator
Desired Dough Temperature (DDT) Calculator
Desired Water Temperature Calculator
Click on Recipes to go to the Recipe execution engine of Sourjoe.
Click the compass icon in the top header to open this guide.
Hover or click the info icons to get guidance.
The Main TOC has the calculator icon that launches Calculator Chooser.
Click the calculator icon to open the Calculator List and launch a calculator.

Click on the arrow to close opened sections and return to top of page.

Search for key words or phrases. Hits are highlighted yellow; current hit is highlighted orange. Navigate next/previous hit with center up/down arrows.
Clicking More... will reveal additional content for the section's topic.
Clicking Less... will hide additional content.
The Rabbit Hole opens another more detailed layer of information related to the section's topic.
Sourjoe is a Brandem Technologies Company.
All rights reserved.
Contact info@sourjoe.com for inquiries.
HAPPY BAKING!
05Jul26c
Home-baker guidance only. Sourjoe is a learning guide for home bakers. It is not a sanctioned, certified, or professional baking authority, and its content is provided for educational and lifestyle guidance only.
Nutrition estimates. Nutrition information in Sourjoe is approximate. Values are calculated from recipe ingredient amounts and proportional nutrient contributions. No laboratory analysis has been performed to verify finished-bake nutrition values, so results may vary with ingredients, substitutions, fermentation, baking loss, and portion size.
No health claims. Sourjoe does not make medical, therapeutic, disease-prevention, or health-outcome claims about its guidance, fermentation methods, or recipes. Any lifestyle benefits described are general observations about home baking and fermentation culture, not medical advice.
Gluten, celiac disease, and sensitivities. Most Sourjoe recipes use wheat, rye, barley, spelt, or other gluten-containing grains unless expressly stated otherwise. Sourjoe does not claim that fermentation makes these recipes gluten-free or safe for people with celiac disease, wheat allergy, or gluten sensitivity. Users with medical or dietary restrictions should consult a qualified health professional and rely on verified gluten-free ingredients, equipment, and processes.
Kitchen and baking safety. Baking involves hot ovens, hot cookware, steam, sharp tools, heavy vessels, and time-sensitive food handling. Users are responsible for safe kitchen practice. Novice bakers should seek guidance from experienced bakers where appropriate, and young users should have adult supervision during any bake session.
Allergens and ingredient responsibility. Sourjoe recipes may include or be adapted to include common allergens, including wheat/gluten, dairy, eggs, soy, sesame, peanuts, tree nuts, and other ingredients. Sourjoe does not undertake to identify every possible allergy or cross-contact risk. Users are responsible for reviewing ingredient labels, substitutions, and their own allergy requirements before preparing or consuming any recipe.
Here's some content for the bottom drawer with embedded scripts or forms.
Miraculous! Flour + Water = Yeast Farm!!
